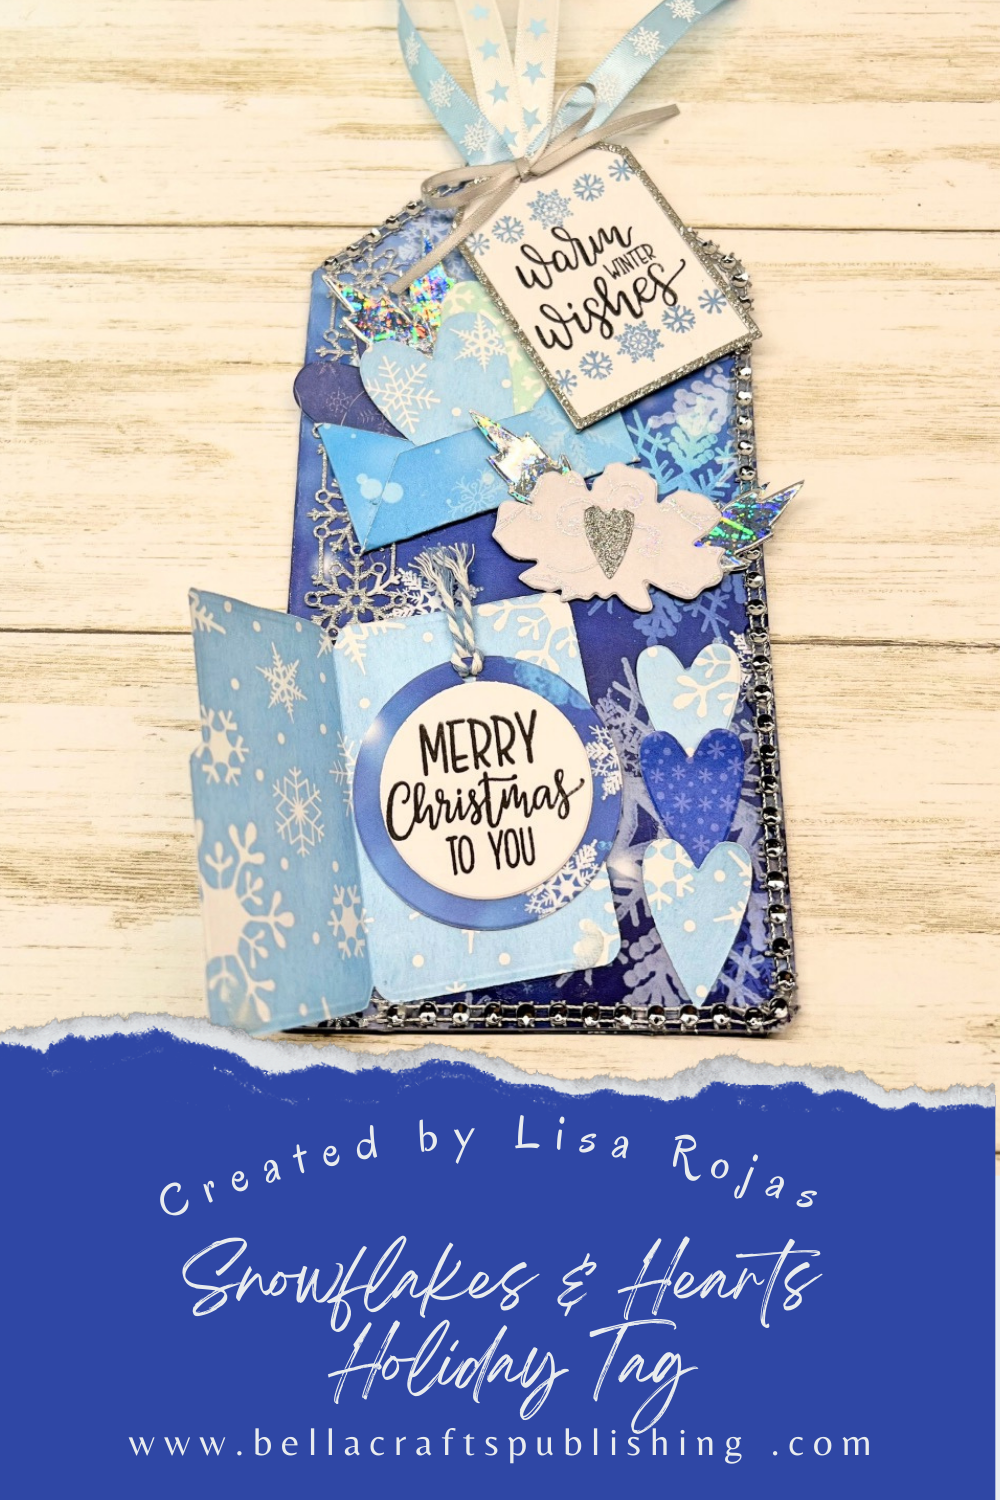
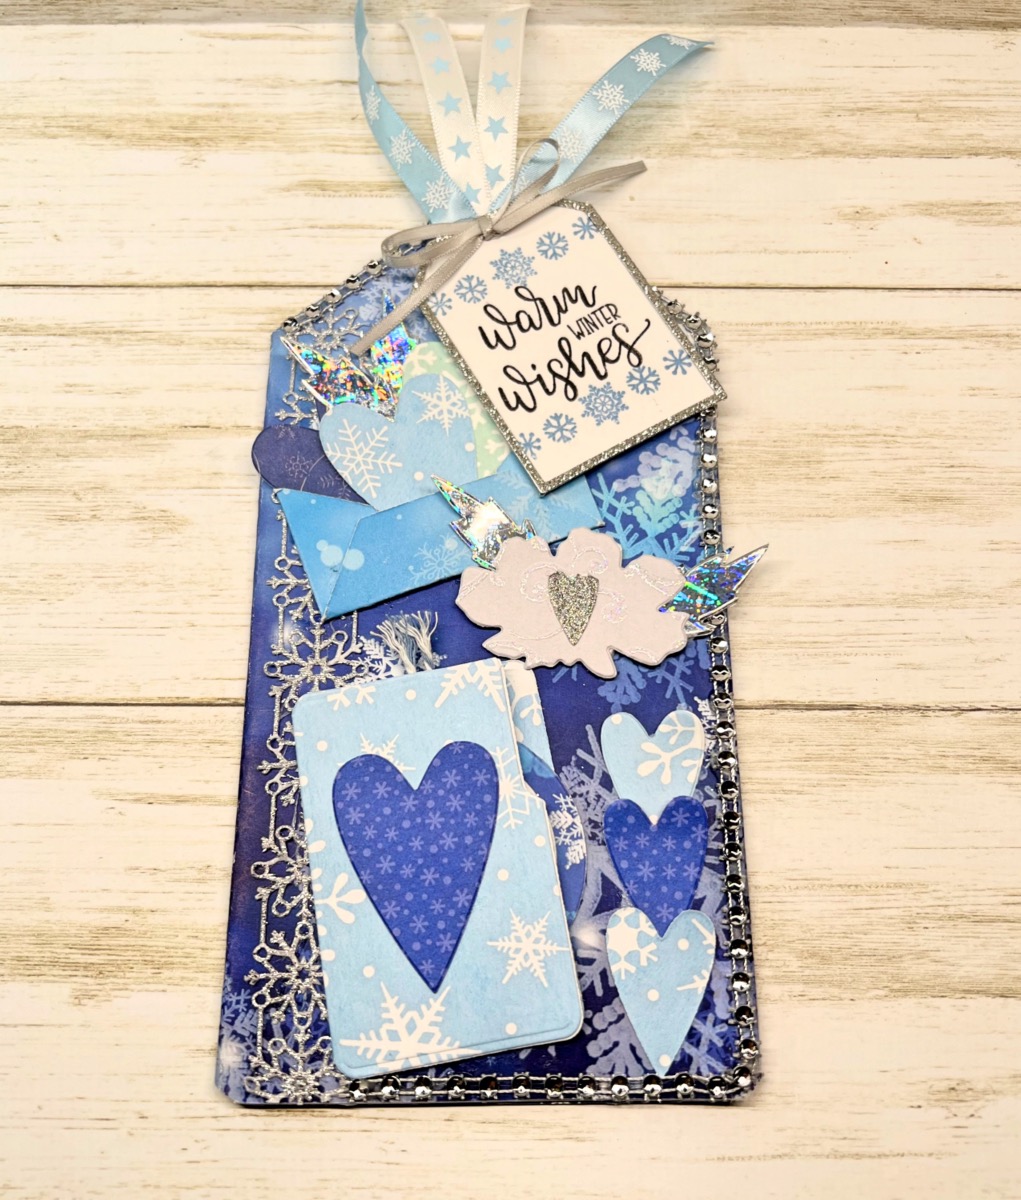
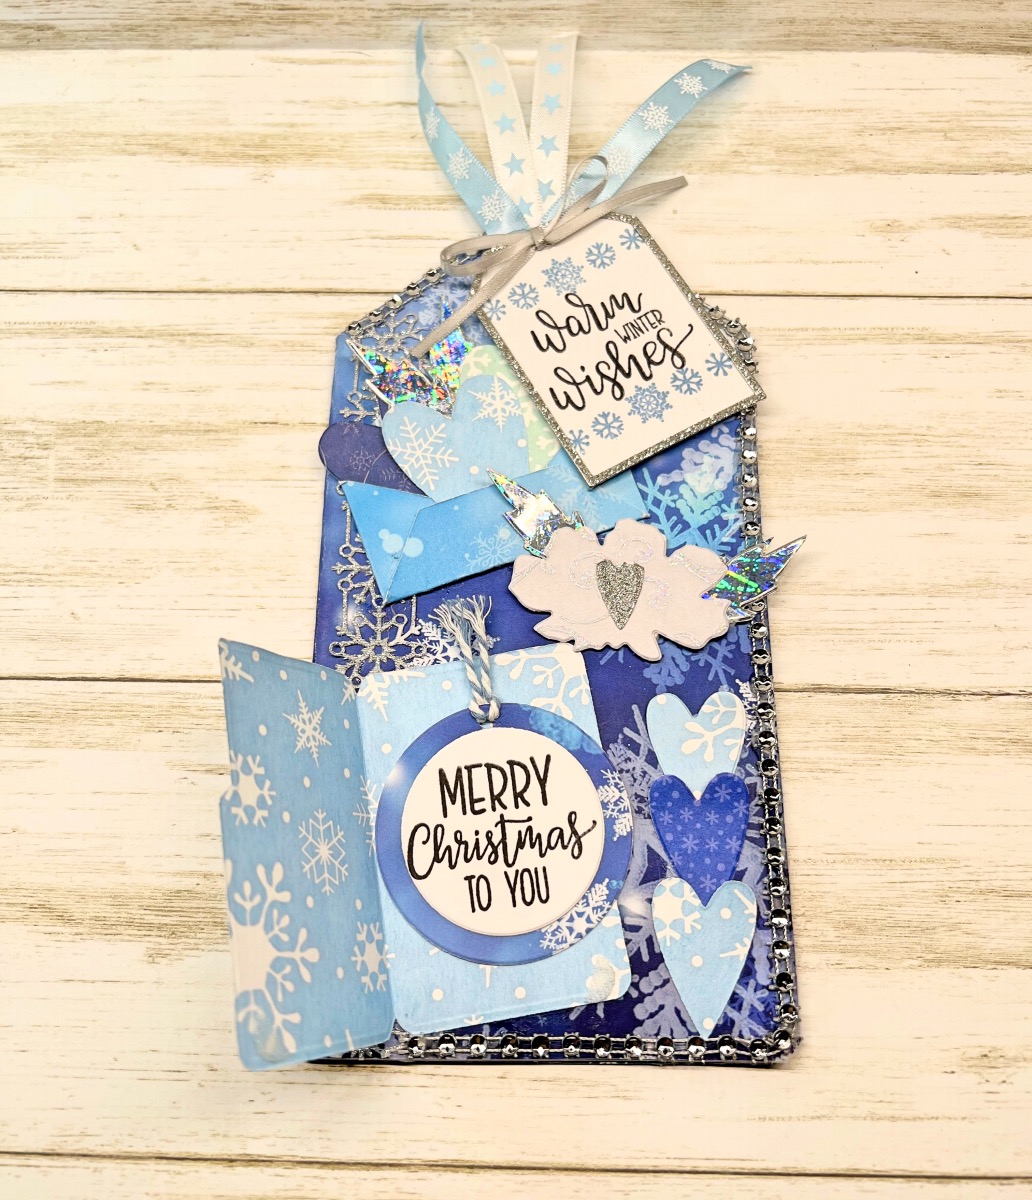
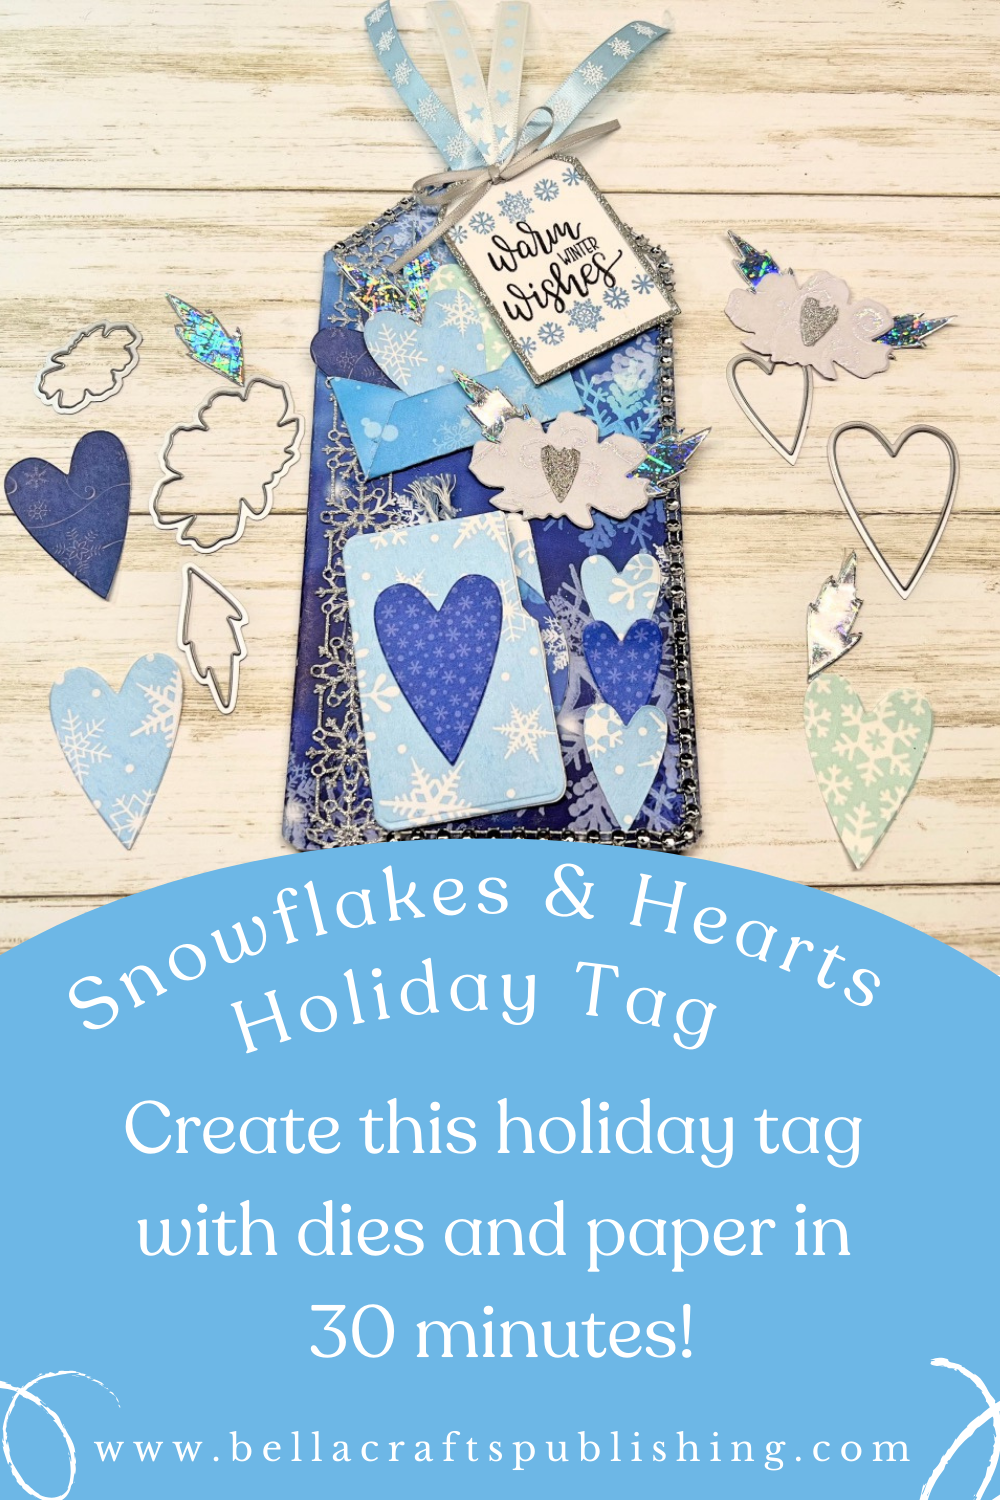
Create your own winter masterpiece with this Snowflakes & Hearts Holiday Tag. It’s a perfect way to share the magic of the holidays with those you love~
Please note: This post contains affiliate links. If you use these links and make a purchase, we earn a commission at no extra cost to you…
I know it’s a little early to be thinking about the holidays, but we all know that they will be here in no time. As creative people that love to make our own decorations and cards, the holidays come even faster! With that thought in mind, I created this Snowflakes & Hearts Holiday Tag that you can make in 30 minutes. I hope you give it a try. Have fun! Hugs, Lisa~
Supplies for Snowflakes & Hearts Holiday Tag
Check out the full list of supplies at the end of this post.
Step One:
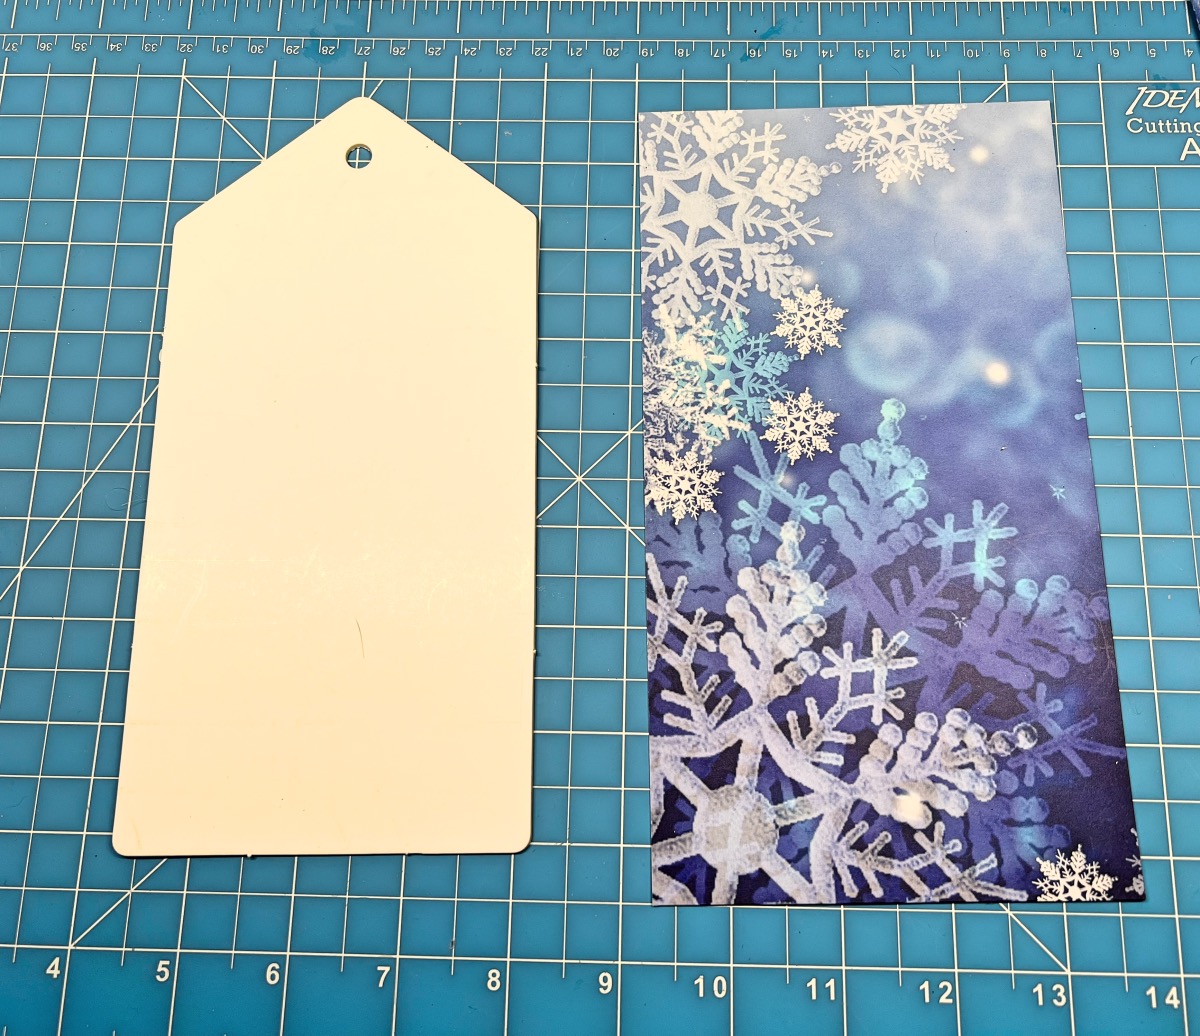
Cut a piece of patterned paper 4 1/2″W x 8 1/2″H. Adhere the paper to the chipboard tag. Trim all the edges with a craft knife. Cut a piece of snowflake trim 6 3/4″ long and adhere it to the left size of the tag.
Step Two:
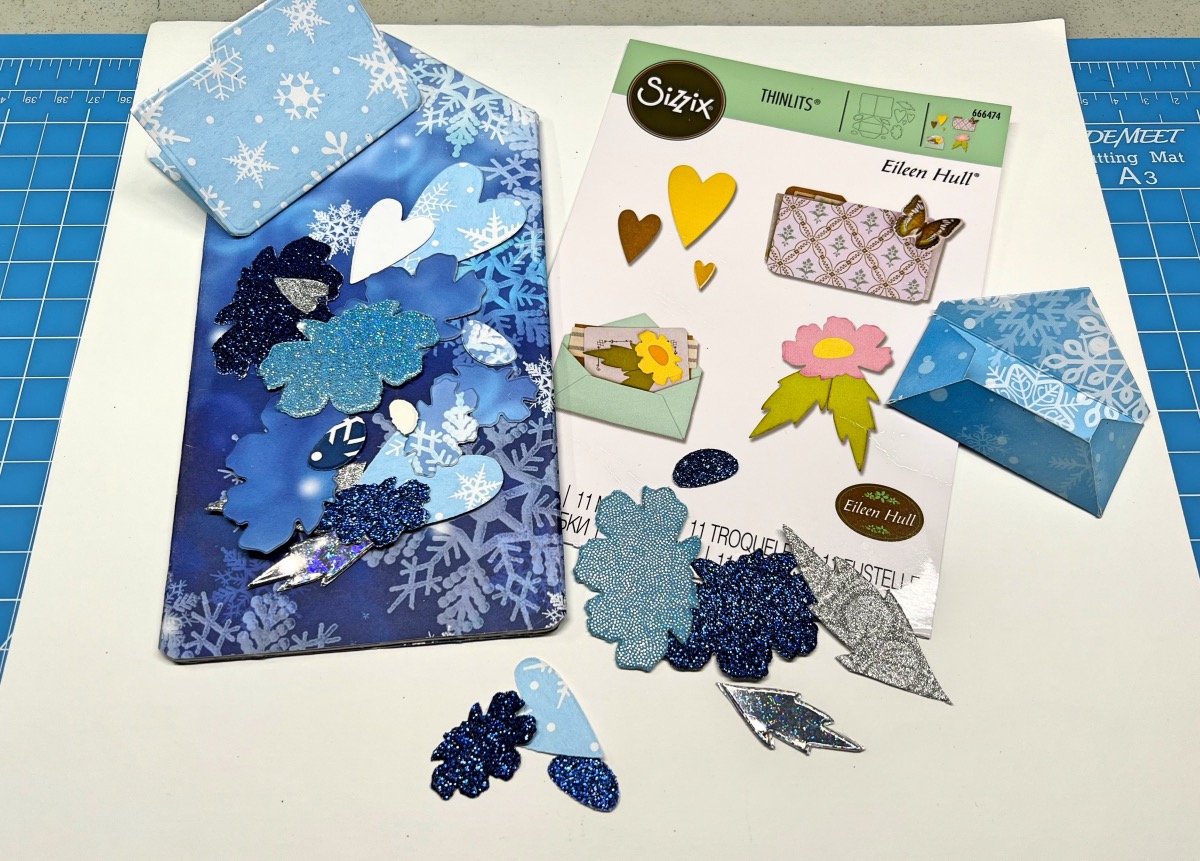
Die cut a variety of shapes from the Envelope, Folder & Flowers die set with different patterned papers.

Step Three:
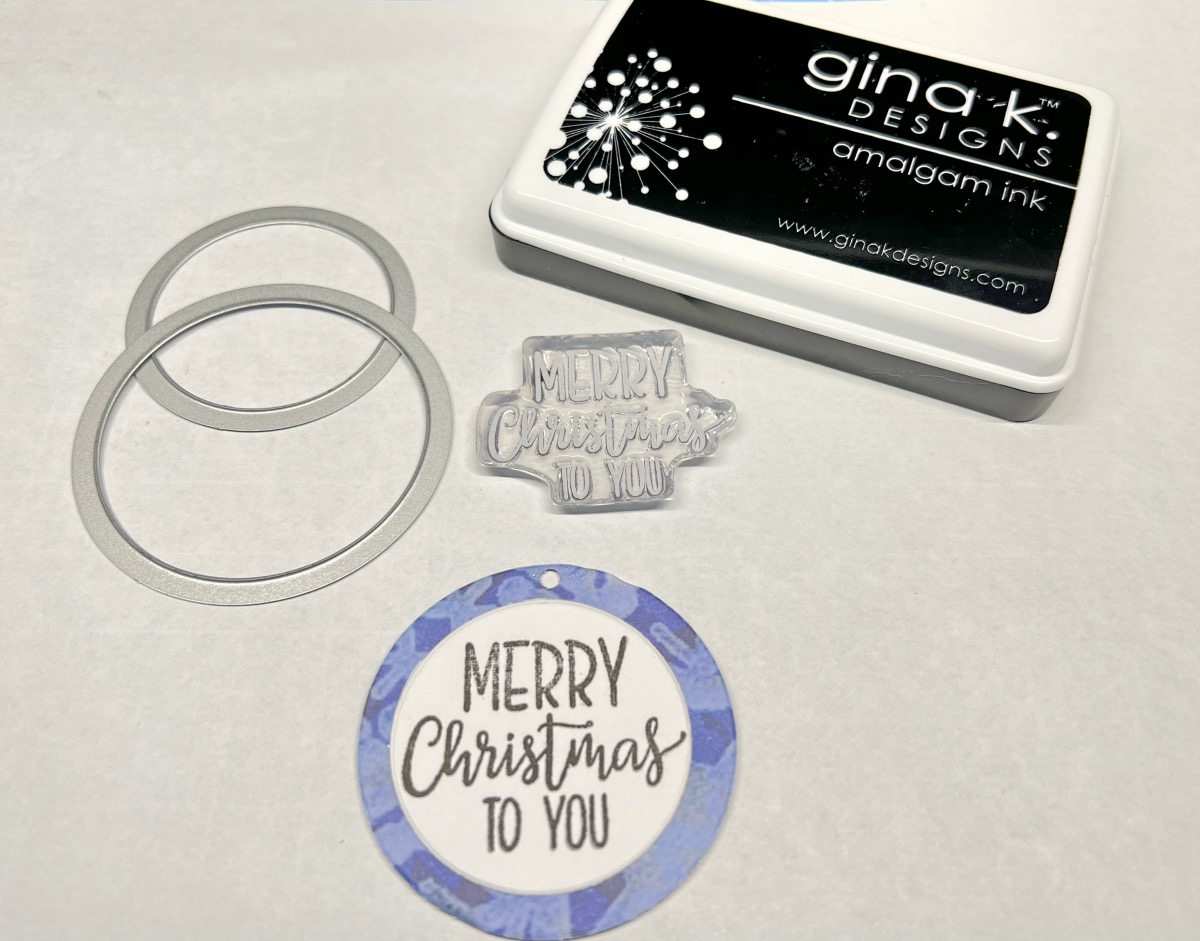
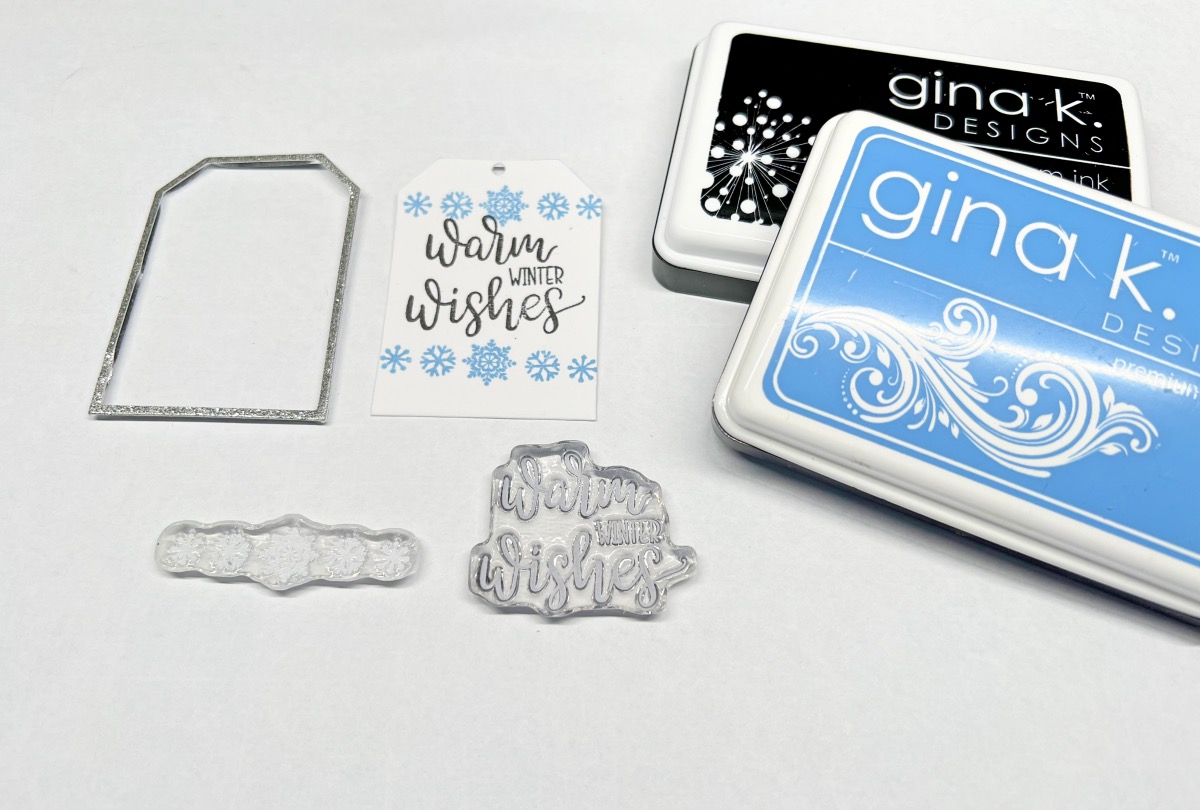
Use a 2″ die and cut a cirlce from a piece of patterned paper. Next, die cut a 1 1/2″ circle from white cardstock. Stamp the smaller circle with the black inkpad and adhere the circles together.
Step Four:
Trace the metal tag frame onto white cardstock and cut it out. Stamp the sentiment with the black inkpad and the snowflake with the blue inkpad. Place the tag into the metal tag frame. To finish the tag, apply the rhinestone trim around the edge with a glue gun. Adhere all of the die cut shapes and ribbons to the tag using the finished photo for placement.
Snowflakes & Hearts Holiday Tag
Here’s Another PIN For You To Share!
Supplies for Snowflakes & Hearts Holiday Tag
- Cardstock, White
- Patterned Papers, Holiday Theme
- Gina K Designs Holiday Wreath Builder
- Gina K Designs Inkpads: Obsidian, Powder Blue
- Glitter Papers
- Chipboard Tag, 8″
- Gwen Studios Silver and Blue Holiday Ribbon Pack
- Gwen Studios Die Cut Ribbon, Silver Snowflakes
- Rhinestone Trim
- Glitter Metal Tag
- Zip Dry Paper Glue
- Glue Gun
- Craft Knife
- Eileen Hull Designs, Envelope, Folders & Flowers Die Set
- Sizzix Framelits Circles
- Sizzix Big Shot Die Cutting Machine
This is so pretty!!! Love making tags and this is giving me inspiration!