Hello and thank you for visiting! Today I am sharing a Junk Journal I made, using the Twine Binding Technique.
SUPPLIES:
- Patterned Paper
- PVA Glue, Lineco
- Ranger Distress Ink “Bundled Twigs”
- Cardboard from a cereal box
- Embroidery Thread
- Printer paper that I dyed with tea
- Assorted ephemera, book papers, tags and paper scraps
I started this Junk Journal by making my signatures. A book is made with many signatures. To make a signature you take several pieces of paper and fold them in the center, giving you pages on both sides of the fold. You do this several times and you have the inside of your book. My Junk Journal has 5 signatures. I gathered my papers and cut the tea dyed paper to 6″ x 4″. I added the rest of my pieces on top, as shown in the collage. I inked all the edges of the papers.

Design Tip~ If you use doilies in your projects, ink them on top of paper so it becomes a stencil!
Next, I made the covers. I cut the covers (6.5″ x 4.5″) and the spine (6.5″ x 1″) from a cereal box. I applied glue to them and put them on the patterned paper and let them dry. I folded over the edges, (carefully so the paper doesn’t rip) mitered the corners and adhered them to the back of each cover. A different patterned paper was glued on top. The spine piece was glued to an old dictionary page the same height as the cover by 3″. The dictionary paper is 1 inch wider than the spine on each side and that extra paper is adhered to the covers. Be sure to leave a 1/4″ gap between the covers and the spine. Ink all the edges of the cover.

Now it’s time for the Twine Binding! I used embroidery thread instead of twine. This book is so small it didn’t need a thick thread, but it had to be bigger than sewing thread. To measure your thread, you need the length of the spine times 2 for each signature and an additional 2 legnths to tie the bow. For this Junk Journal I used 14 lengths of thread. 2 for each signature, 1 for the top tail, 1 for the bottom tail (tie the tails for the bow) and an additional 2 for an extra signature. I always add an extra thread for binding in case I want to add more to the Junk Journal. Start at the top of the spine. Leave the top tail and wrap the thread around the spine 6 times. Be sure that the thread stays straight. Tie the 2 tails and you are done! Adjust the thread where needed. Be sure it is evenly spaced.
Then you are ready to add the signatures. Start with the last inside thread and last signature. Open the signature to the center and slip it under the thread to the middle. That’s it! Your first signature is in. keep adding the signatures until you are done.

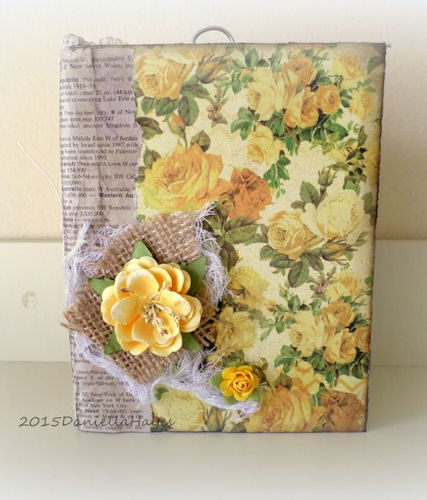
Is that easy or what??? Here are some pictures of the finished Junk Journal.

I hope you enjoyed this tutorial and are inspired to create your own Junk Journal with Twine Binding!!
Have an awesome day!!
xxDaniella
This is absolutely beautiful Daniella! I love it the vintage look! Great job!
I love it, so pretty!!!
Great tutorial! Love the vintage look of journal.
This is gorgeous!
Greetings,
What a fun journal! I will have to add this to my “bucket list” of books/journals to create. Your step by step tutorial is perfect. Such a great way to re-purpose and use up some of the stuff we get in the mail.
Love and light,
Michele
That is beautiful.
Daniella, I love your creation. This is totally my style. I can’t wait to made one like yours. Thank you for sharing this wonderful tutorial. Hugs!
Daniella, I love the contrast of the book pages and pattern paper! Great job!!!!!