Have you ever created an Interactive Venetian Blind Card? If not, you are in for a great experience! These cards put the fun in card making!
Please note: This post contains affiliate links. If you use these links and make a purchase, we earn a commission at no extra cost to you…
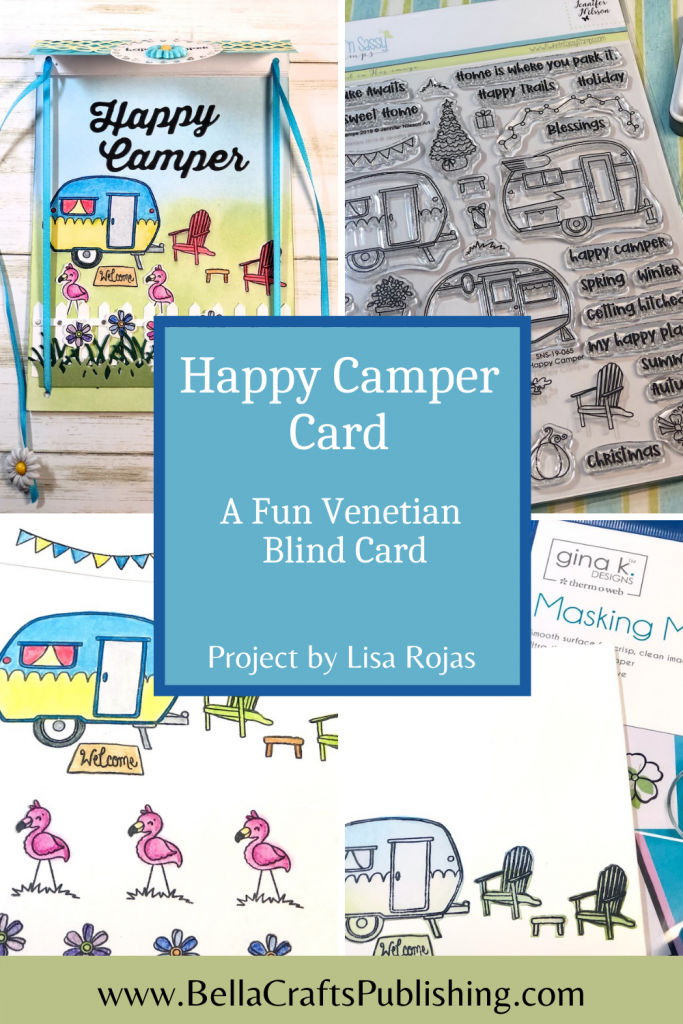
I’ve been making these Interactive Venetian Blind Cards for over twenty years and they never get old. I think this Happy Camper Card has now become my favorite one yet! I hope you have as much fun making it as I did~ Lisa

Supplies for Venetian Blind Card
Check out the full list of supplies at the end of this post
Step One:
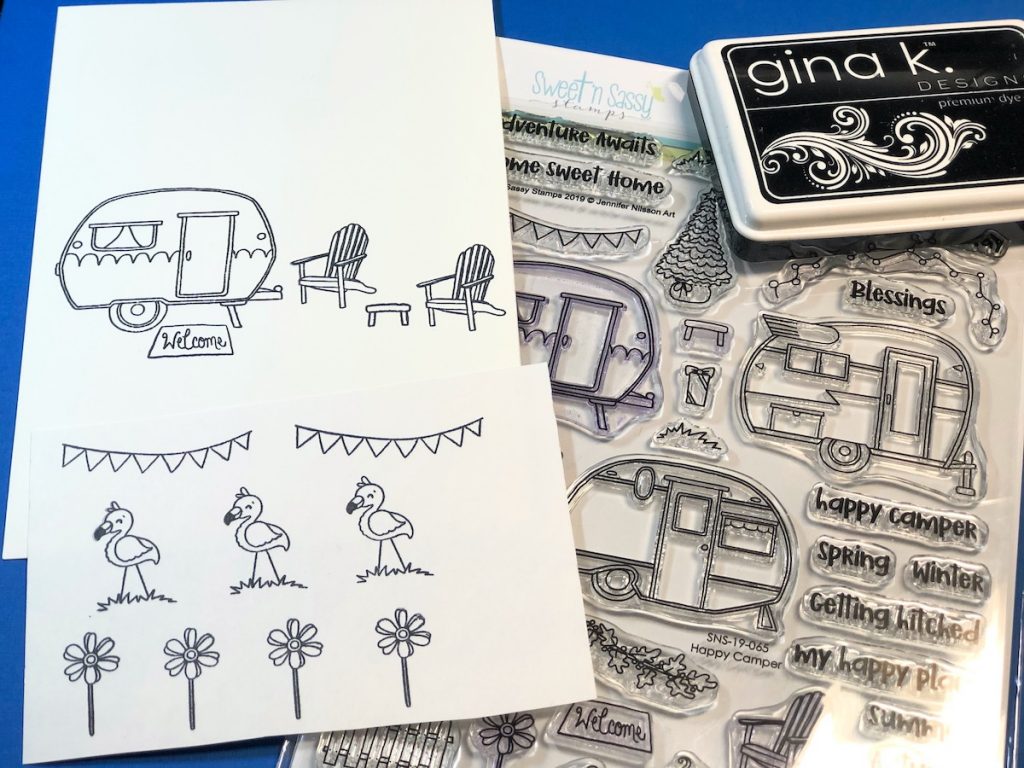
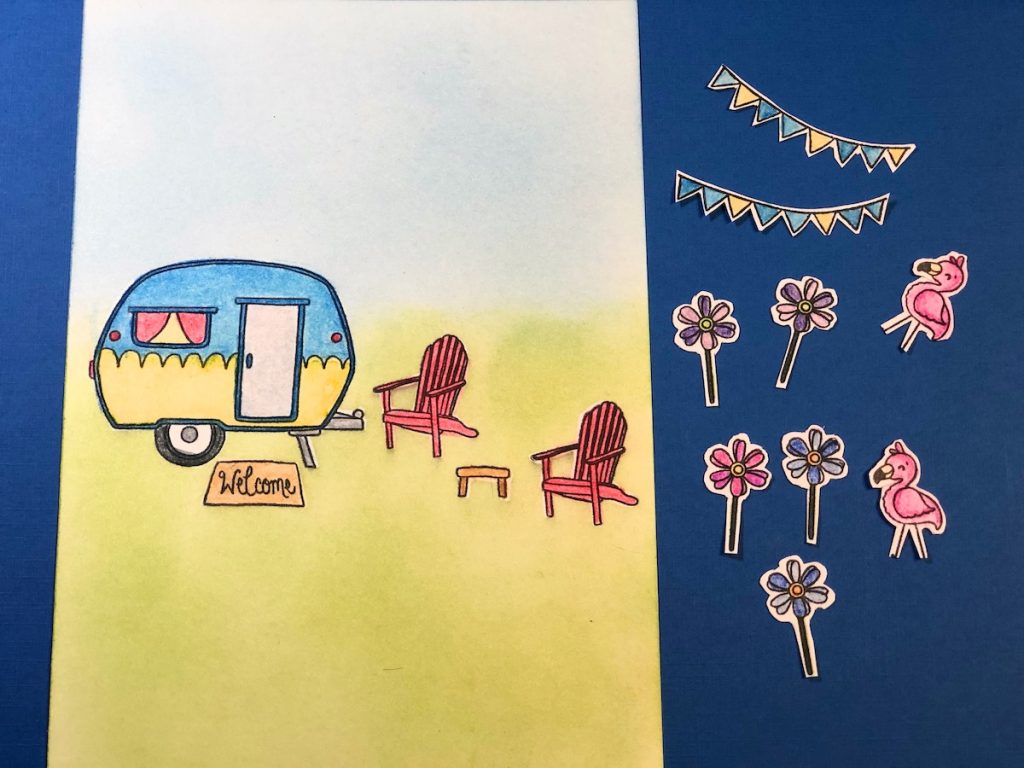
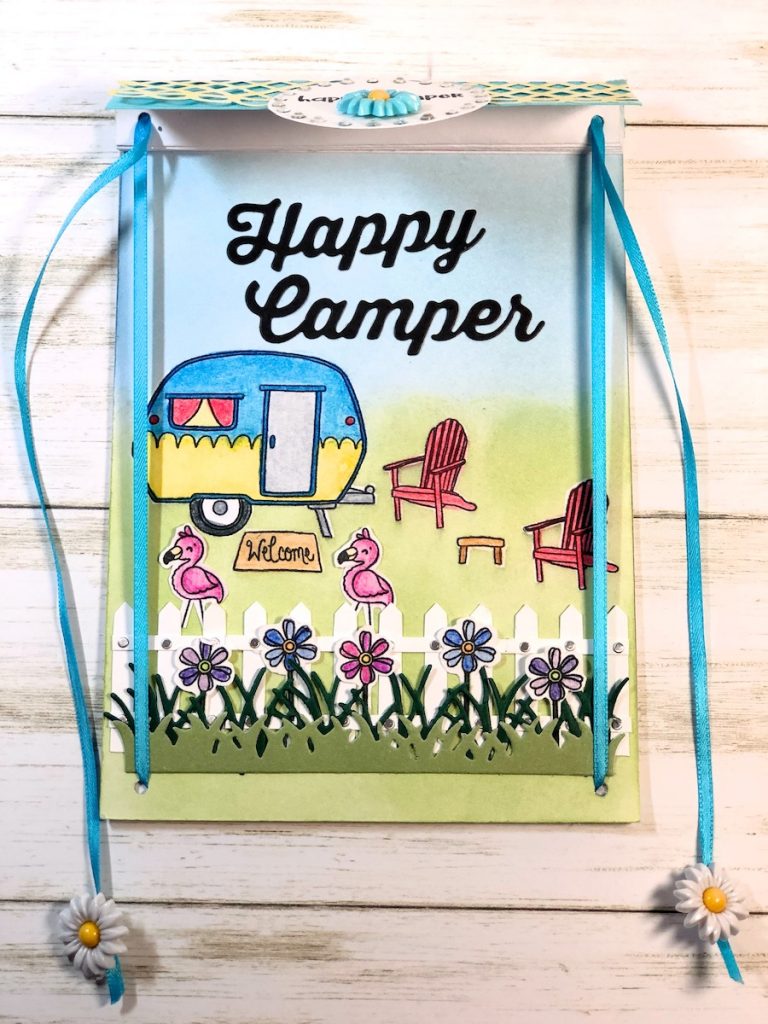
Cut white cardstock 5″ x 7″ and stamp the trailer, chairs, welcome mat & table with black inkpad. On a scrap of white cardstock, stamp the other images as shown.
Step Two:
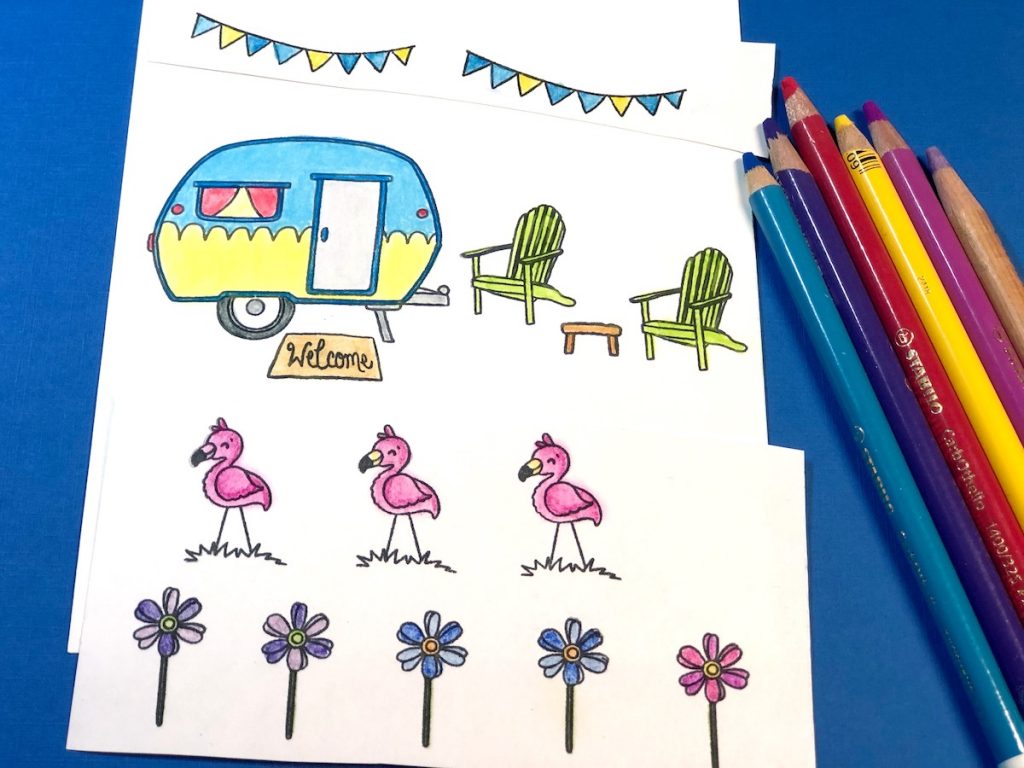
Color all of the images with chalk pencils.
Step Three:
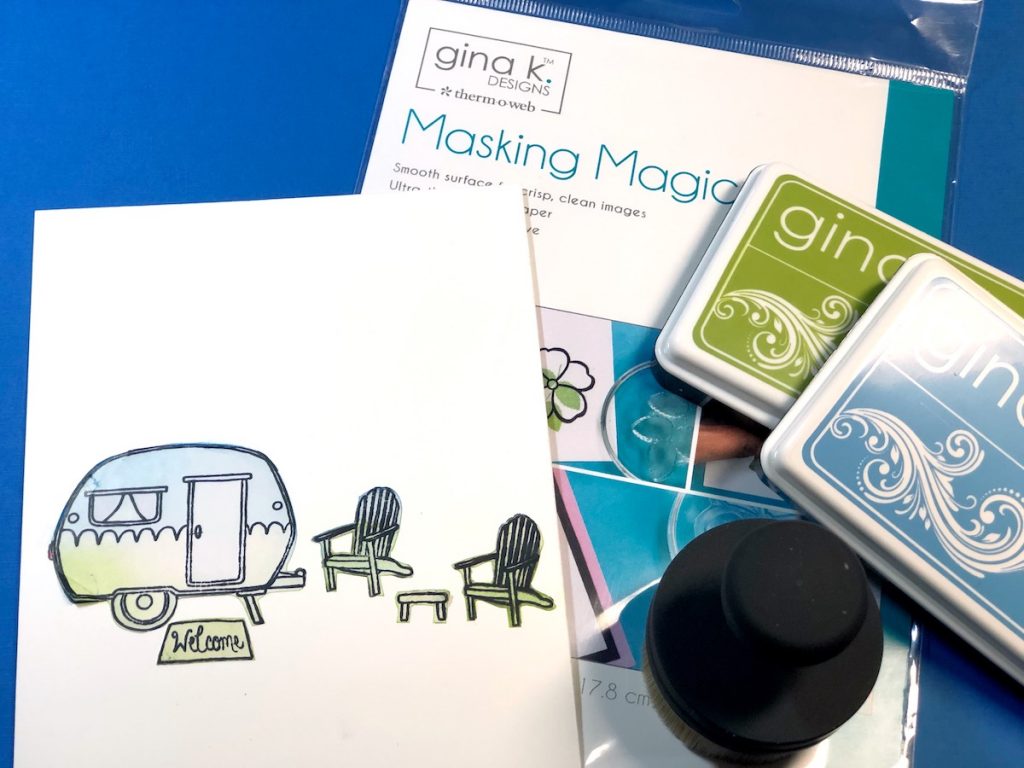
Following the instructions on the Masking Magic, mask images and add blue inkpad for the sky and green for the grass with blending brushes. Remove masks and save for another time if needed.
Step Four:
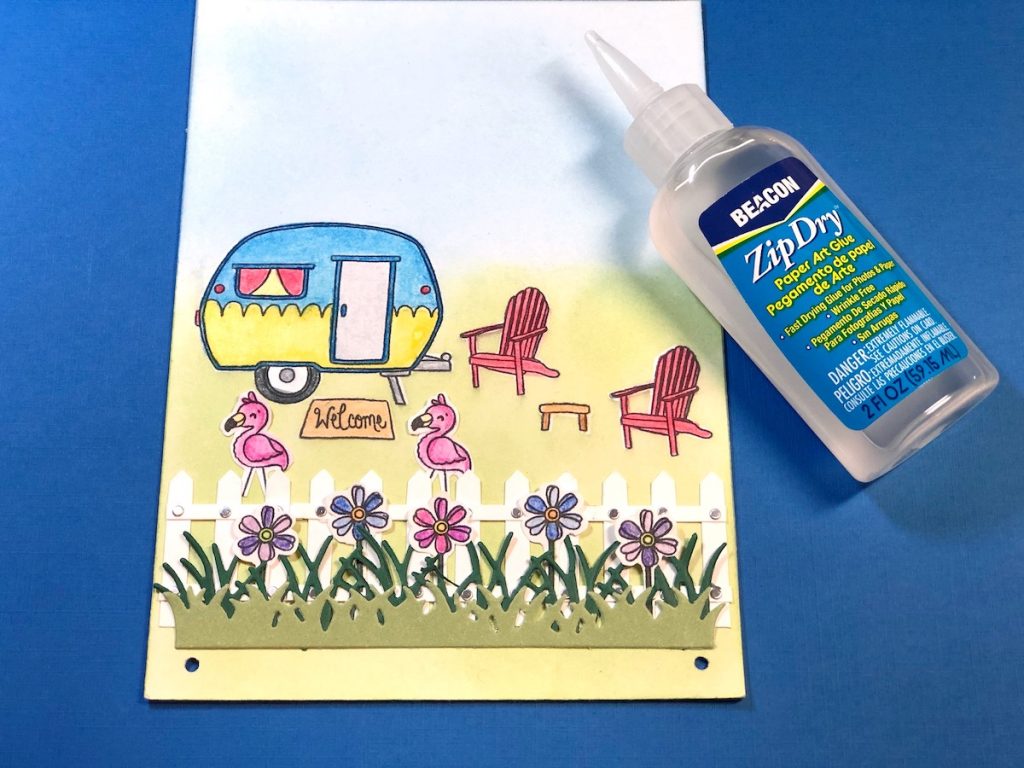
Cut smaller images out with scissors. Cut a piece of cardboard 5″ x 7″ and adhere the cardstock to a piece of cardboard.
Step Five:
Die cut grass from different shades of green cardstock. Adhere the fence, grass, flowers and flamingos to the card base and punch two holes at the bottom as shown. Die cut “Happy Camper” from black cardstock and adhere to the top of the card above the trailer.
Step 6:
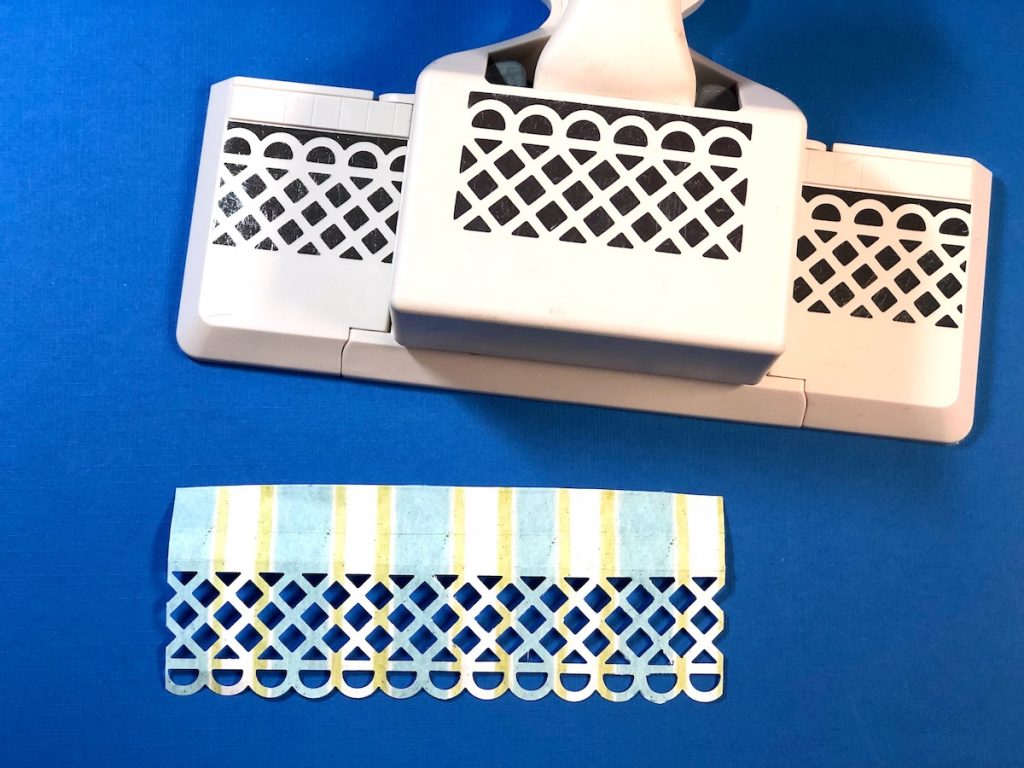
Cut one piece of patterned paper and one piece of cardstock 2″ x 5″. Use punch on patterned paper. Adhere both pieces together. Score along long edge at 3/8″ & 3/4″ and fold to create the valance. Set aside.
Step 7:
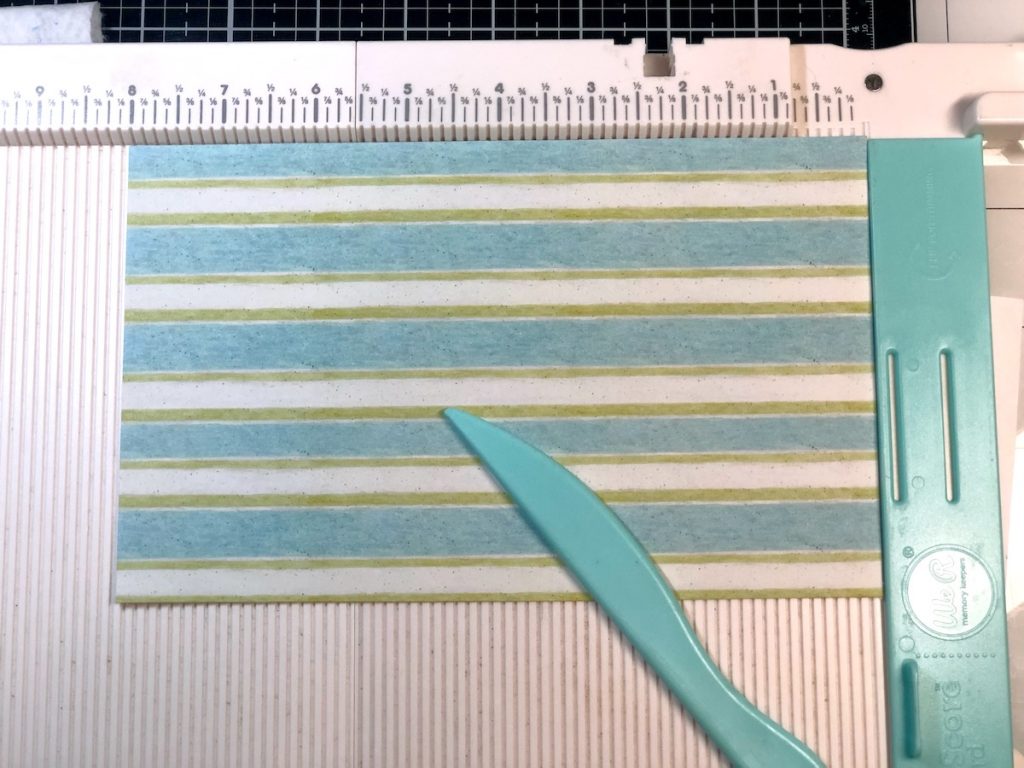
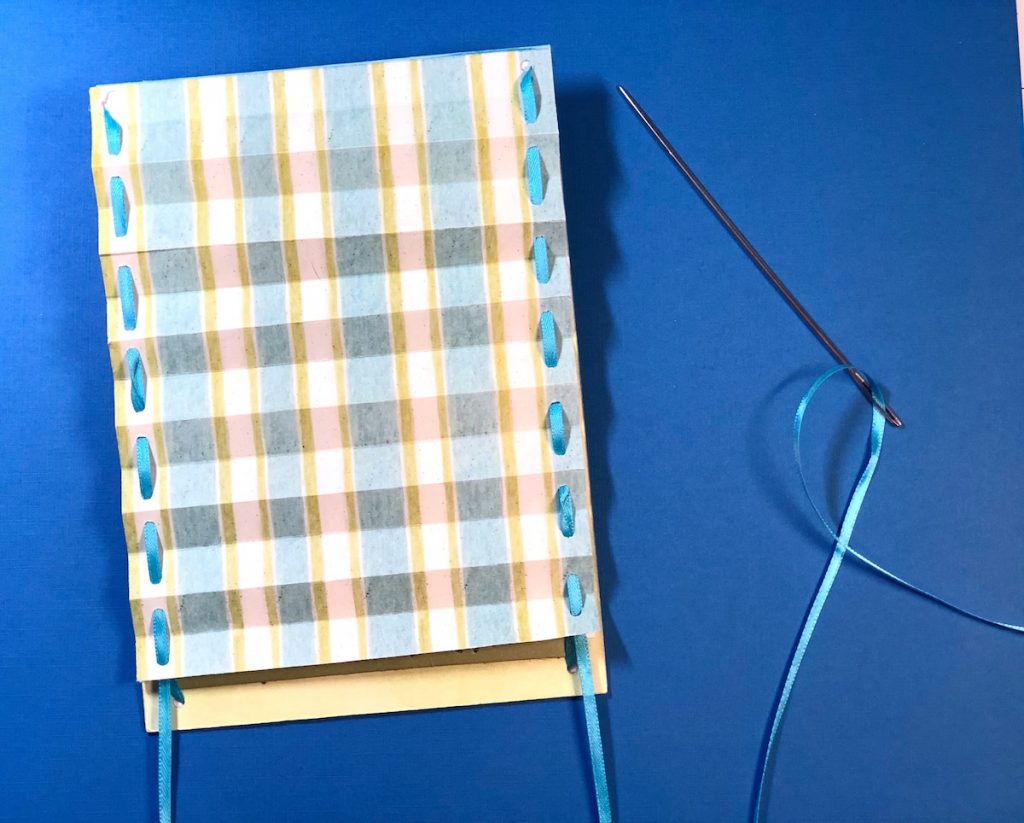
Cut patterned paper 5″ x 7 1/2″ and score every 1/2″. Fold from the bottom up, with the first fold being a valley fold. Continue the accordion folds up to the top of the paper. Hold the sections together and punch a hole on both sides about ¼” in. Fold the top ½” of the patterned paper over the top of the cardstock and glue in place.
Step 8:
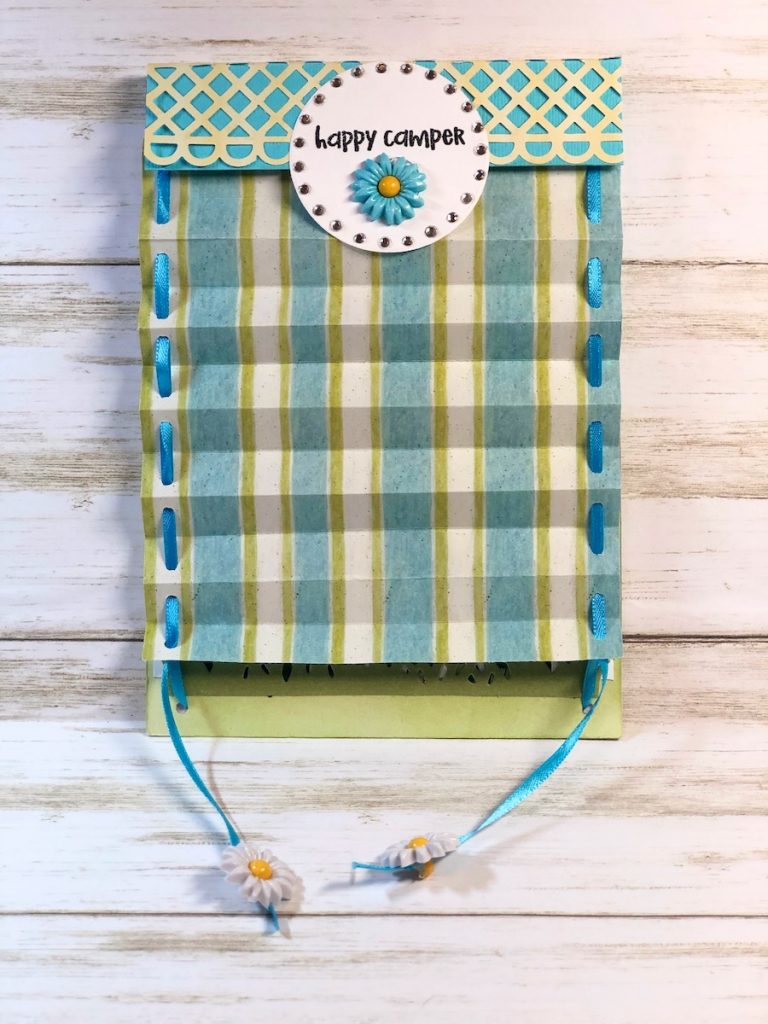
Using a large needle, start threading the ribbon in the bottom right hole of the patterned paper. Leaving a 4” tail, go up the right side, across the top, around the back and down the left side. Then go across the back of the card and up the right bottom hole of the bottom of the card. Repeat up the right side, across the top, around the back and then down the left side, leaving a 4” tail. To Finish the card, adhere the valance to the top of the card. Die cut a circle from white cardstock, using Rhinestone Genie Kit and Template to add the bling. Stamp “Happy Camper” and add button. Cut a piece of patterned paper 5″ x 7″ and adhere to the back of the card. Add two buttons to the ribbon ends and pull up the blind!
Happy Camper Card Closed
Happy Camper Card Open
Supplies for the Happy Camper Card
- Happy Camper Stamp Set from Sweet n Sassy Stamps
- Cardstock: White, Blue, Light Green, Dark Green
- Patterned Paper
- Cardboard
- Dye Inkpads: Black, Blue & Green by Gina K Designs
- Masking Magic by Therm O Web
- Rhinestone Genie Kit
- Template for Rhinestone Genie by Ann Butler Designs
- Flower Buttons, (3)
- Ribbon, Blue, 52″ long
- Die Cut Machine
- Happy Camper Die
- Grass Dies by Impression Obsession
- Sticker Fence
- Hole Punch
- Scissors
- Zip Dry Paper Glue by Beacon Adhesives
- Large-Eye Needle
- Paper Trimmer with Scoring Blade
- Hole Punch
- Decorative Punch by Martha Stewart
Trackbacks/Pingbacks