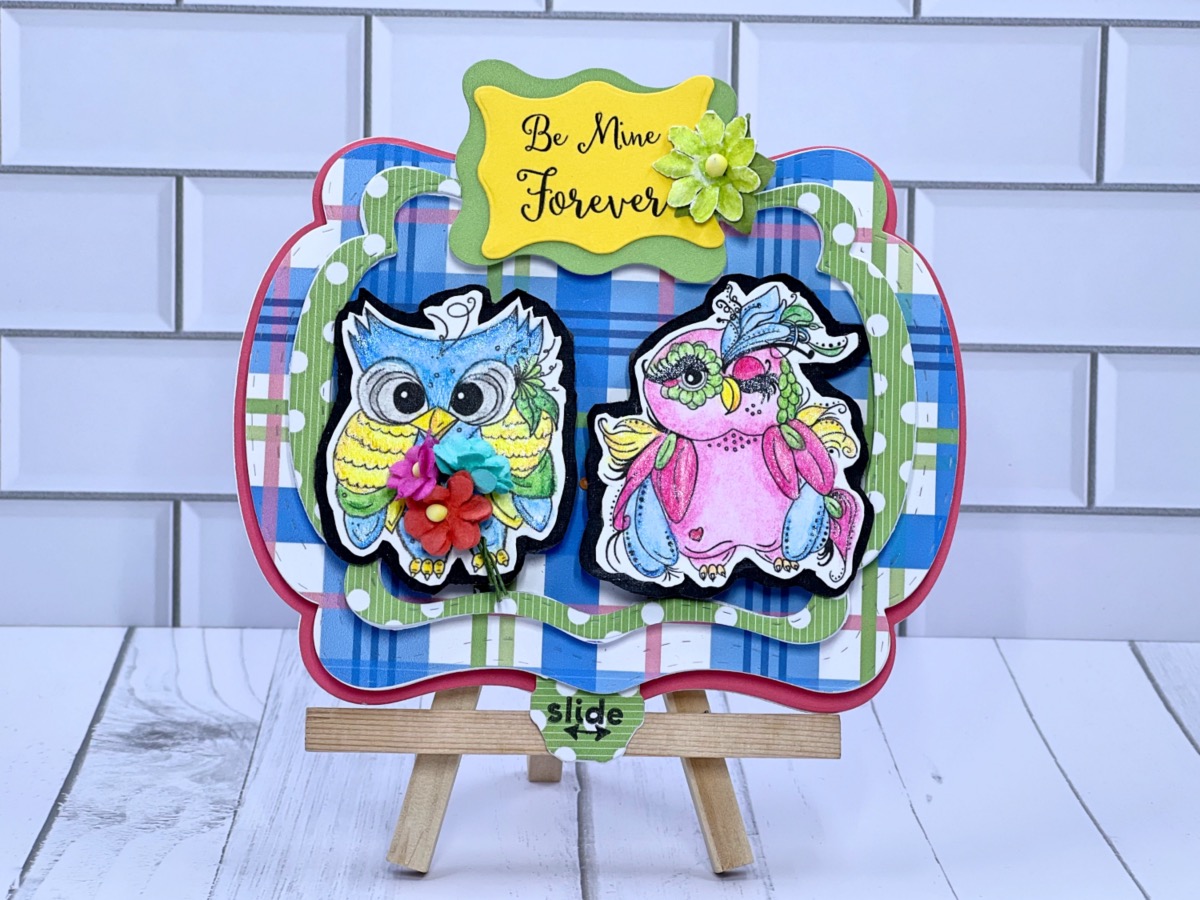
This Interactive Owl Card is perfect for Valentine’s Day or Anniversary! You can’t go wrong with these adorable owls and the die set I used to create it~
Please note: This post contains affiliate links. If you use these links and make a purchase, we earn a commission at no extra cost to you…
This is such a fun interactive card, and if you’re anything like me you will definitely want to add this die set to your toolbox! The dies, digital owl and sentiments images, along with the papers I used to create this adorable card are from TLC Designs. If you haven’t been to their website I hope you’ll stop by and grab these products for yourself. You will love to creating with them. Have fun! Lisa~


Supplies for Interactive Owl Card
The complete list of supplies is below
Note: Sometimes in my blog posts I use different papers and/or embellishments for my step outs then I used on the finished project. This does not affect my instructions in any way~
Steps One, Two, Three:

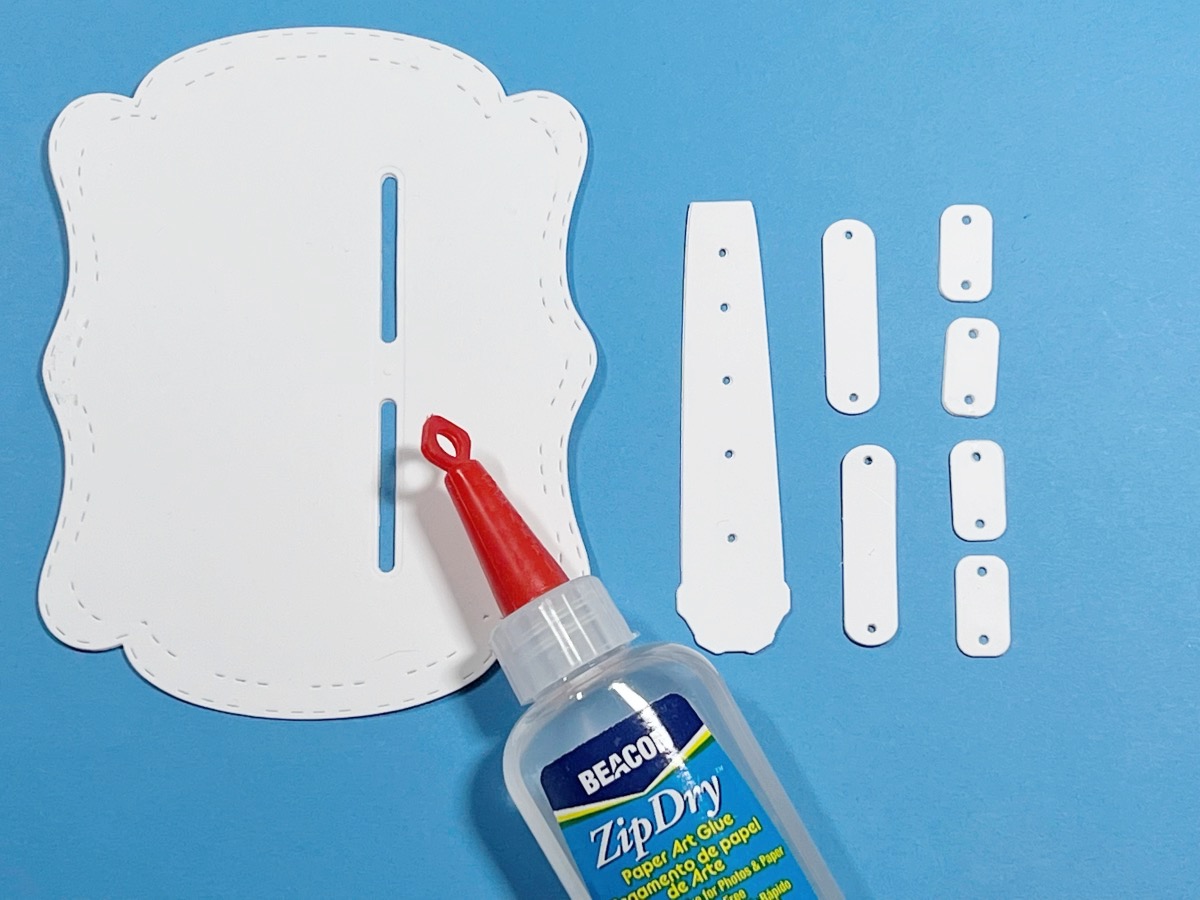

Using a heavy cardstock, cut two pieces of the frame and one piece of the frame with patterned paper, two of the handle (dial), four of the arms, and eight pieces of the washers. Next, place all three of the frames together and die cut the slots*. Adhere the cardstock pieces together (step 2) and then, adhere the patterned paper frame to the cardstock frame (step 3).
*Note: You will need to run the frames with the slot die 2-3 times due to the multiple layers.
Steps Four, Five, Six:

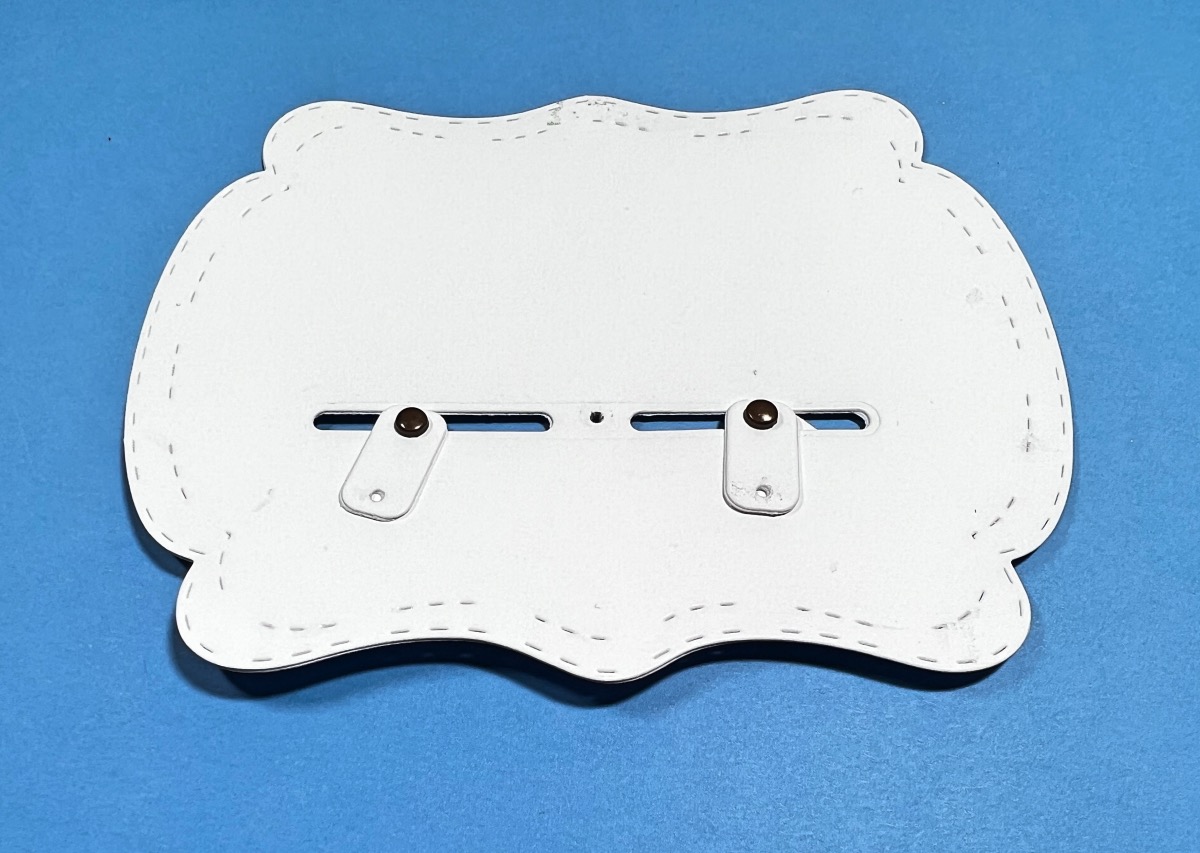

Die cut another handle from patterned paper and adhere it to the cardstock handle. Place a brad from the front of the handle in hole two and attach the arm. Add the second arm in hole four (step 4). *On the front side of the frame punch a hole in between the two slots. Attach two of the washers to the front of the frame (step 5). Turn the frame over and attach the other two washers (step 6). Now you will have two washers attached to each brad on the frame and back of the frame.
*Note: The patterned paper would already be adhered to the frame (step 3). I didn’t add it in the photo to make it easier for you to see step 5. Also, you will notice a difference in the brads (step 5 & step 9). I found that the flower brads were flatter than the regular ones and made it less bulky in my finished card.
Steps Seven, Eight, Nine:
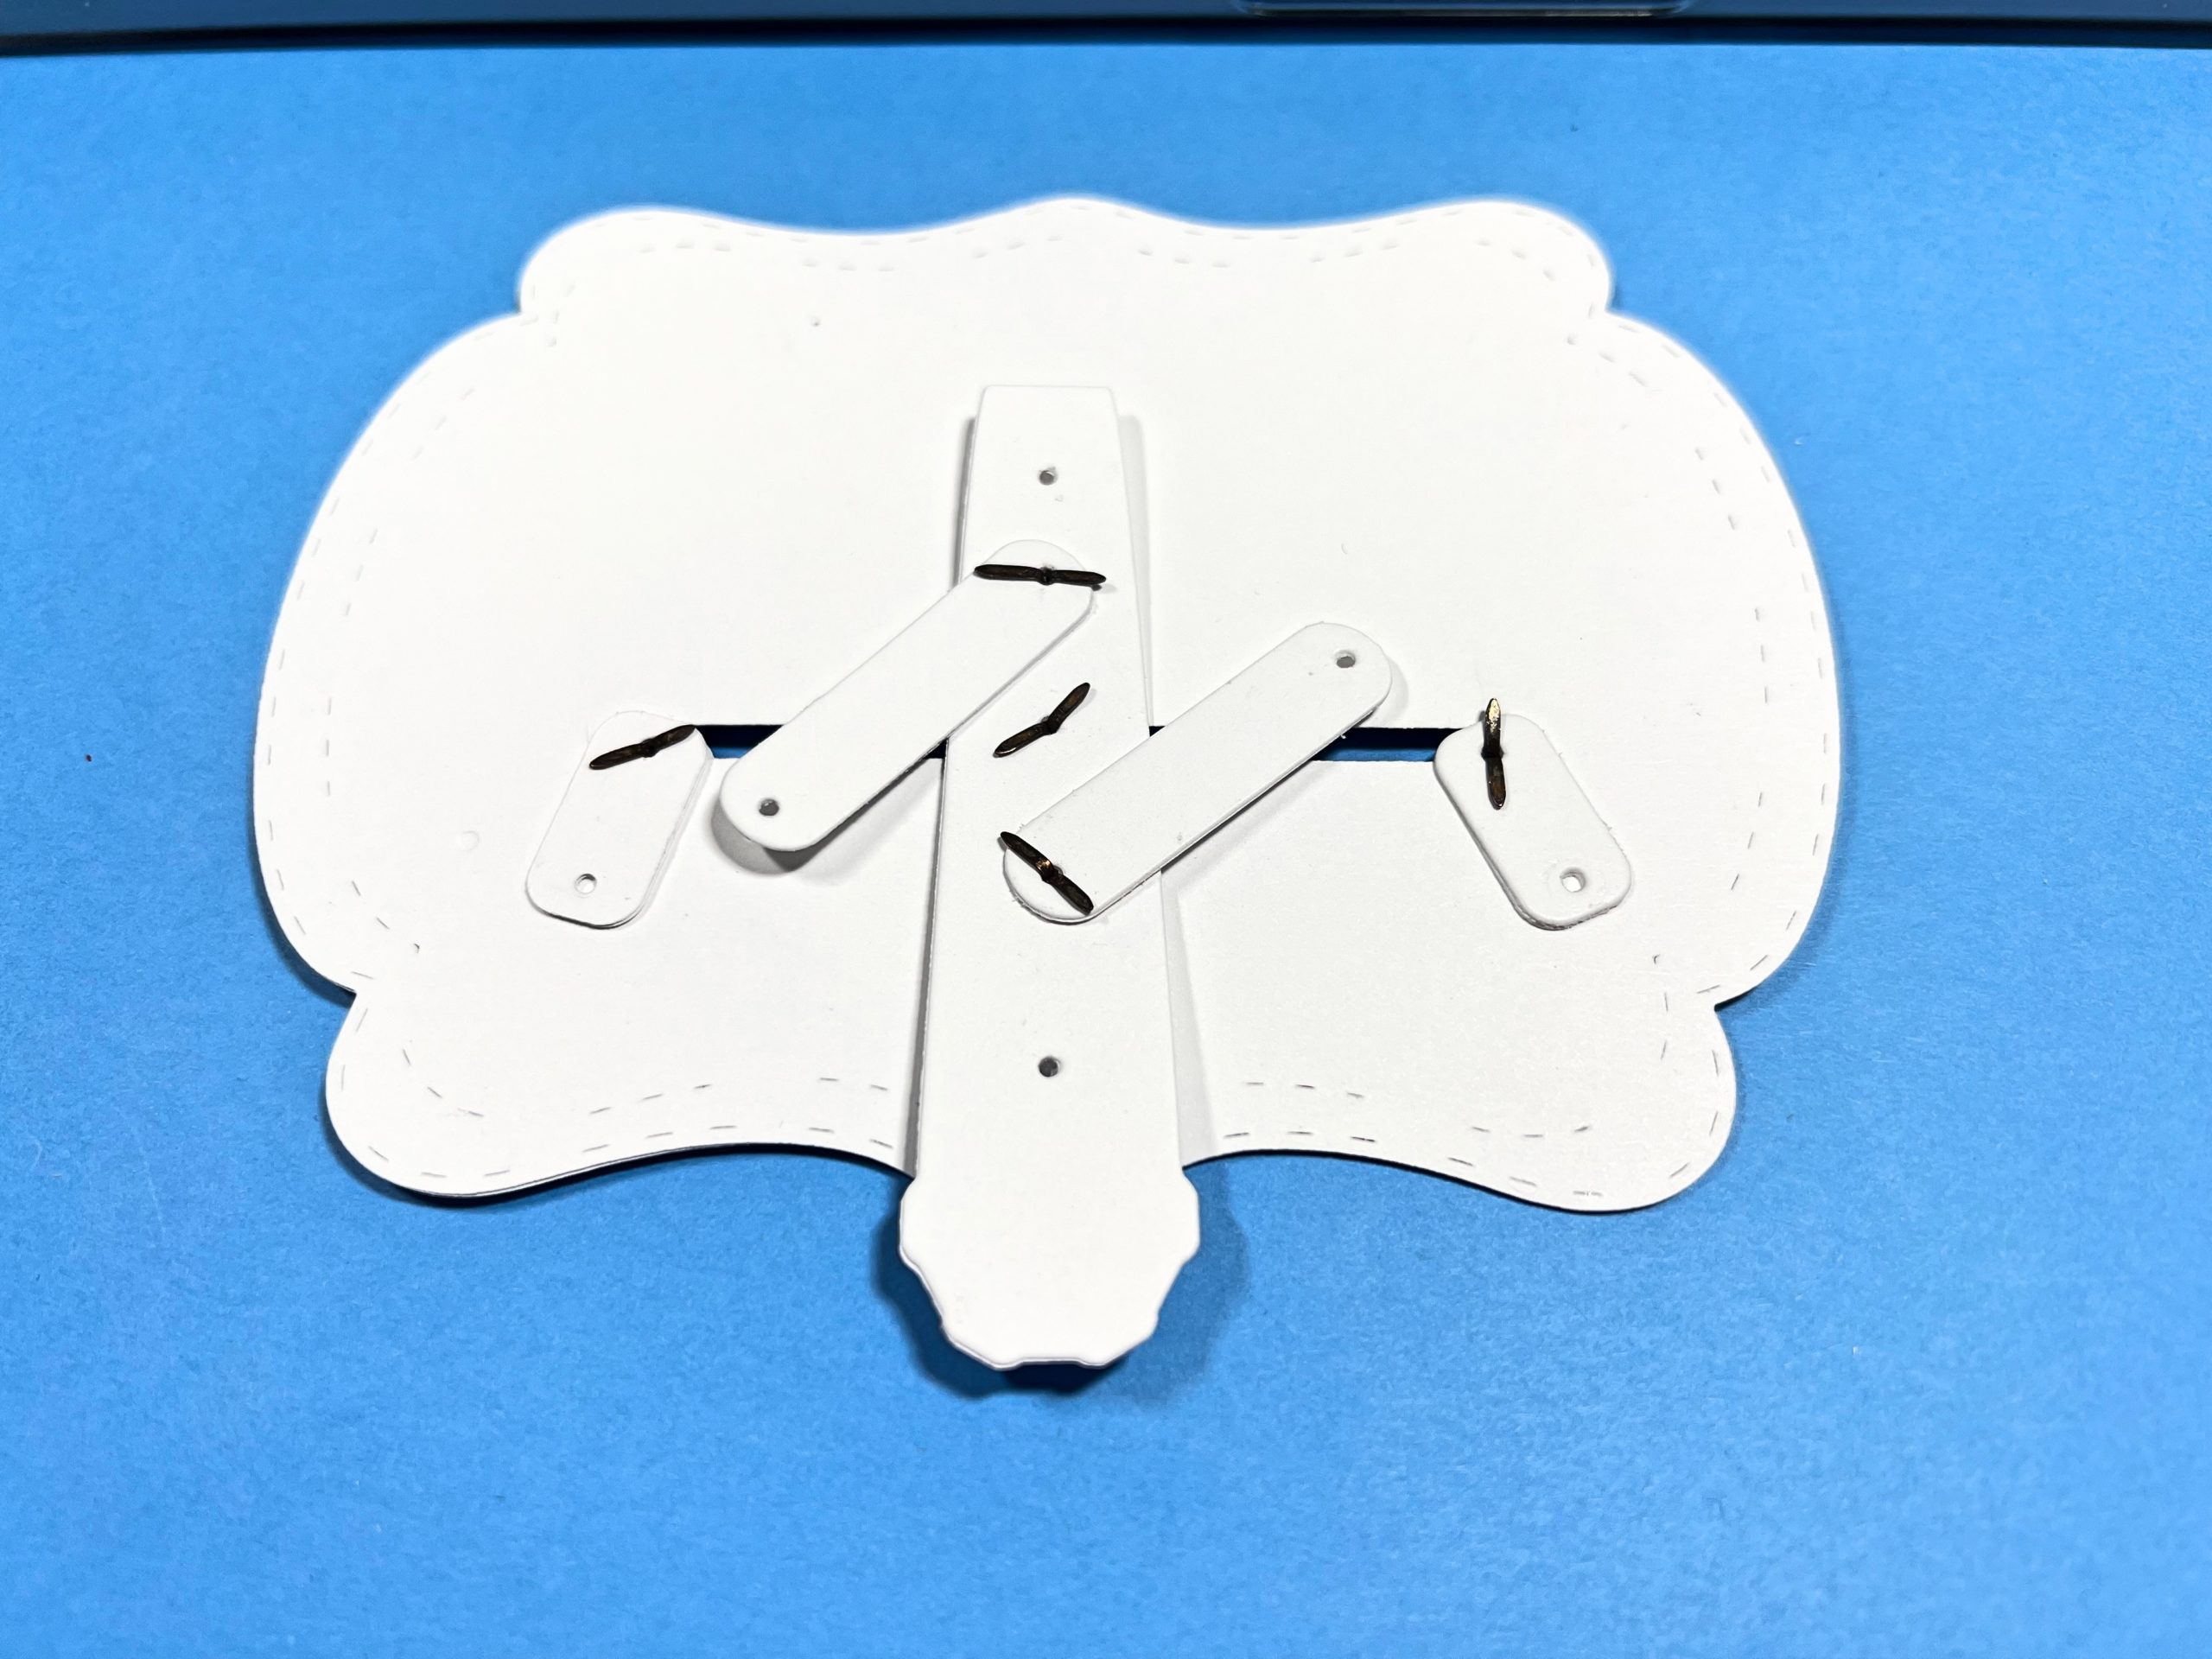

Place a brad in the third hole of the handle (with the arms already attached (step 4) and attach it to the back of the frame (step 7). Next, attach the arms to the washers as seen in (step 8). This is the mechanism frame that will move the owls. Turn the frame over to the front. Use the large, thin frame die and cut one from white cardstock and one of colored cardstock. Adhere the two together. Attach the large frame to the mechanism frame with two layers of foam tape, being careful of the mechanism. Die cut the smaller frame from patterned paper and attach it with foam tape (step 9). Stamp the arrow and the word “slide” onto the handle with a black inkpad.
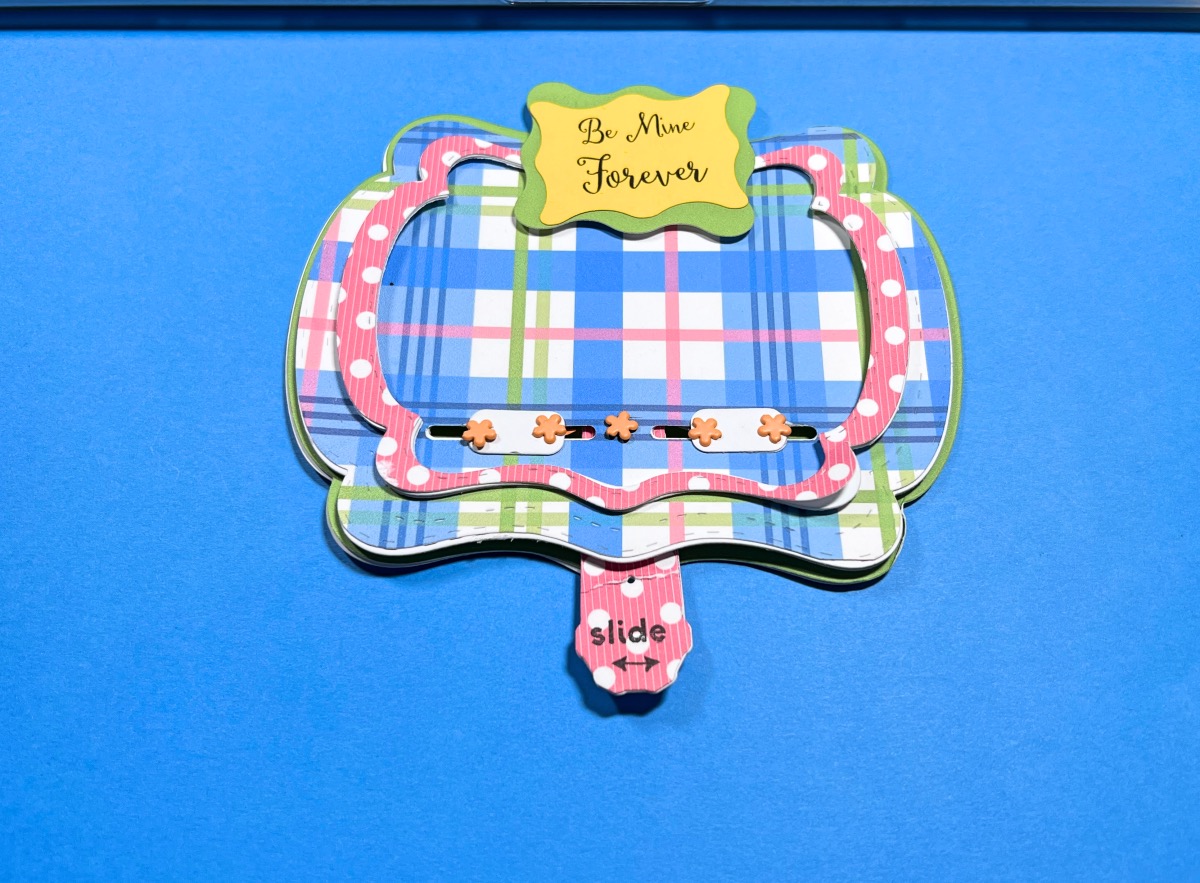
Steps Ten, Eleven, Twelve, Thirteen:
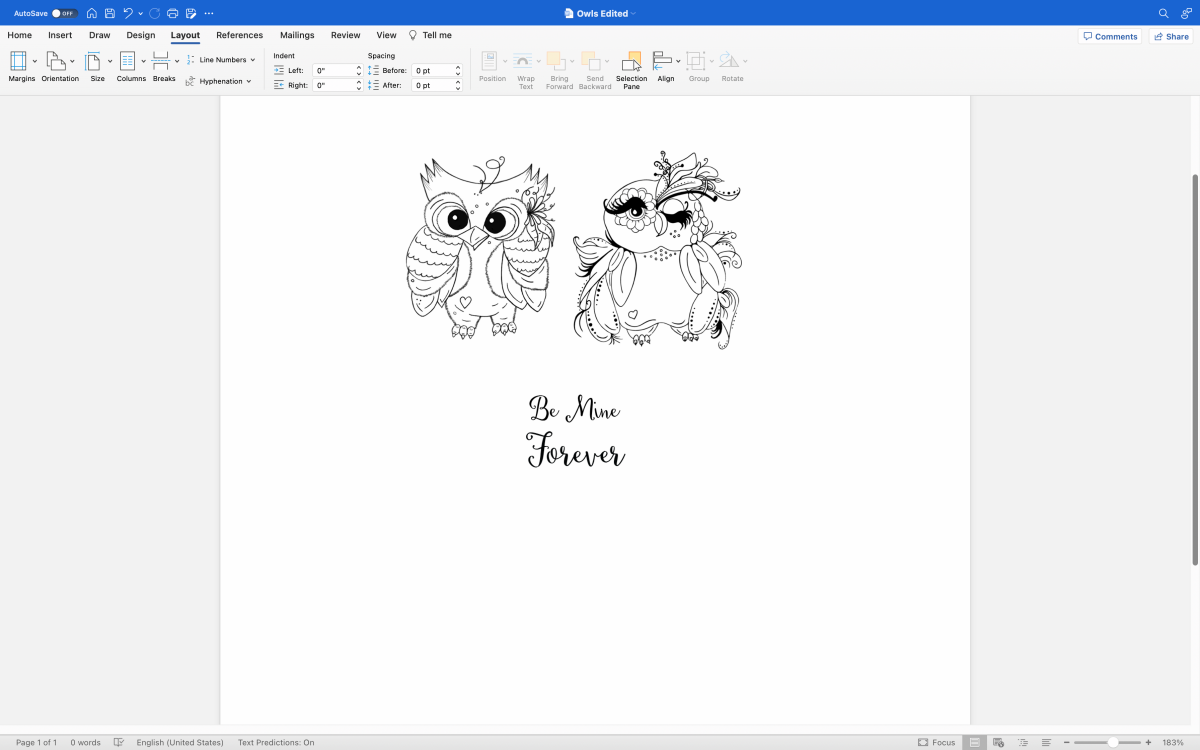

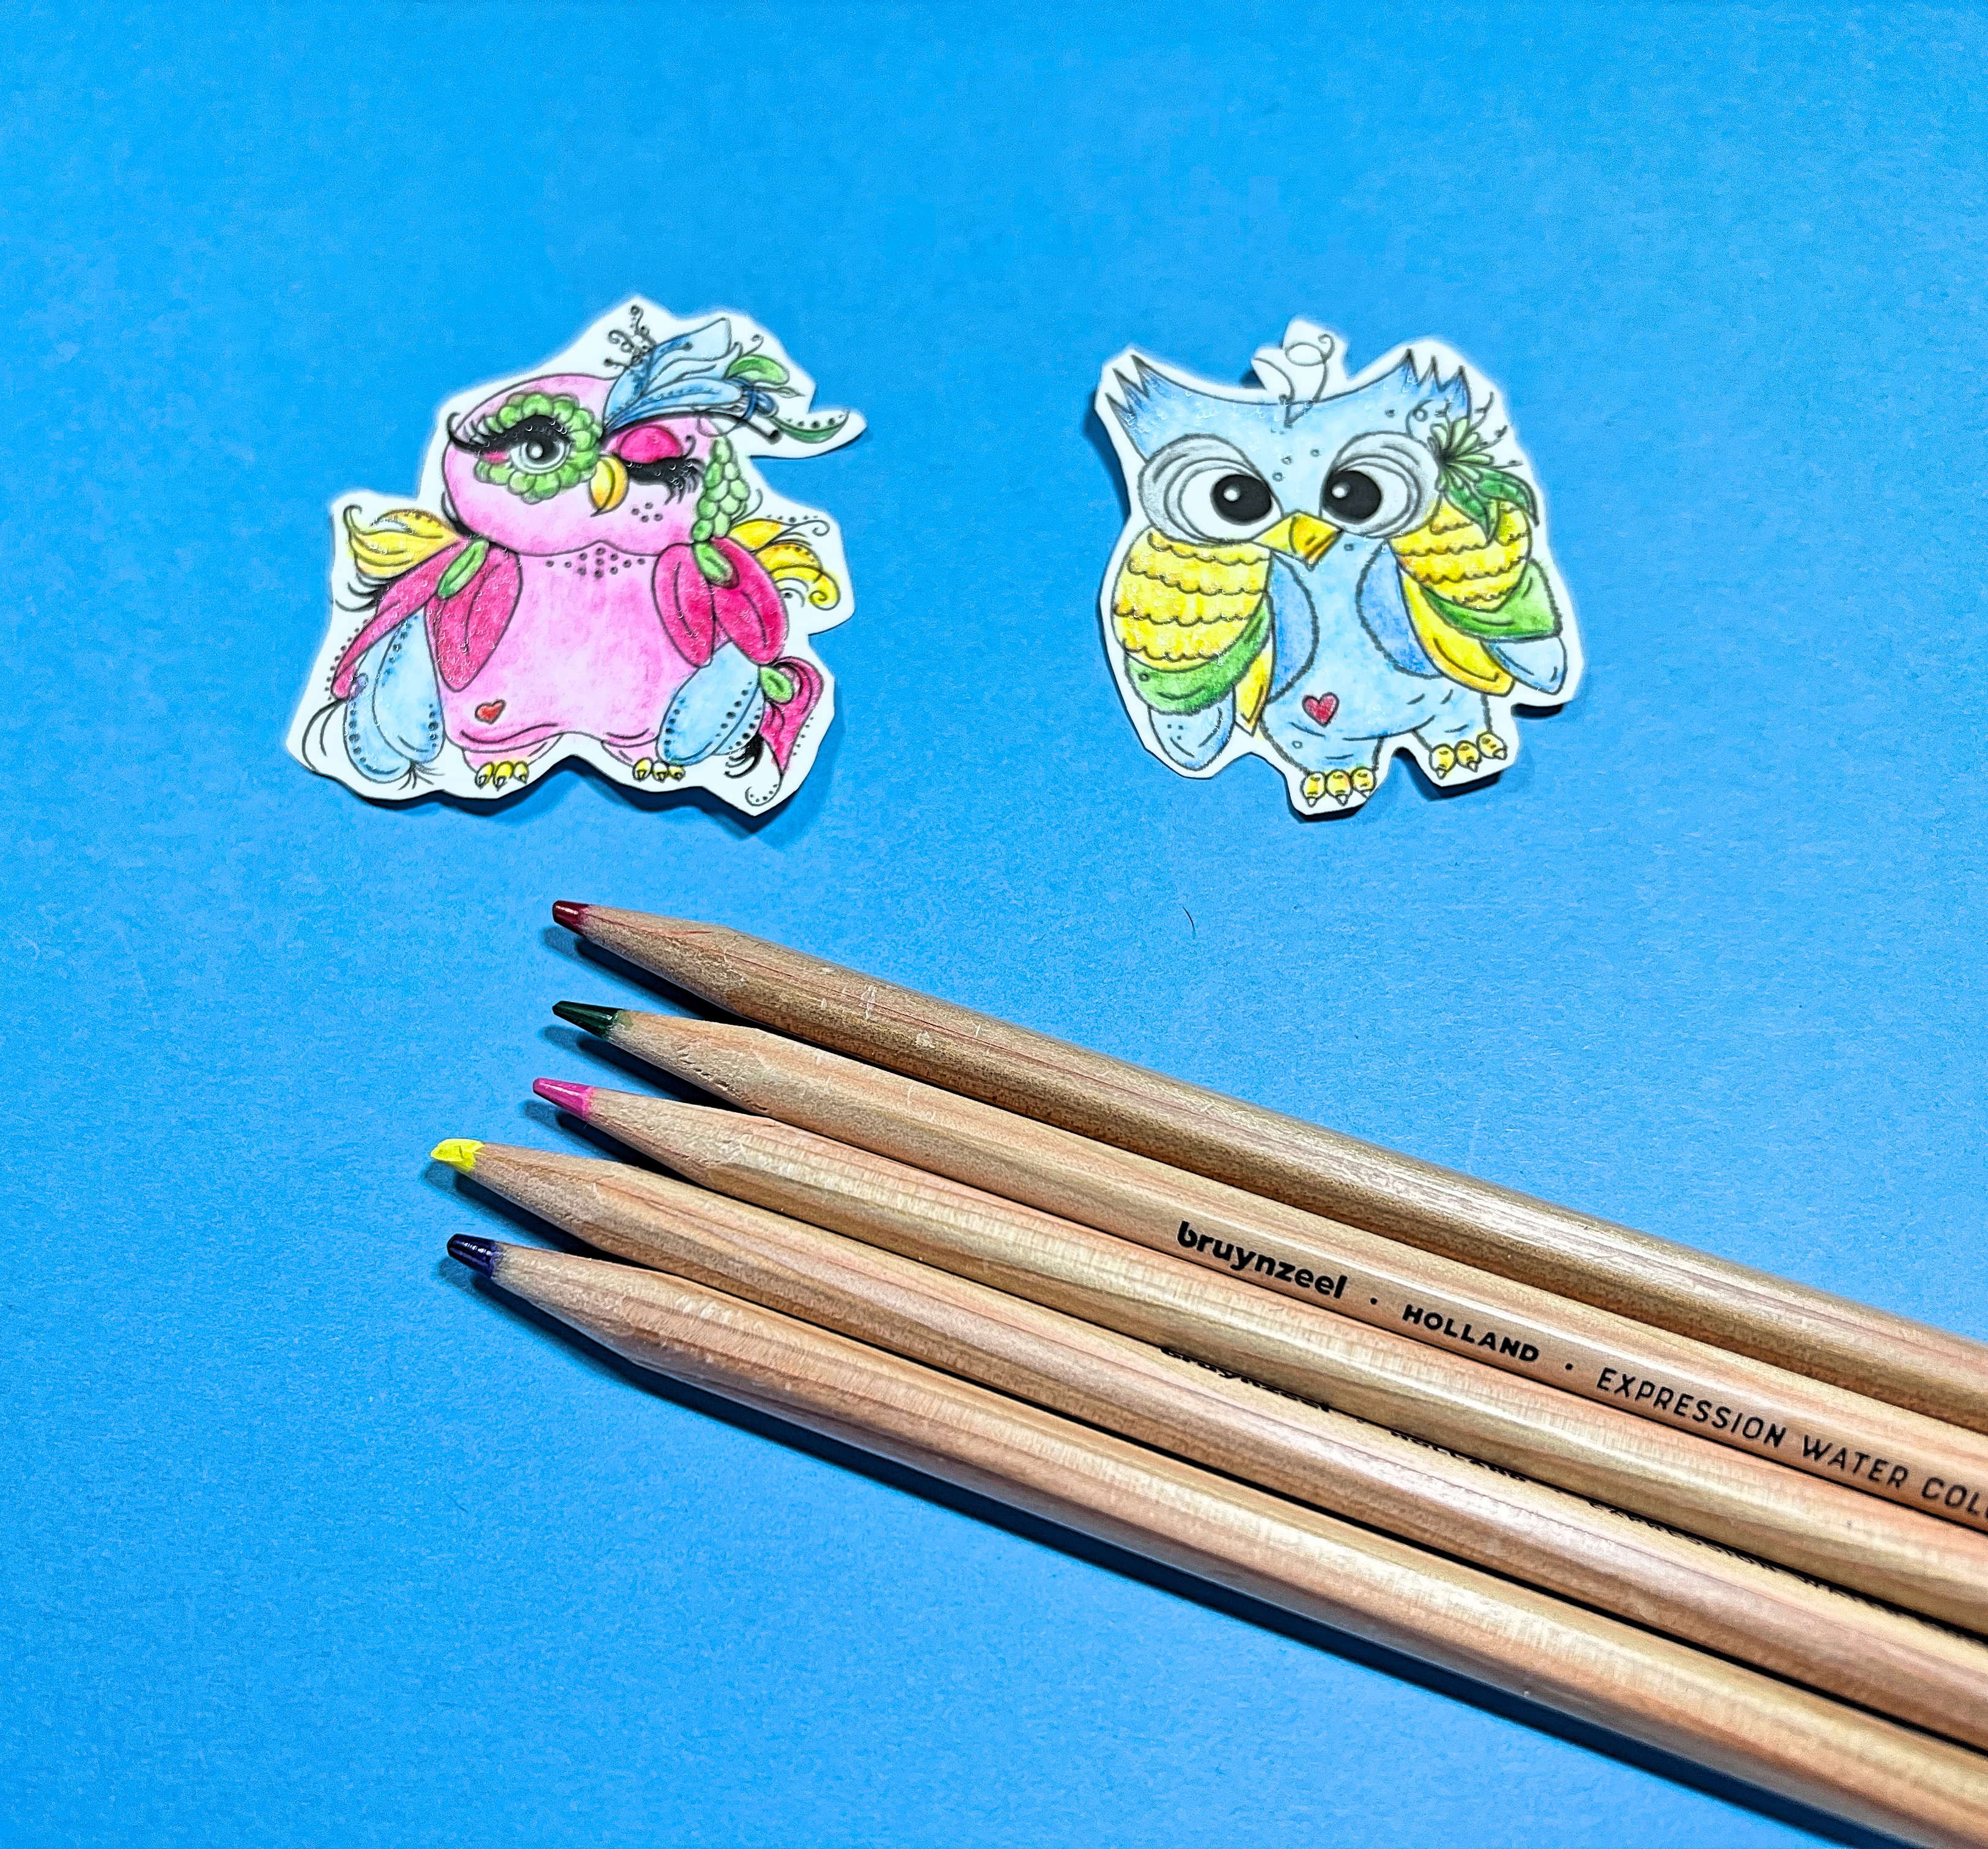
Insert the digitals images into a Microsoft Word program. Resize the owls to 2 1/4″H and the sentiments to 1/2″H (step 10). Print the owl images on white cardstock and the sentiments on yellow cardstock. Die cut the yellow and green cardstock, adhere them together and attach them to the card as shown in step 9. Watercolor the owls and cut them out. Adhere them to some black cardstock and cut them out again. To finish the card, adhere some mini flowers to Gazing Gabe. Attach both owls to the washers with 2-3 layers of foam tape. Add a mini flower to the front of the card.
Project Name
- Cardstock: White, Yellow, Black
- Simply Sweet Paper Pack by TLC Designs
- See You In The Center Die Set by TLC Designs
- Gazing Gabe and Winking Wanda Digital Images by TLC Designs
- Ben Bot Digital Stamp Set by TLC Designs for Sentiments
- Action Stamp Set by TLC Designs
- Amalgam Inkpad, Obsidian by Gina K Designs
- Miniature Flowers
- Watercolor Pencils by Royal Talens
- Zip Dry Paper Glue by Beacon Adhesives
- Foam Tape
- Scissors
- Big Shot Die Cutting Machine
- Computer
- Printer
One more PIN of the Interactive Owl Card to share

Trackbacks/Pingbacks