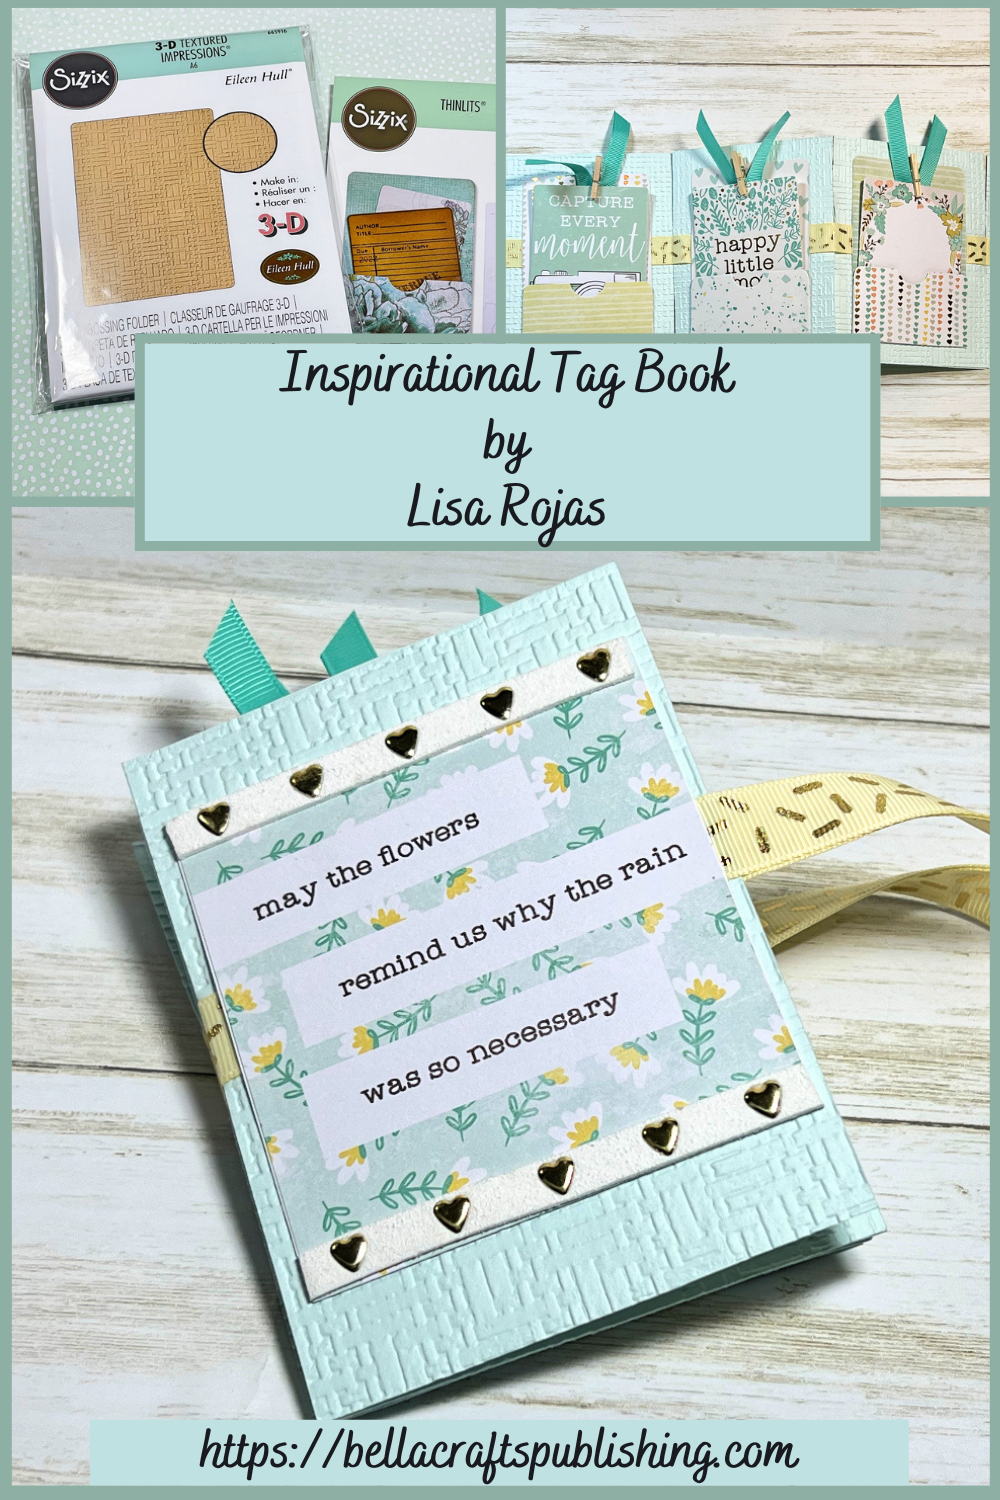
There are so many items you can add to this Inspirational Tag Book! An added bonus… it’s also quick & easy to make~
Please note: This post contains affiliate links. If you use these links and make a purchase, we earn a commission at no extra cost to you…
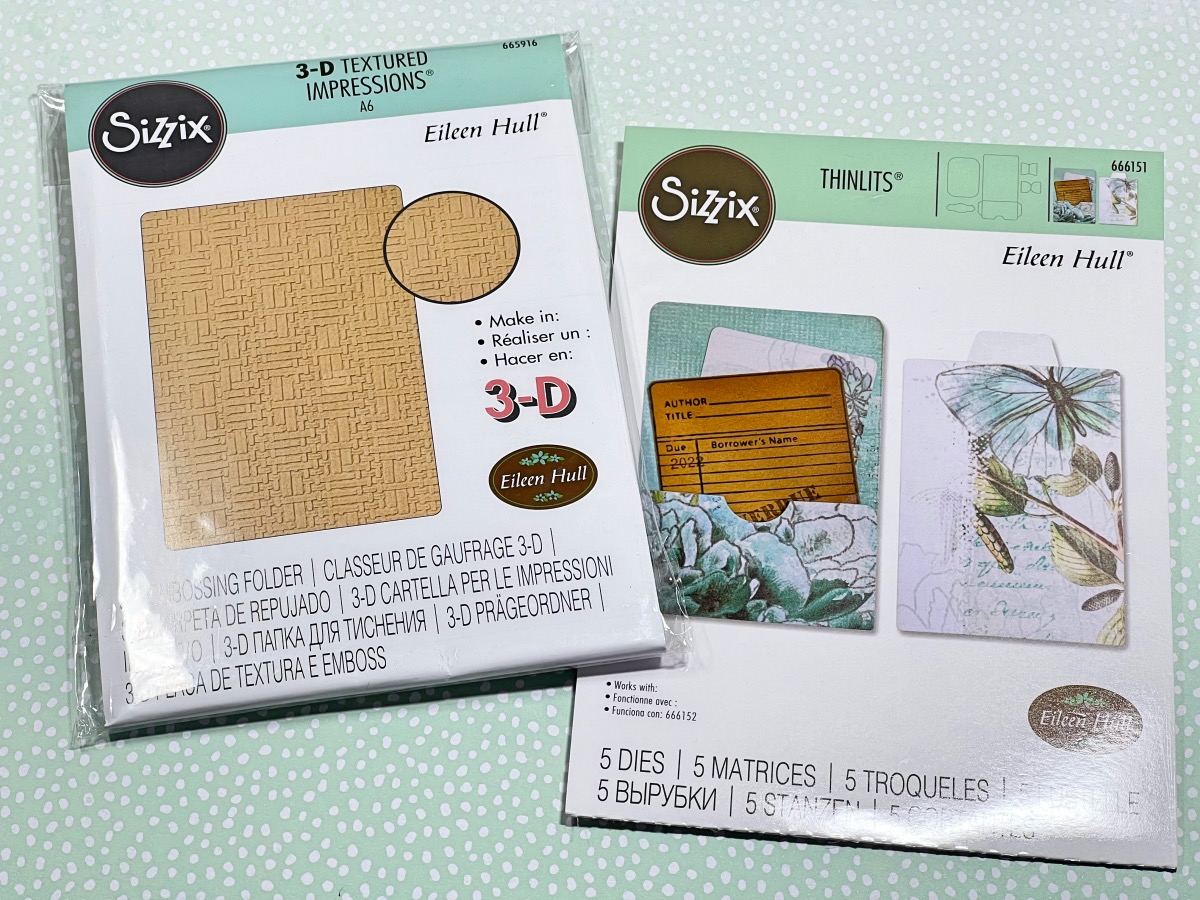
When I saw the NEW 3-D Textured Impressions embossing folder and the Library Pocket & ATC die set from our friend, Eileen Hull Designs, I knew right away what I wanted to create with them. You can put anything in the library pockets like, photos, gift cards, notes, etc. You are only limited by your imagination. I hope you make some of your own. Have fun! Lisa~
Supplies for Inspirational Tag Book
Check out the full list of supplies at the end of this post.
Step One:
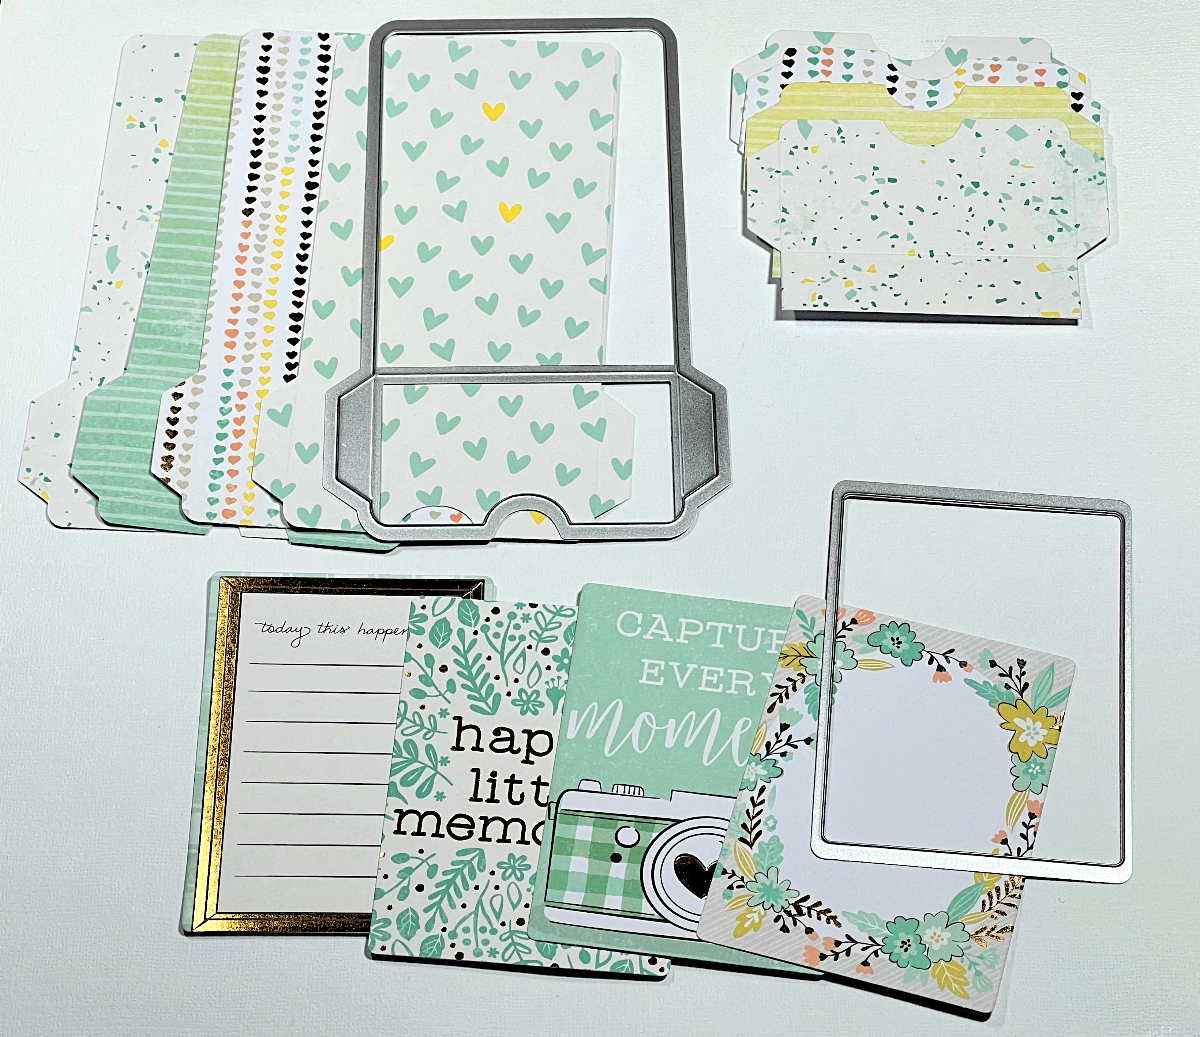
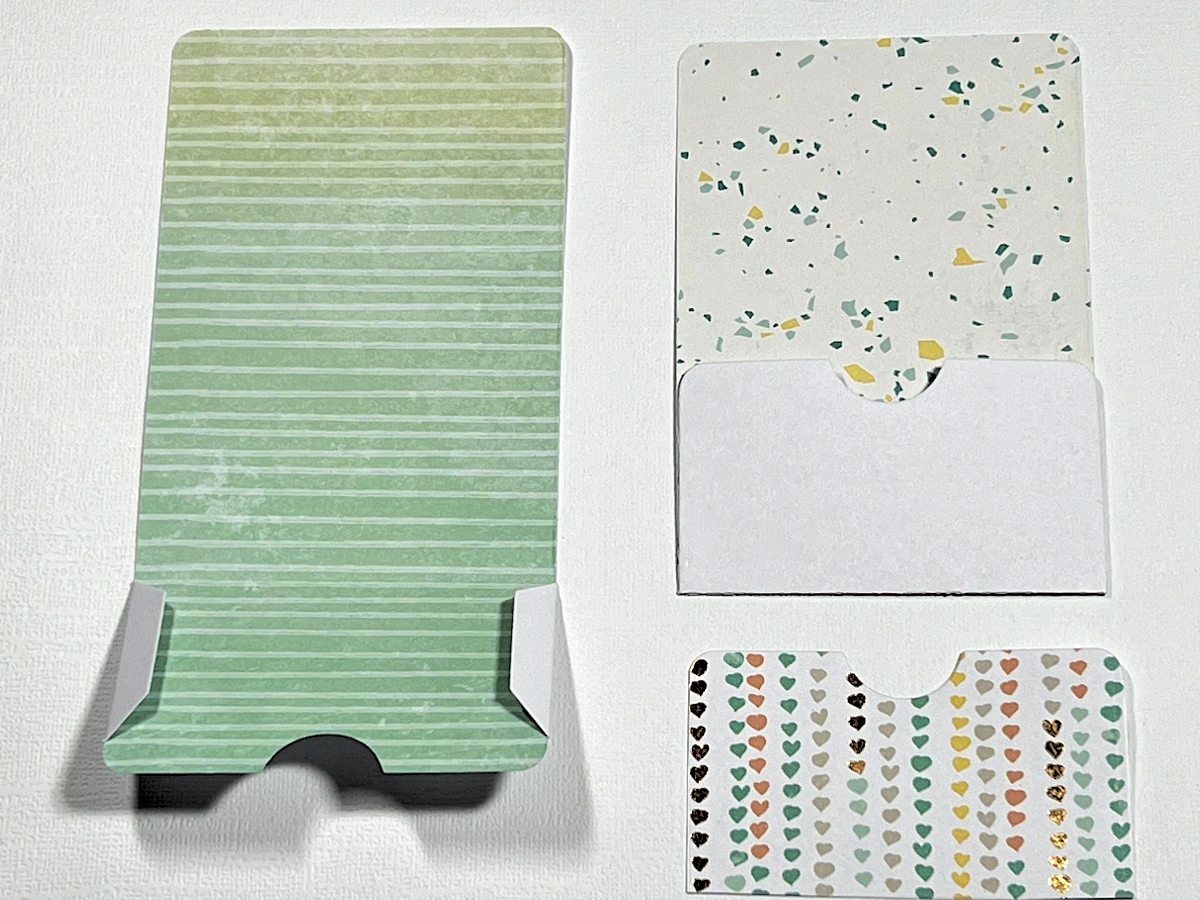
I wanted this project to be quick and easy to make. I used a patterned paper pad that had all the cute elements to put into my pockets. To begin, die cut the pockets in four different patterns of the paper. This paper is single-sided so you need to die cut the bottom portion of the pocket die four times. Next, die cut four elements from the paper pad with the ATC die as shown below.
NOTE: The paper pad I used is from Craft Smart and I bought it at Michaels. You can also find some at Amazon.
Step Two:
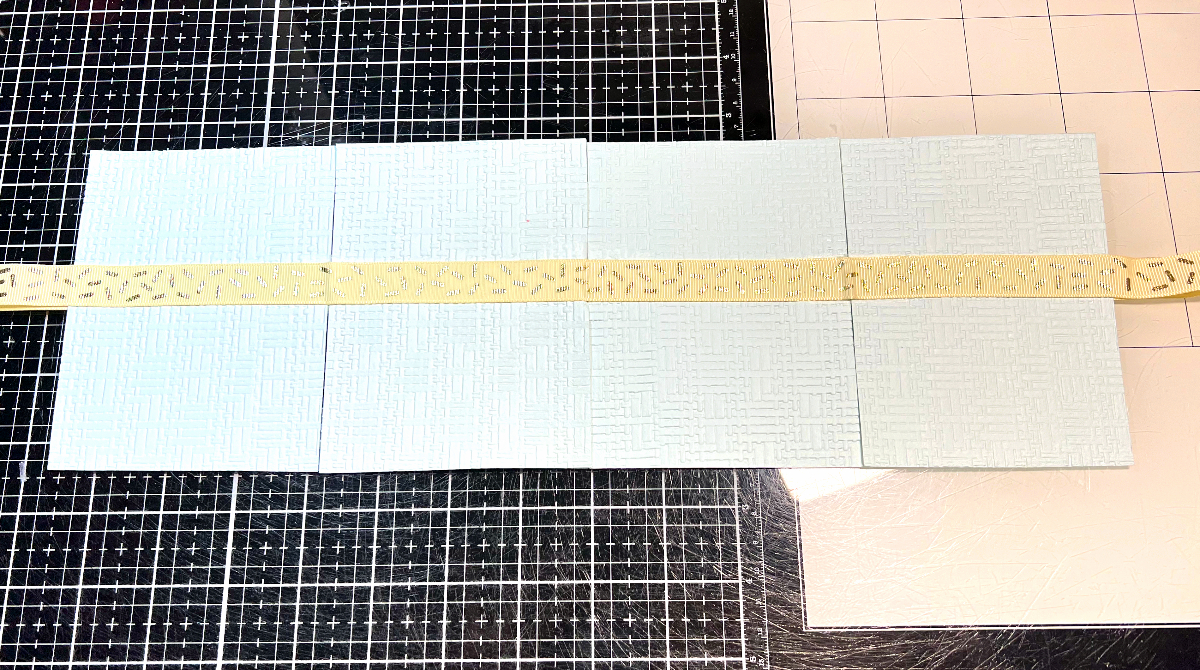
Fold a piece of light green cardstock in half and us a spray adhesive to adhere them together. Cut four pieces, 3 3/4″ x 5″. Place each piece into the embossing folder and run them through a die cutting machine.

Step Three:
Cut two pieces of ribbon 28″ long. Lay the cardstock side-by-side and adhere the ribbon to the cardstock. Turn them over and repeat on the other side.
Step Four:
Fold the pockets along the score lines and adhere the sides together. On the smaller piece, cut the bottom off along the score line and also the two tabs on each side. Adhere the smaller piece to the front of the pocket. If you have double-sided papers you can eliminate this step. Repeat with the other pockets.
NOTE: I mixed and matched the patterned papers to add a little more fun to the front of the pockets.
Step Five:
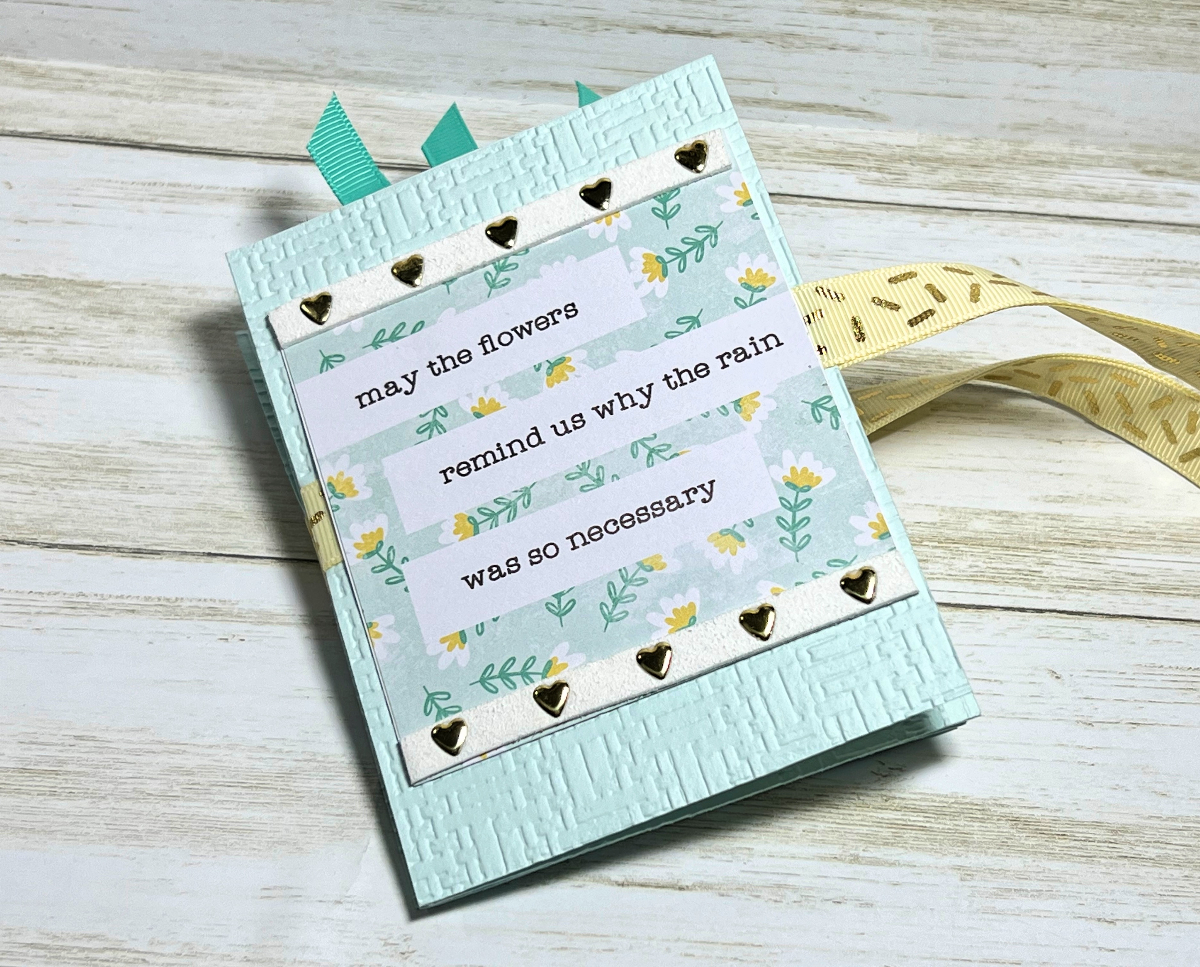
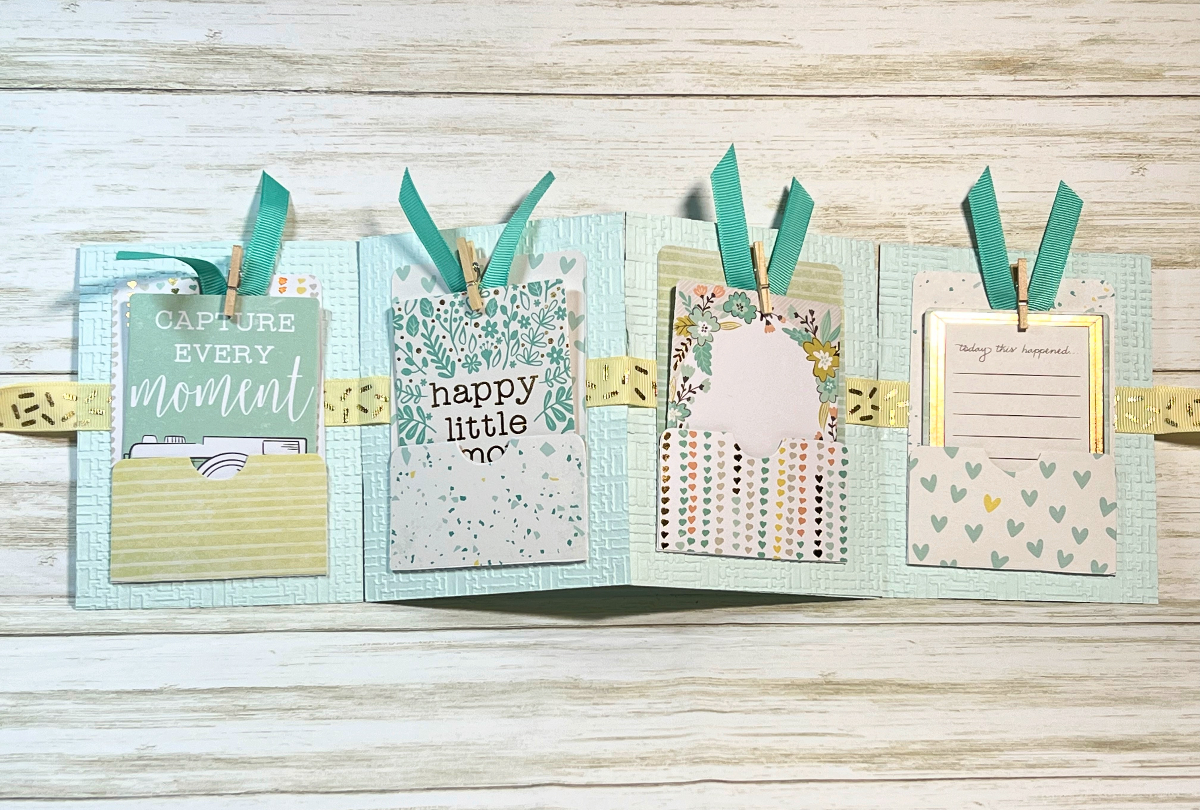
Cut four pieces of ribbon 5″ long. Adhere them on the back side of ATC cards and add some mini clothespins to the tops of the ATC cards. Slide them into the pockets and adhere each one to the four pieces of cardstock. To finish, cut another element for the front of the tag book, 3 1/2″ x 3 1/2″ and adhere to the front. Attach two pieces of the gold heart faux suede ribbon to the front as shown in the finished project photo below.

Inspirational Tag Book- Front Cover
Inspirational Tag Book- Open
Here’s Another PIN For You To Share!

Supplies for Inspirational Tag Book
- Cardstock, Mint Green
- Patterned Paper Pad by Craft Smart
- Sizzix 3-D Textured Impressions, Woven Leather by Eileen Hull Designs
- Sizzix Library Pocket & ATC die set by Eileen Hull Designs
- Sweet Shop Ribbon Packs by Gwen Studios
- Faux Suede Ribbon by Gwen Studios
- Zip Dry Paper Glue by Beacon Adhesives
- Spray Adhesive
- Mini Clothespins, 4
- Scissors
- Big Shot Die Cutting Machine by Sizzix
Sorry if I posted this twice.
Pretty new to you. Where do you find giveaway winners?
Thanks!
We announc the winners from the previous week on our Facebook LIVES each week.