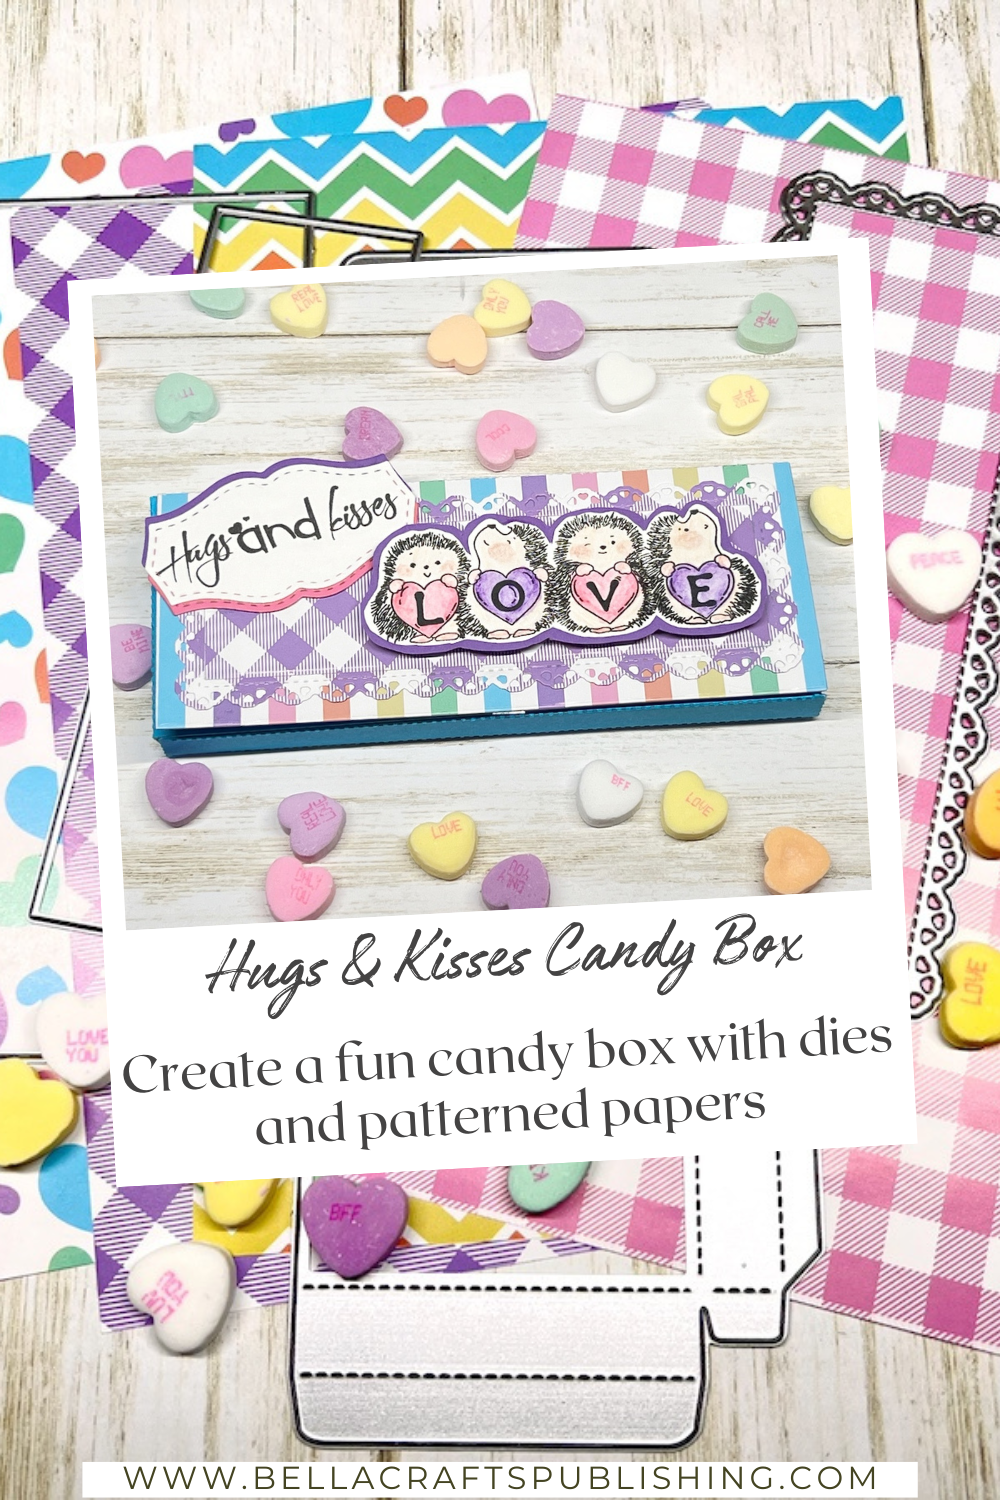
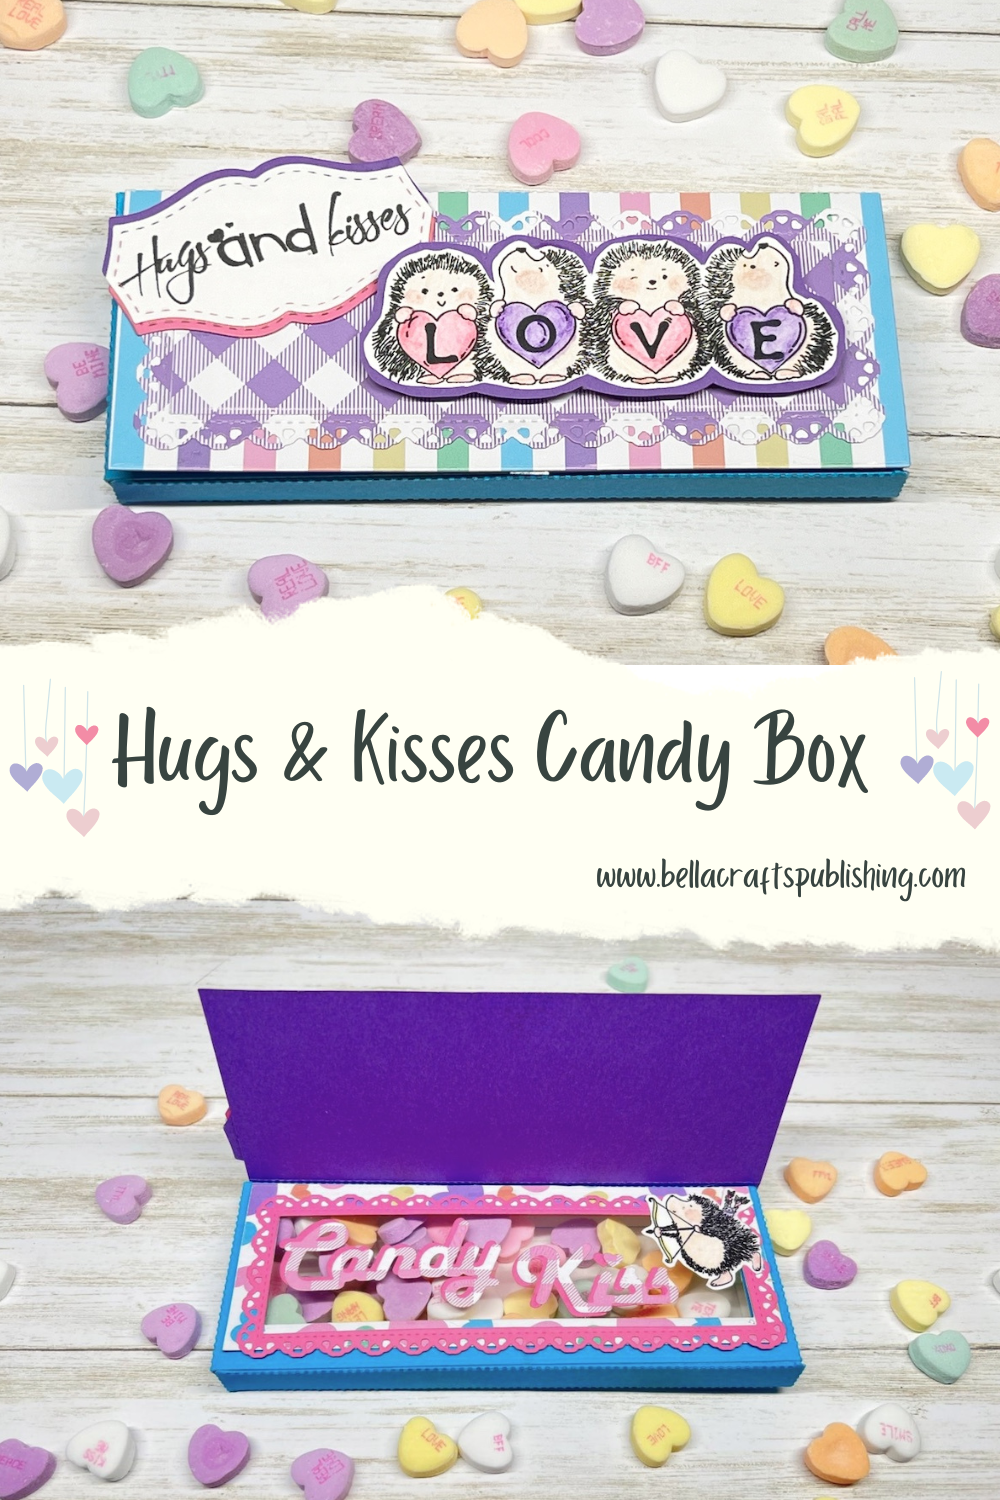
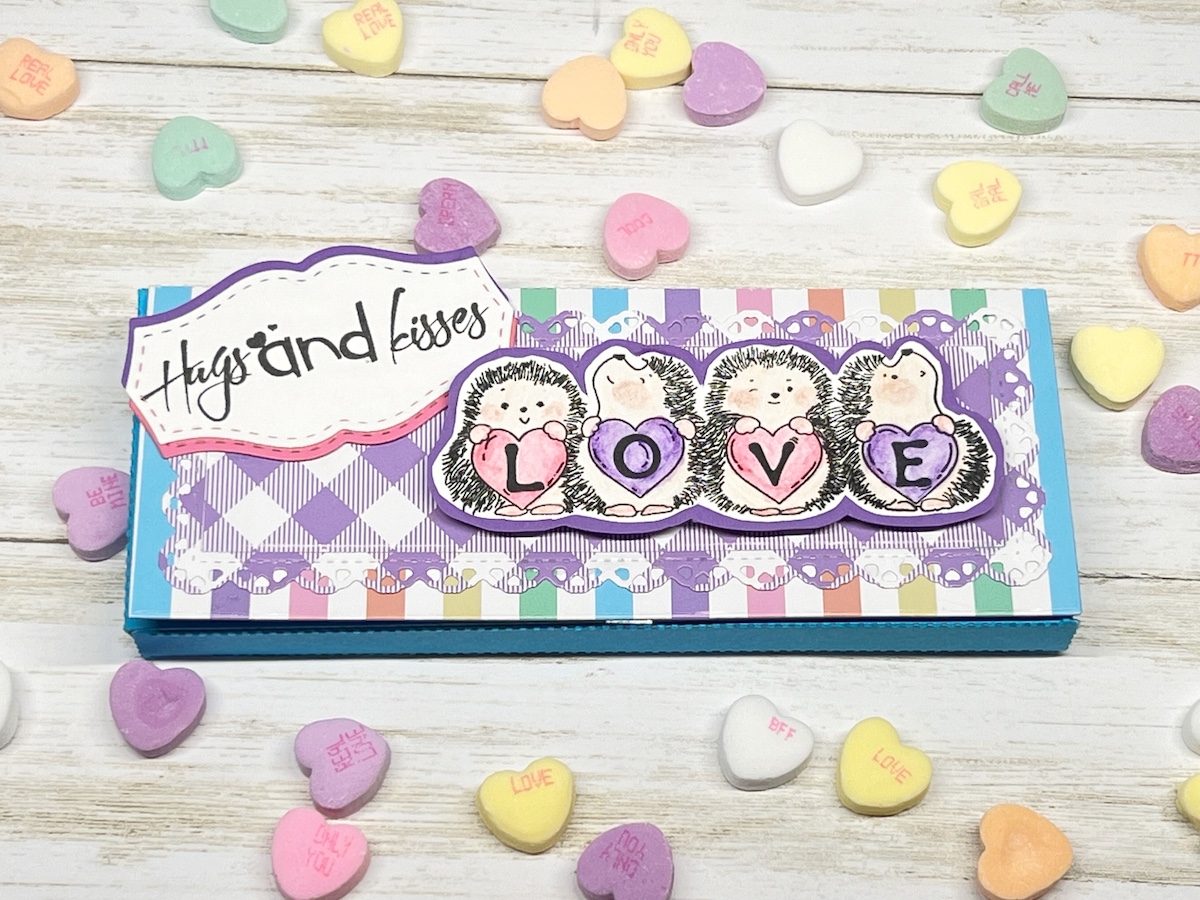
Our Hugs & Kisses Candy Box is a gesture of sweetness that speaks volumes. Create it for your someone special~
Please note: This post contains affiliate links. If you use these links and make a purchase, we earn a commission at no extra cost to you…
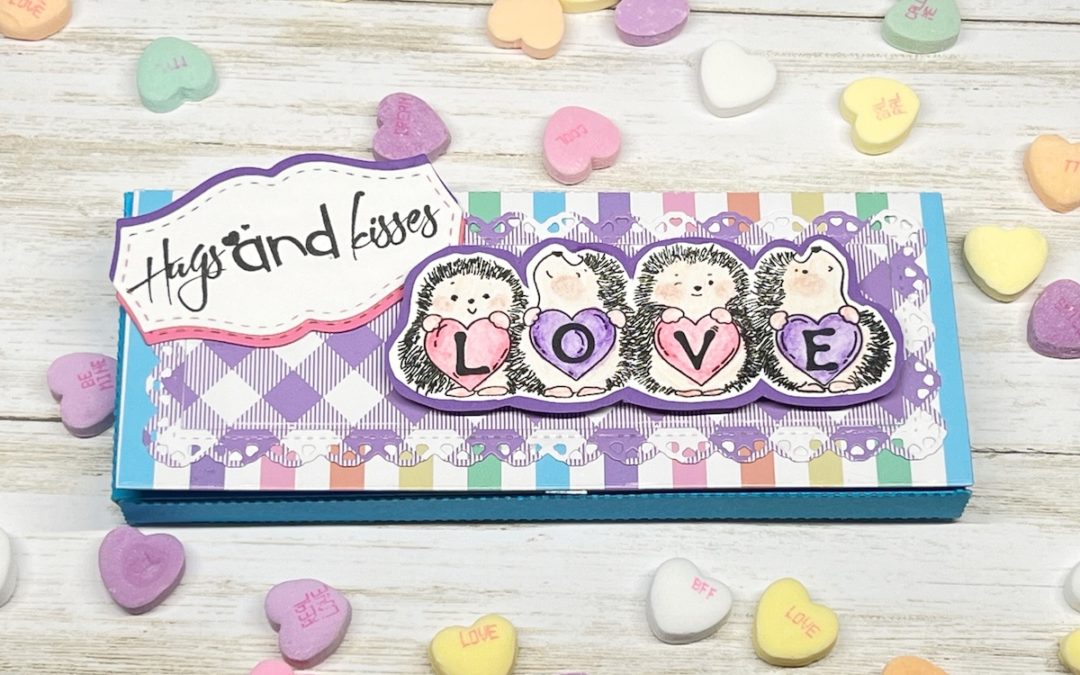
I love to give little boxes especially for Valentine’s Day & Halloween. So, when I found this die from KSCraft on Amazon, I knew it was exactly what I wanted. Once I added the stamped hedgehogs and the Hugs and Kisses sentiment my candy box was perfect. I hope you give it a try. Crafty hugs, Lisa~
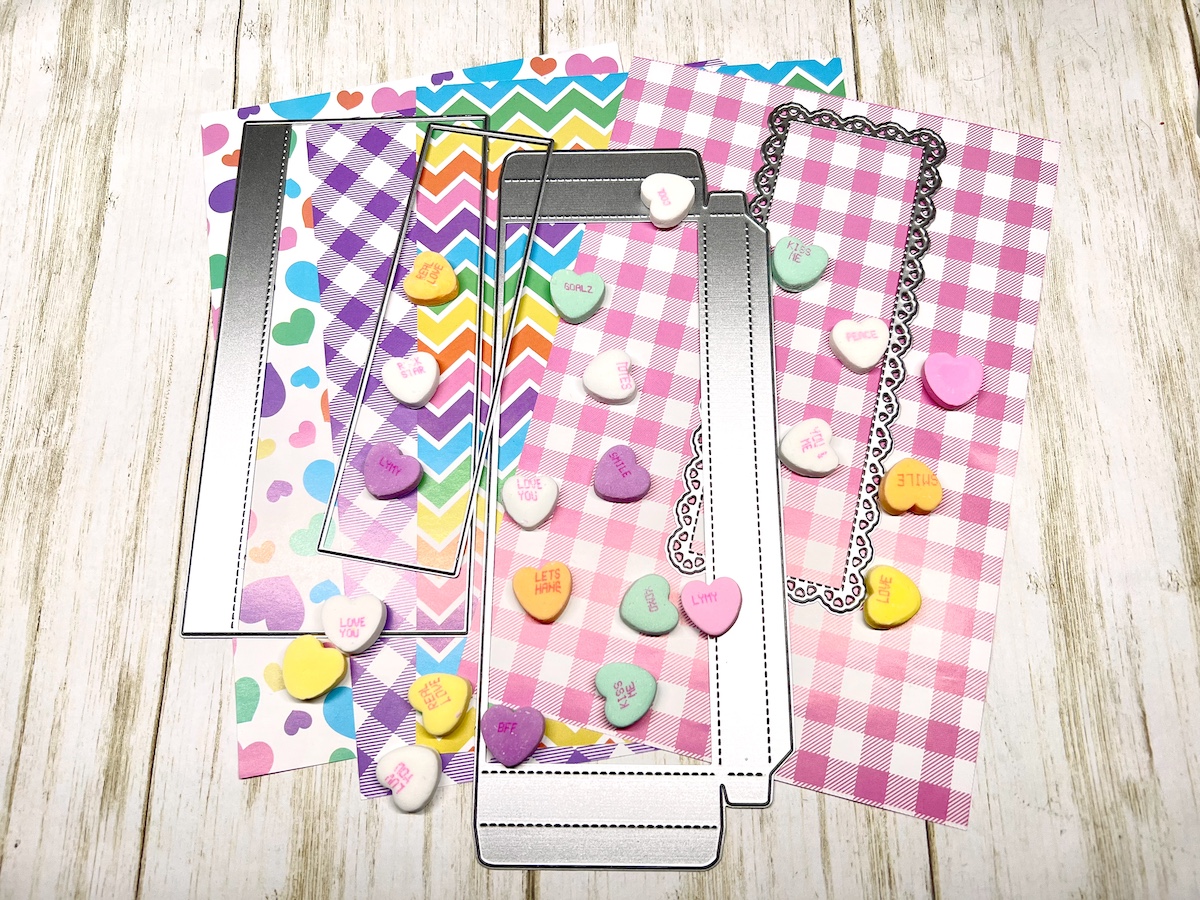
Supplies for Hugs & Kisses Candy Box
Steps One, Two, Three:
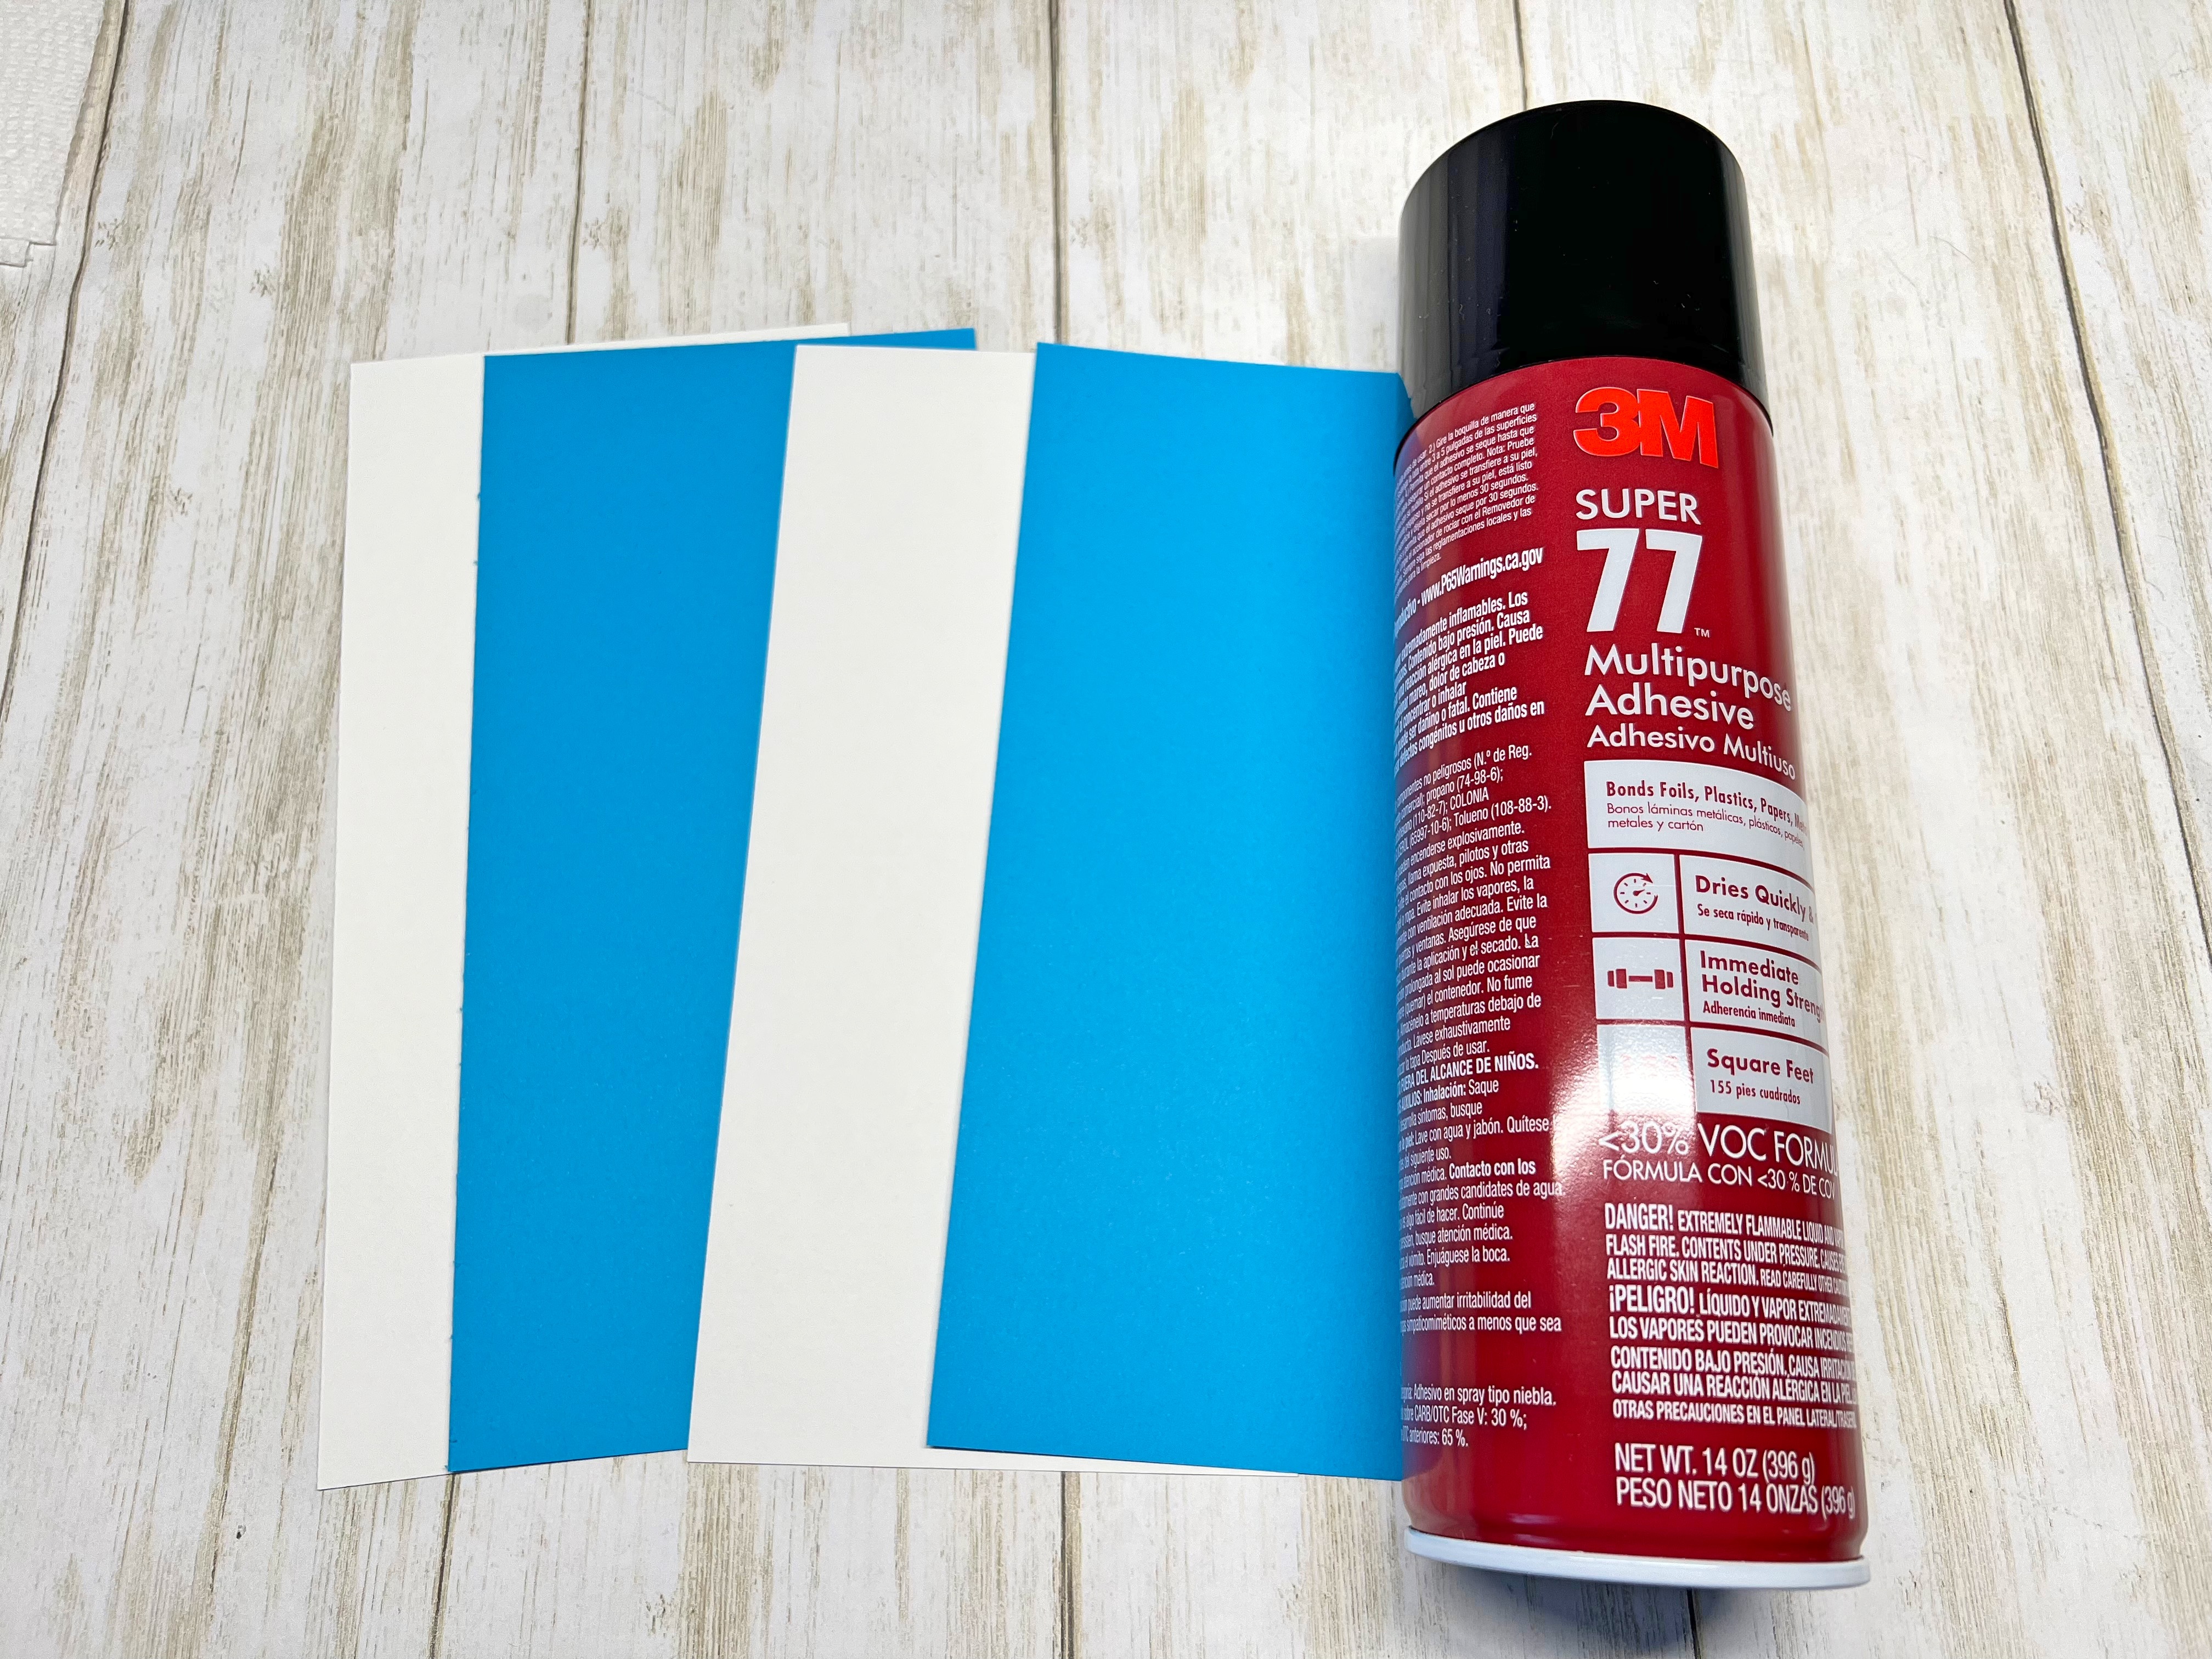
Cut the blue and white cardstock slightly larger than the box die and adhere them together with spray adhesive. Repeat with the striped patterned paper and purple cardstock. This will make the box and the lid stronger.
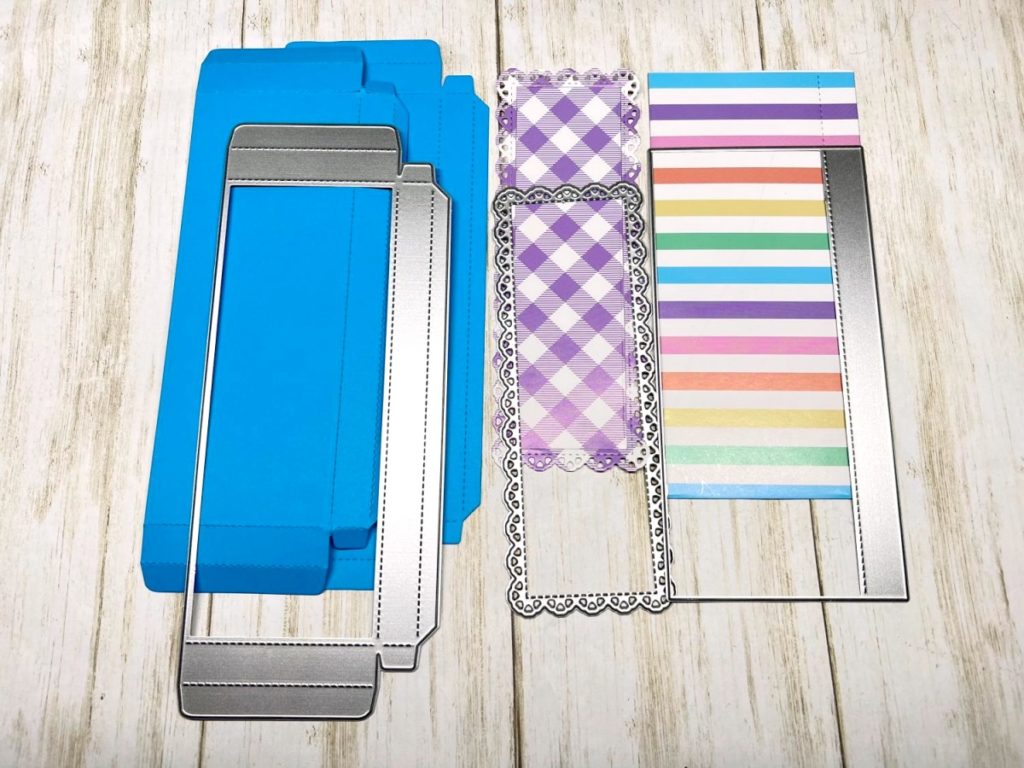
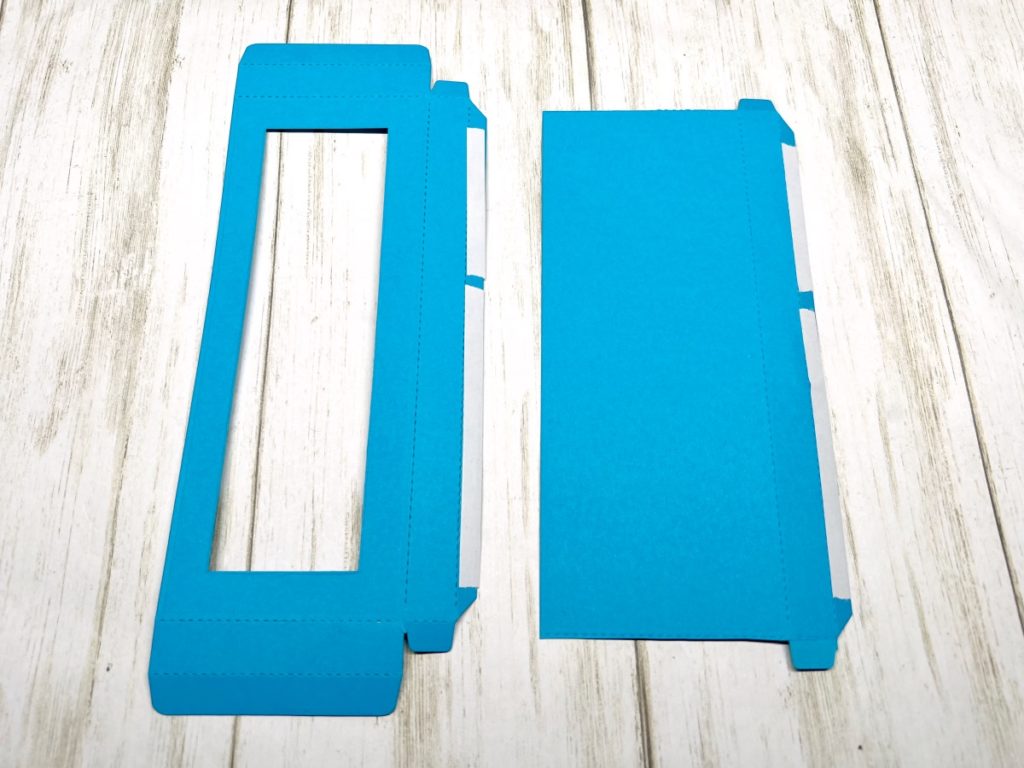
Die cut two pieces of the blue cardstock. Next, die cut one of the purple checkered and one of the striped paper as shown.
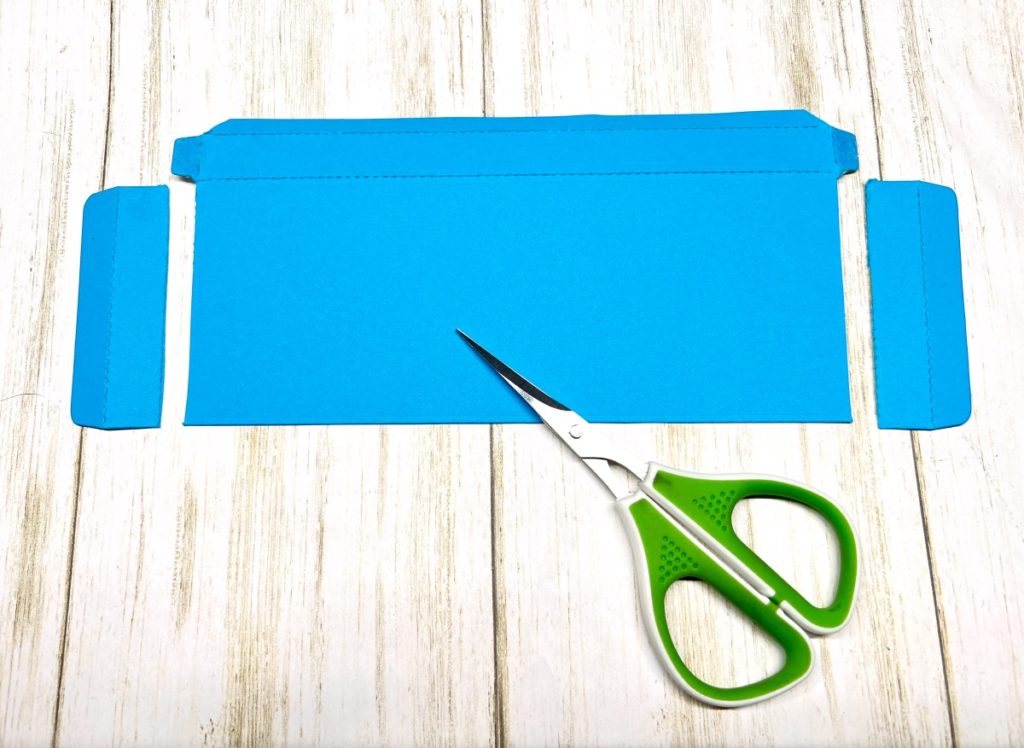
Cut the tabs off of one of the blue cardstock pieces. This will be the bottom of your box.
Steps Four, Five, Six:
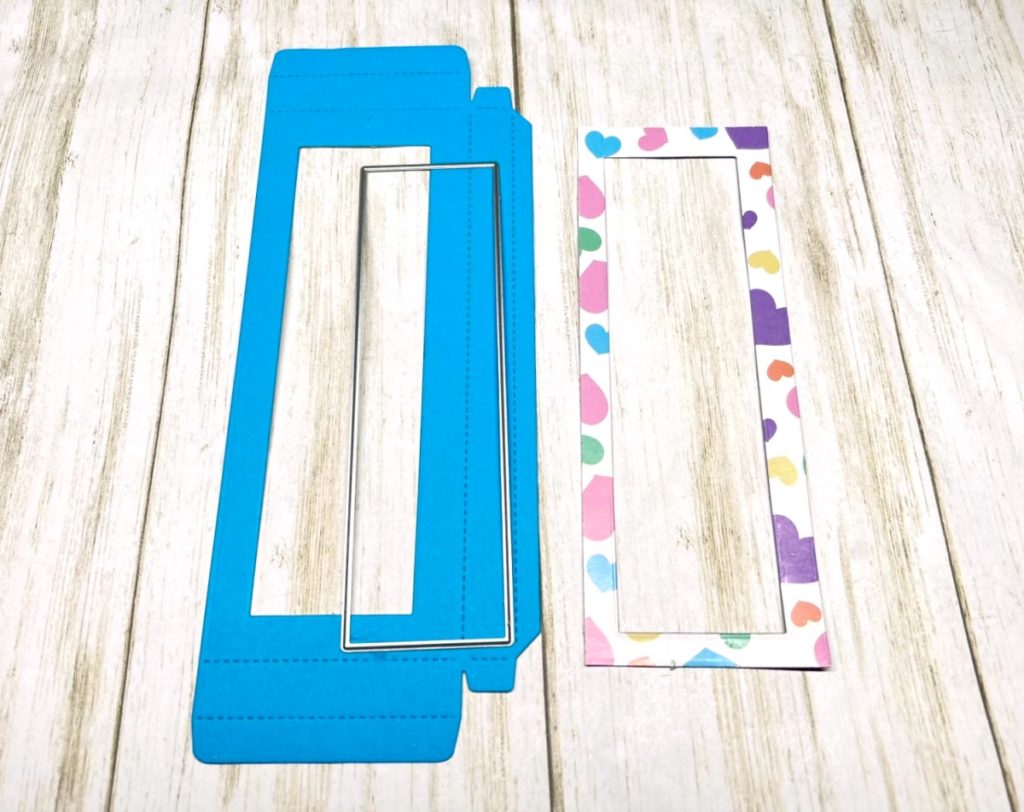
Cut a piece of the heart patterned paper 2 1/4″ x 6 1/4″. Place the rectangle die on top and run it through the Big Shot. Next, lay the heart patterned paper on the other piece of the blue cardstock and trace it out lightly with a pencil. Place the rectangle die on top and run it through the Big Shot.
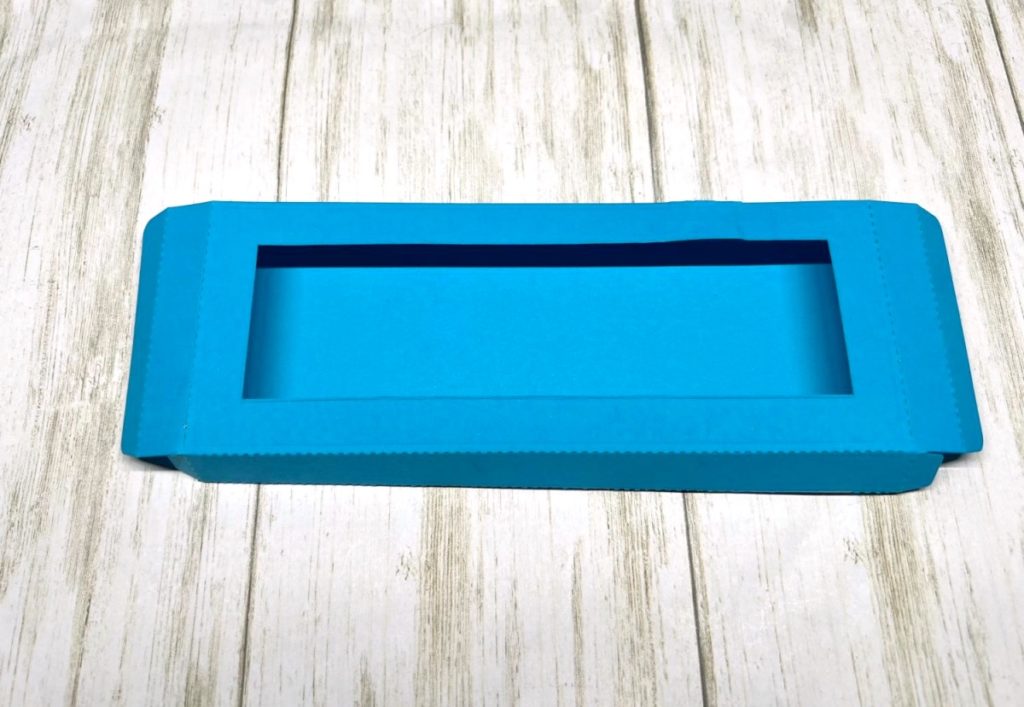
Apply double-sided tape along the edges of each piece of blue cardstock as shown. Attach the bottom piece to the top.
Fold the bottom piece under the top and adhere both pieces together to form the box.
Steps Seven, Eight, Nine:
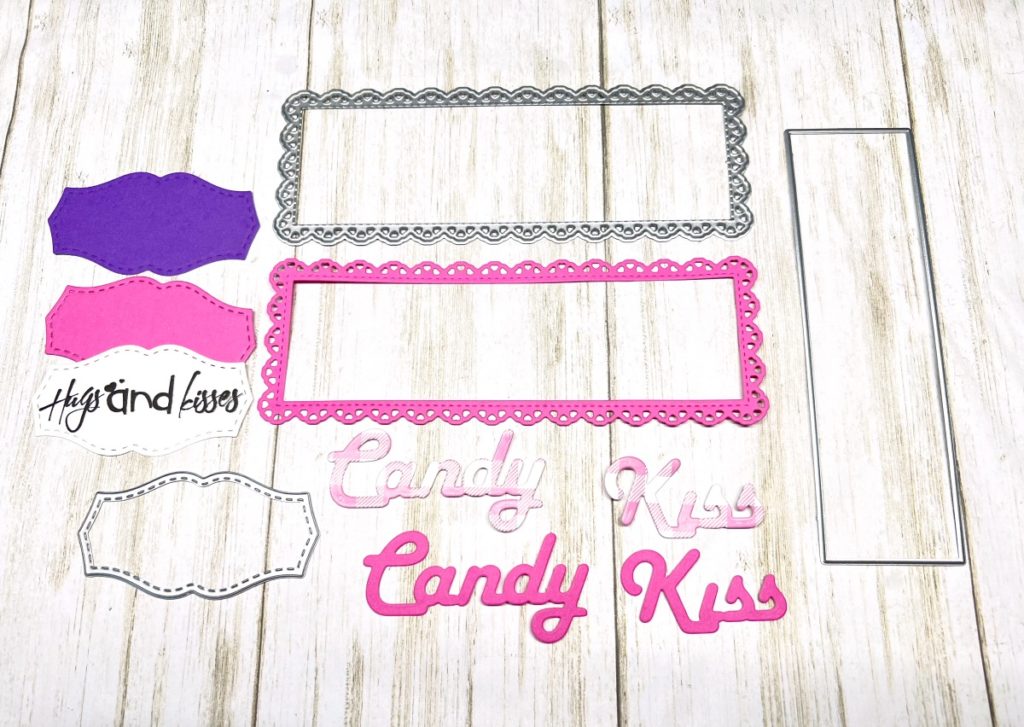
Die cut the decorative pieces as shown in the photo. To die cut the scalloped piece, place the plain rectangle die inside the scalloped die and then run it through the Big Shot.
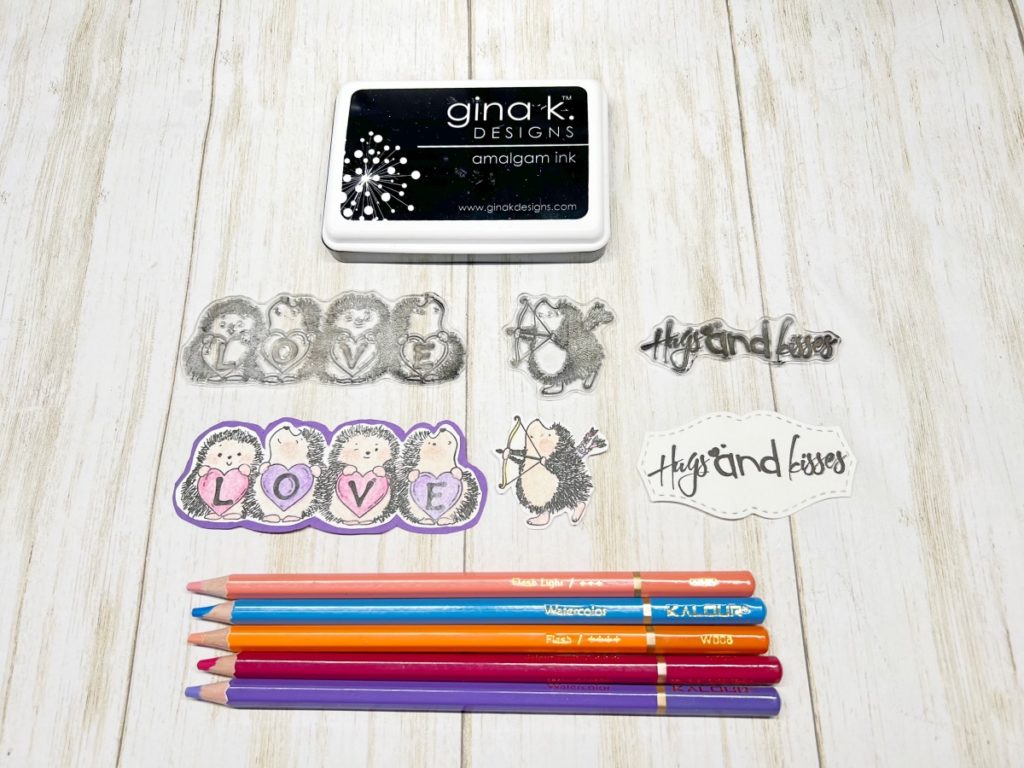
Using the black inkpad, stamp the large hedgehog image and the single hedgehog on white cardstock and watercolor the images. Stamp sentiment on the white die cut piece. Cut hedgehog images out with scissors. Adhere the larger image to a piece of purple cardstock and cut it out again leaving a small border around the image. Spray the images with a clear sealer.
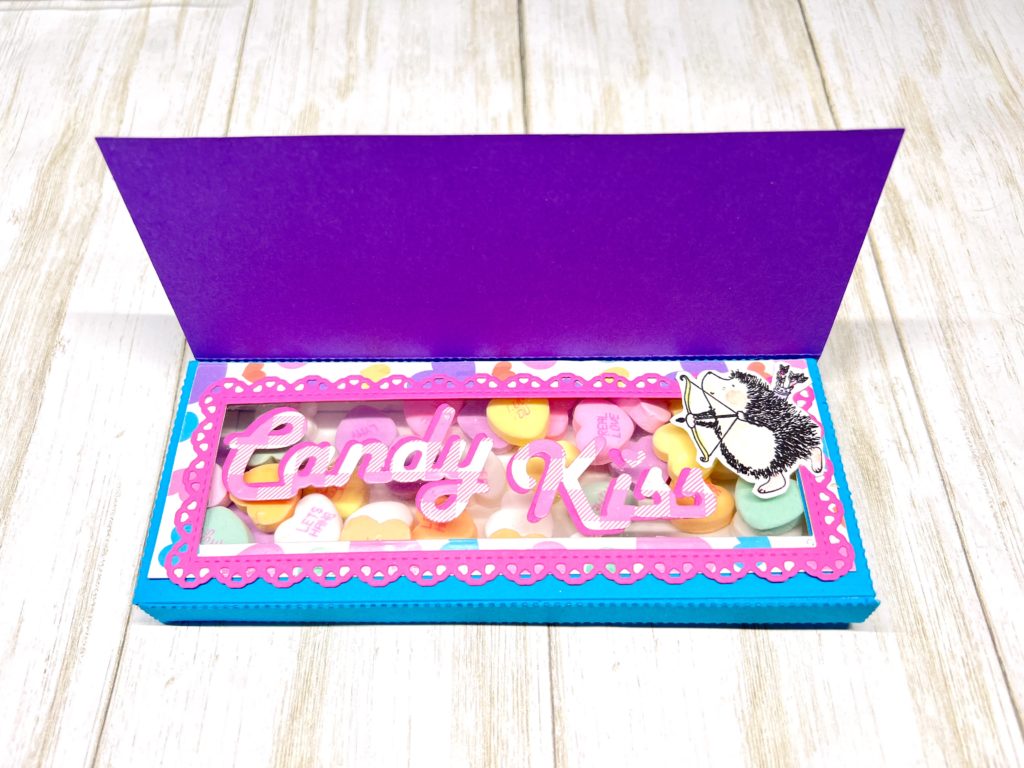
Attach a piece of clear plastic to the back of the heart paper and adhere them to the top of the box. Next, adhere the scalloped paper and single hedgehog on top as shown. Adhere the words together offsetting them slightly. To finish, fold the score line on the cover and adhere it to the box as shown in finished photo below. Attach the checkered paper and the labels to the cover. Apply foam tape to the large hedgehog image adhere it to the cover. Fill with heart candy or a chocolate bar.
Hugs & Kisses Candy Box
- Cardstock: White, Blue, Purple
- Patterned Papers, Various
- Clear Rubber Stamp Set
- Amalgam Inkpad, Obsidian by Gina K. Designs
- Watercolor Pencils
- Candy
- Zip Dry Paper Glue by Beacon Adhesives
- Connect Glue by Gina K. Designs
- Double-Sided Tape
- Foam Tape
- Scissors
- Small Label Die by Stampendous
- Candy Box Die Set by KS Craft
- Big Shot Die Cutting Machine
One more PIN of the Hugs & Kisses Candy Box to share