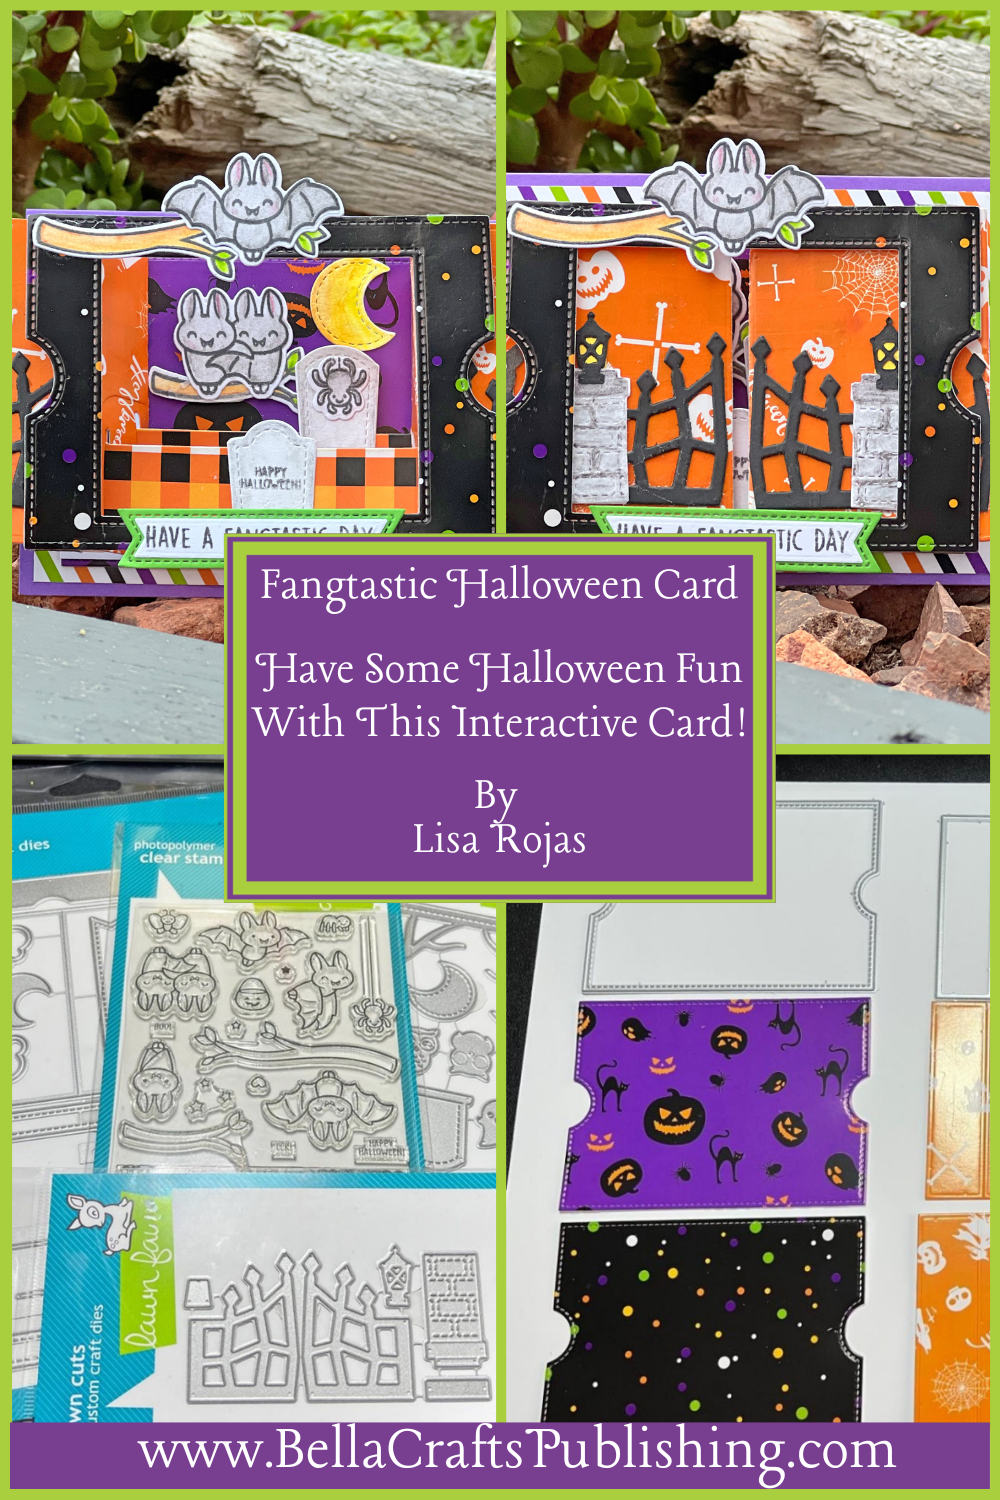
Let us show you how to create a Frighteningly Fangtastic Fun Halloween card with a interactive die set from Lawn Fawn
Please note: This post contains affiliate links. If you use these links and make a purchase, we earn a commission at no extra cost to you…
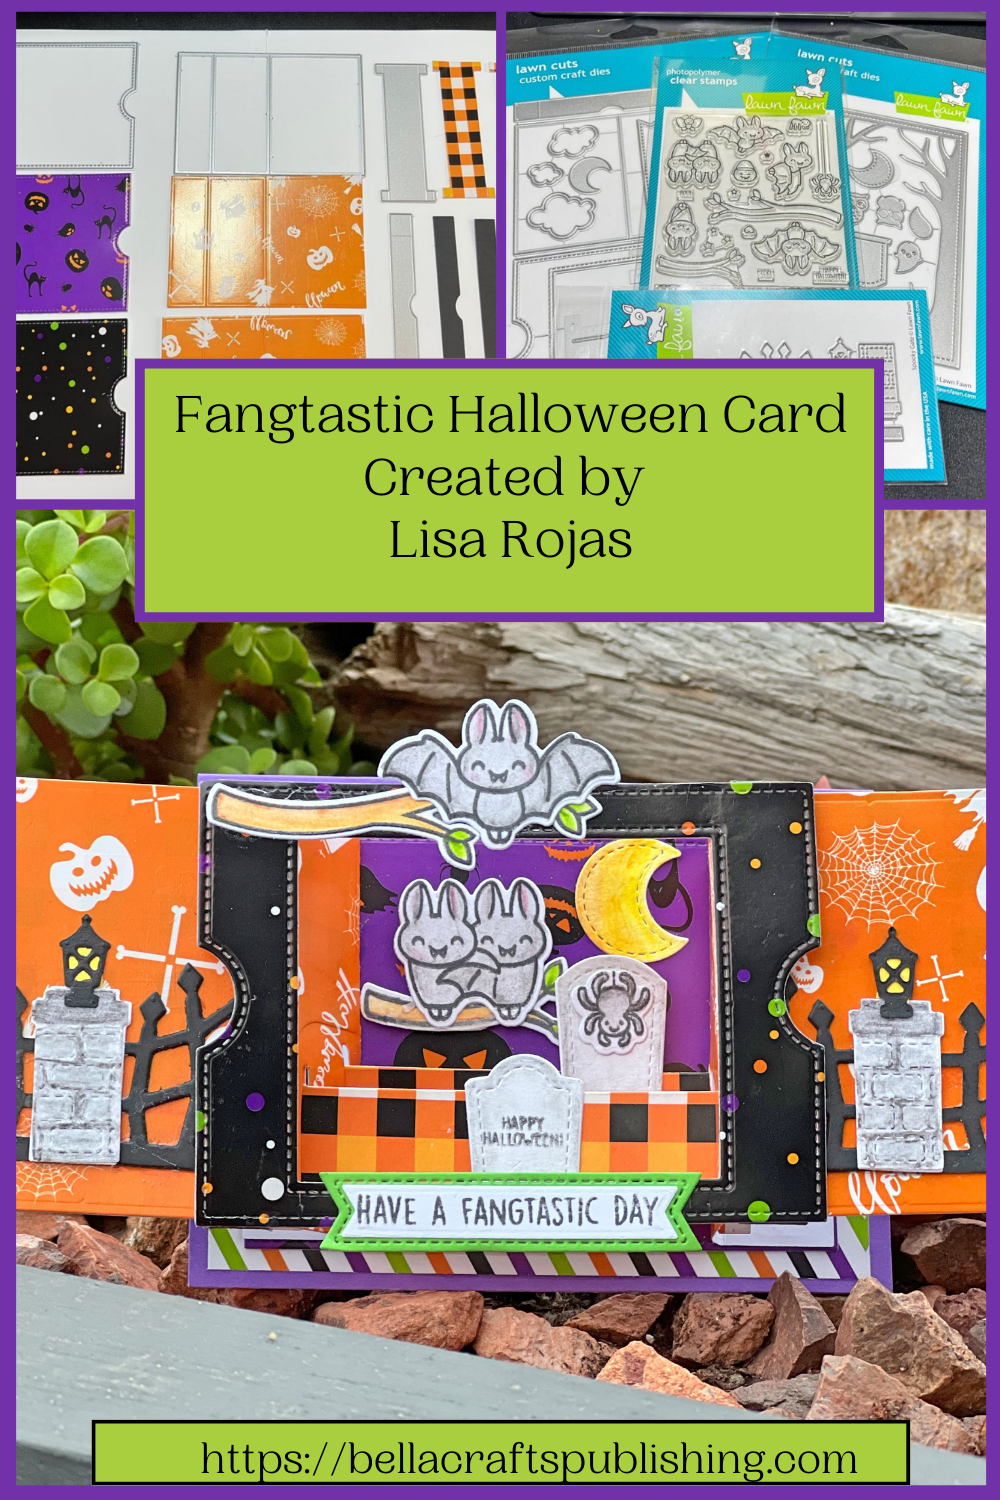
This card has two of my all time favorites things: Halloween and Interactive Cards! This new die set is so easy to use, even if you’re new to paper crafting and interactive cards, you can create this card with ease. I really hope that you give it a try. You’ll have some fangtastic fun!!! Lisa~
Supplies for Fangtastic Halloween Card
Check out the complete supply list at the end of the post
Steps One, Two, Three:
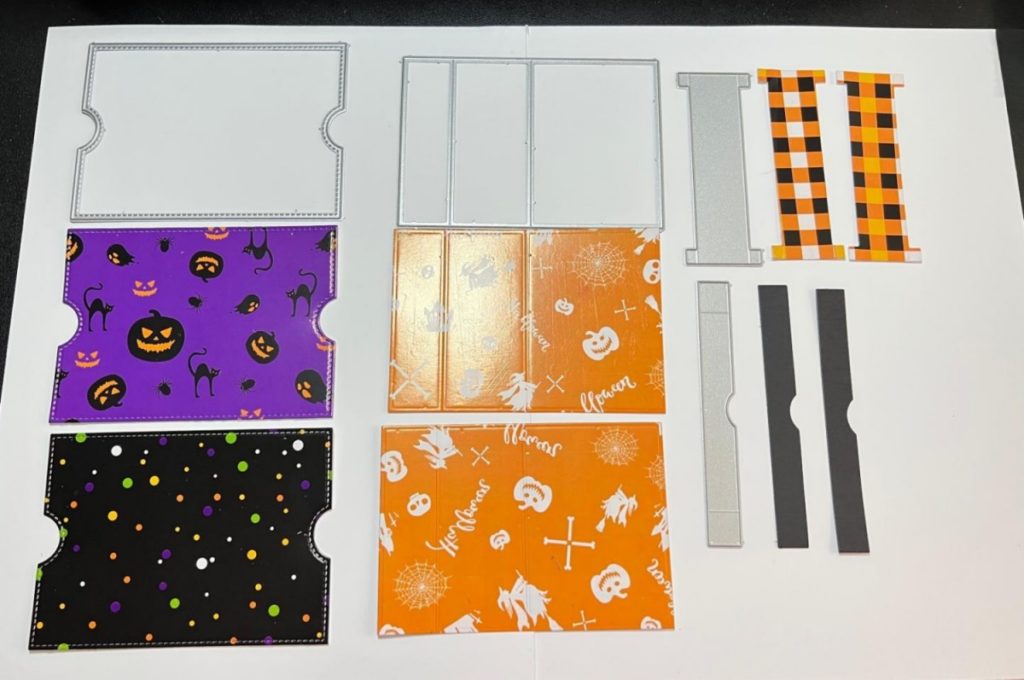
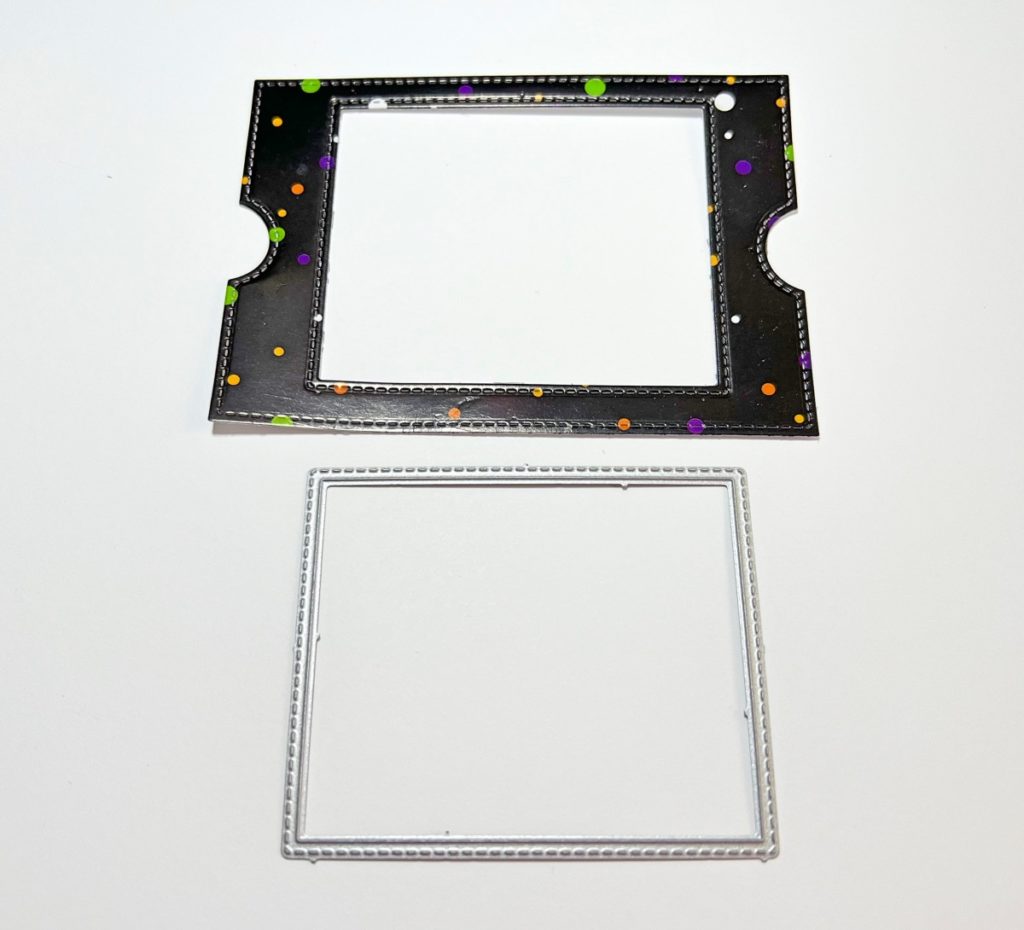
Using the first photo for reference, die cut the patterned papers and cardstock.
After all the papers are die cut in step one, die cut the front piece of the card.
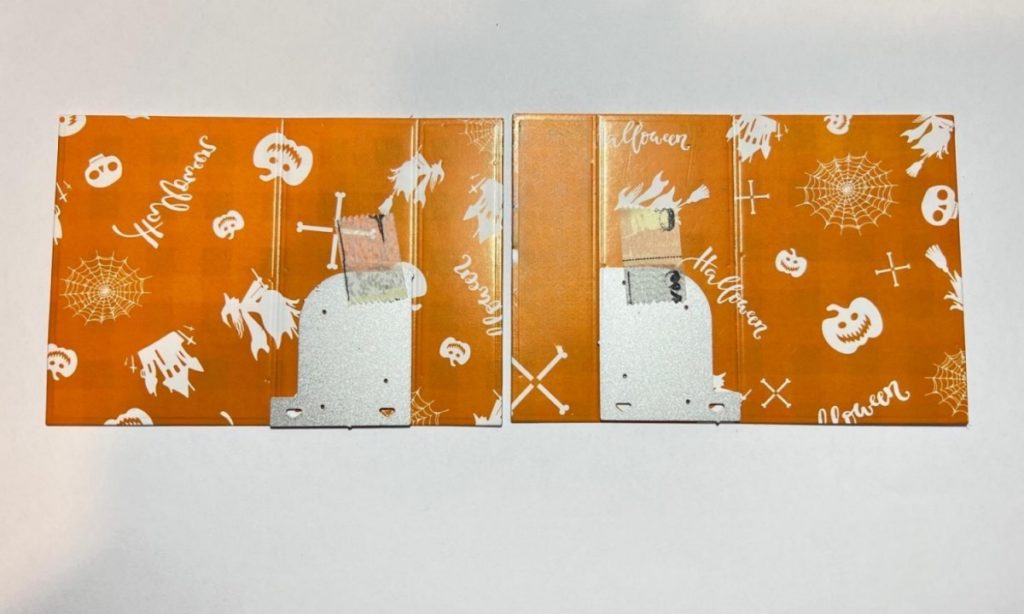
The orange papers have two score marks. Lay the dies on the papers as shown and run them through the die cutting machine. This will give each of the papers two slots as shown in the next photo.
NOTE: This is an interactive card so the papers used should be sturdy. If your patterned papers are lightweight, adhere them to cardstock with a spray adhesive before you die cut them.
Steps Four, Five, Six:
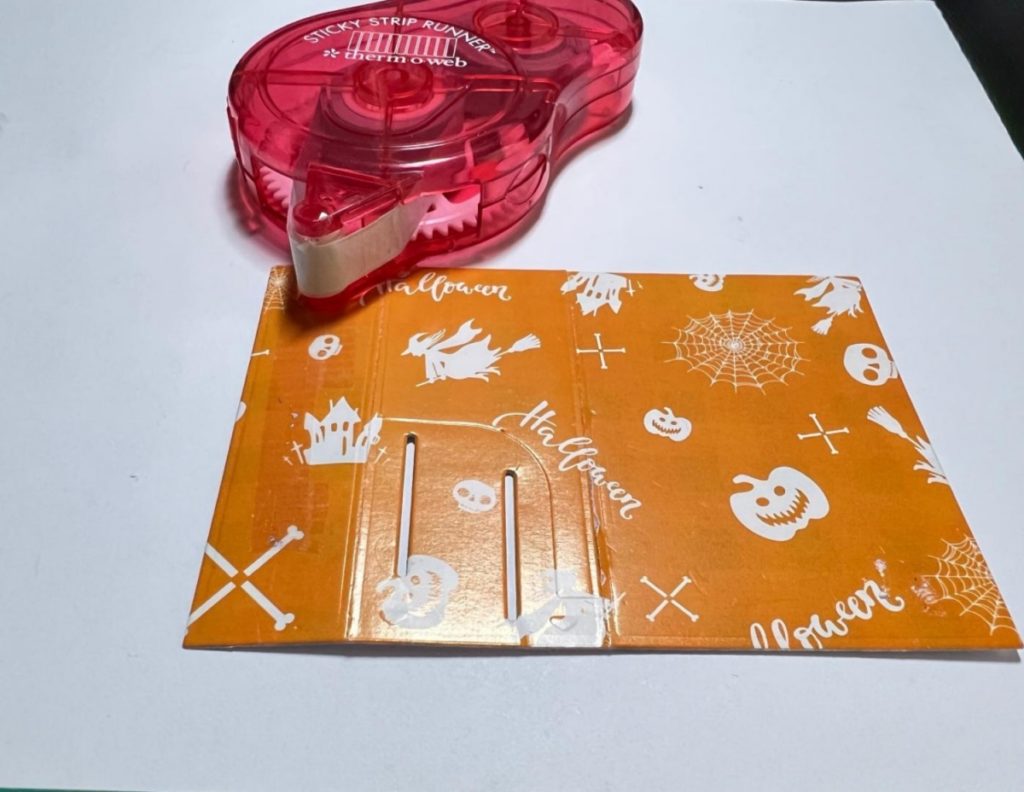

Use a tape runner to add adhesive to the smaller portion next to the slot on both pieces of the orange papers.
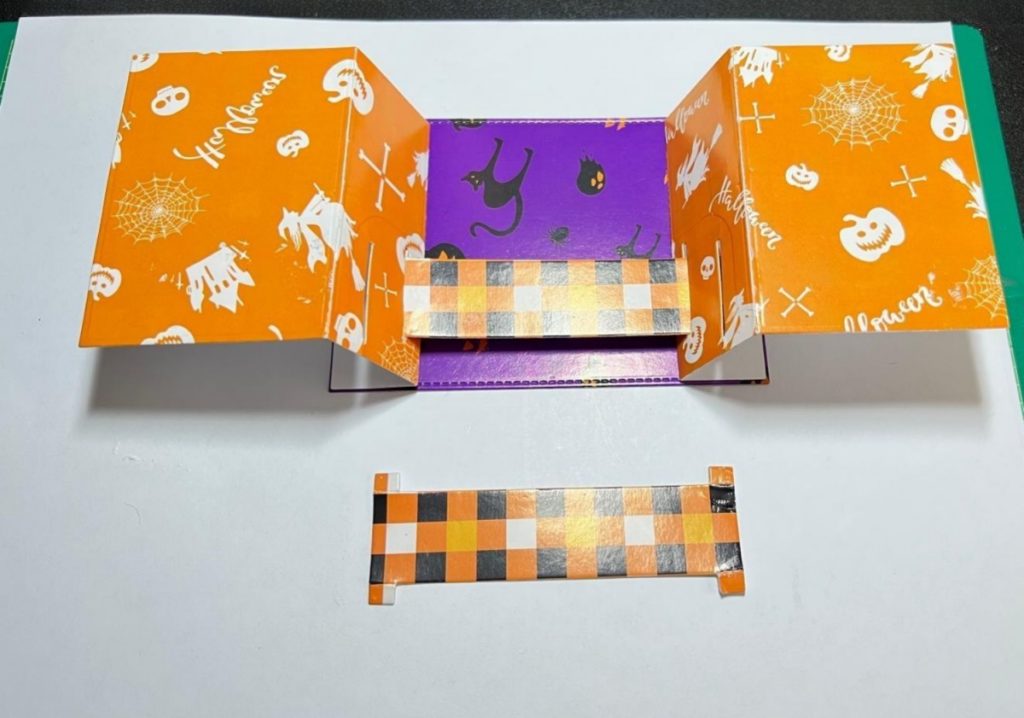
The purple paper is the back of the card. Adhere both pieces of the orange paper to the purple paper as shown.
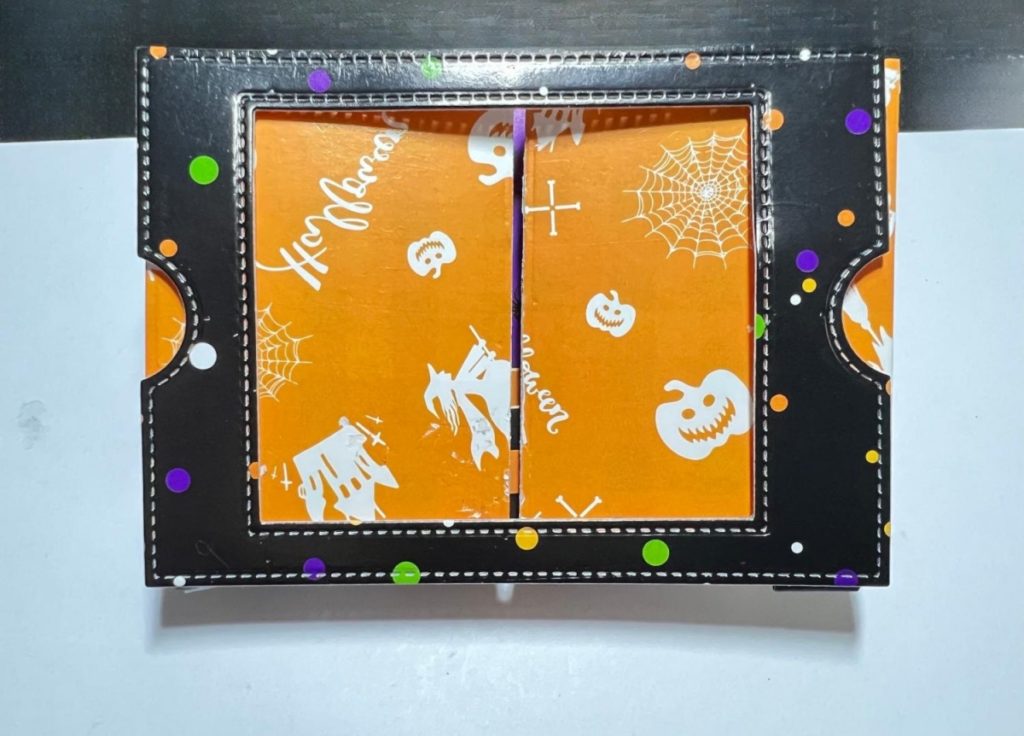
The orange and black paper in photo six has tabs on each end. Fold the ends backward and slide them into the slots. Once you have them in the slots pull the tabs back open to hold the papers in place.
Steps Seven, Eight, Nine:
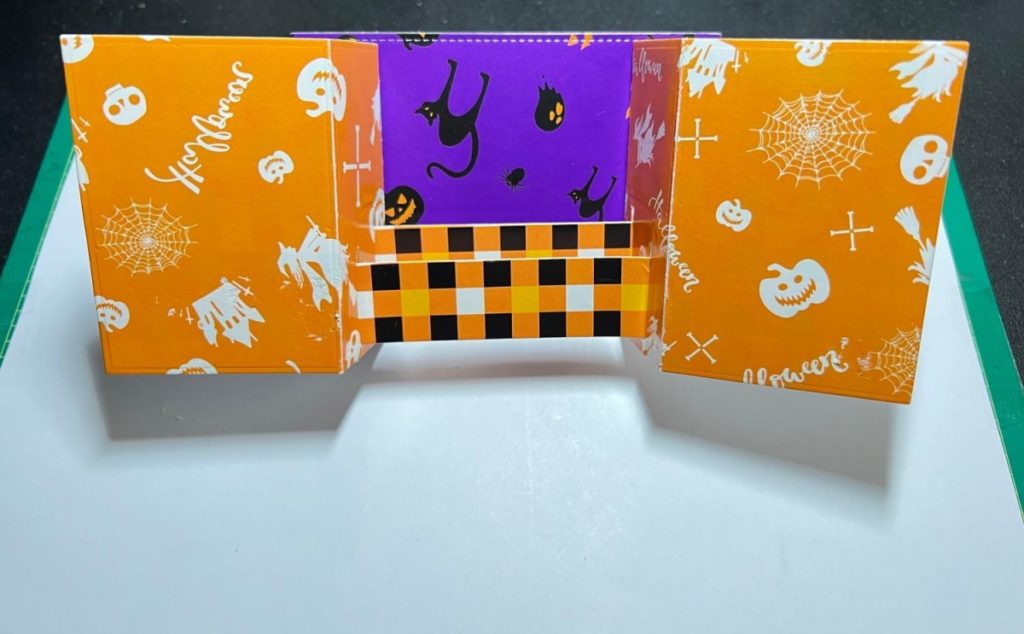

Once step six is done the card should look like the photo in step seven standing up.
Apply adhesive to each end of the black cardstock pieces. Fold the ends back and attach them to the backside of the front paper piece, aligning the notches.
Turn the front piece over and slide each side of the card through the black cardstock pieces. The card will look like the photo in step nine when the side panels are closed.
Steps Ten, Eleven:
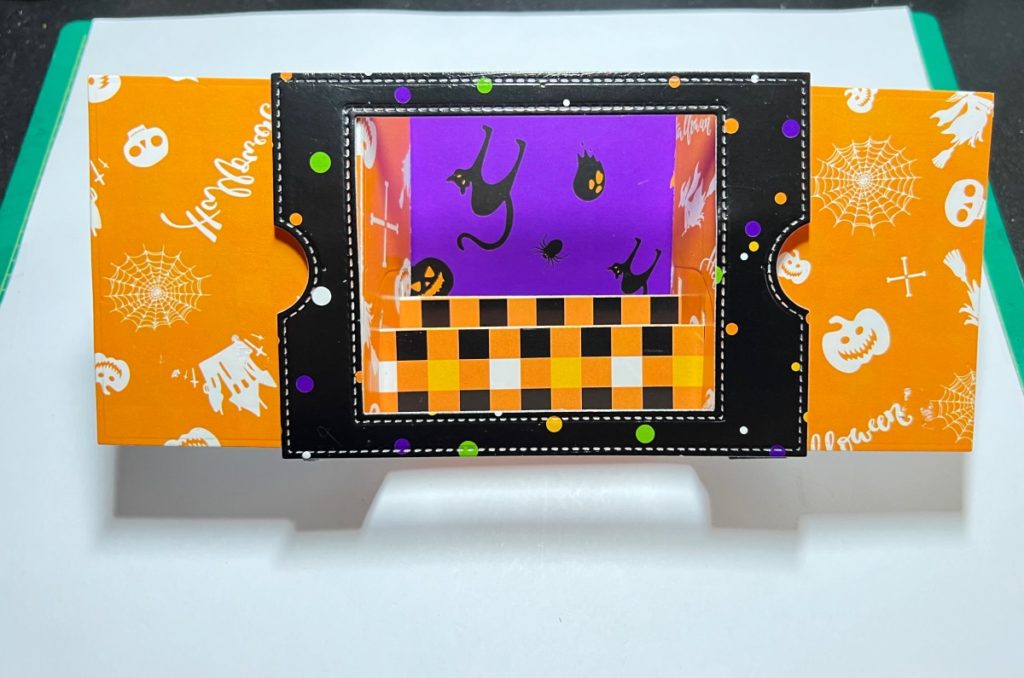
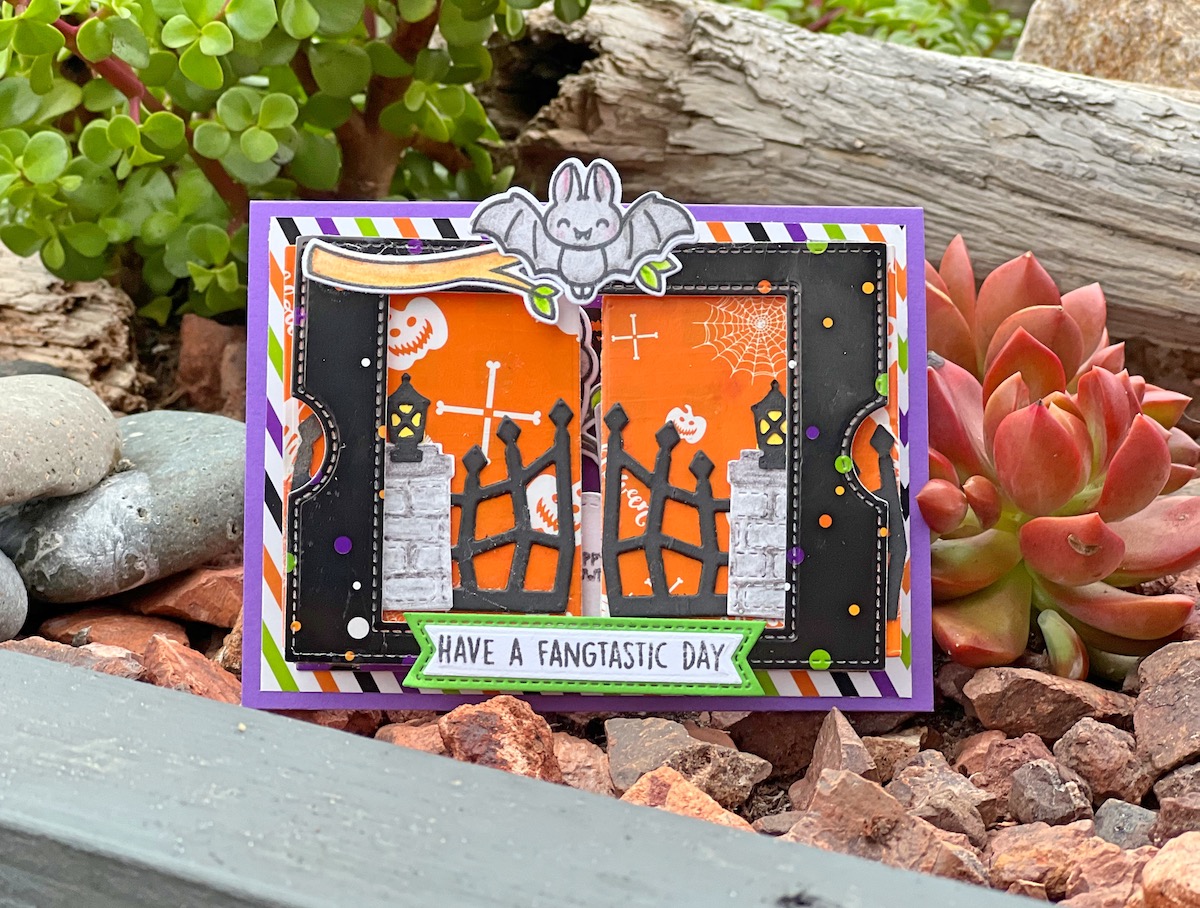
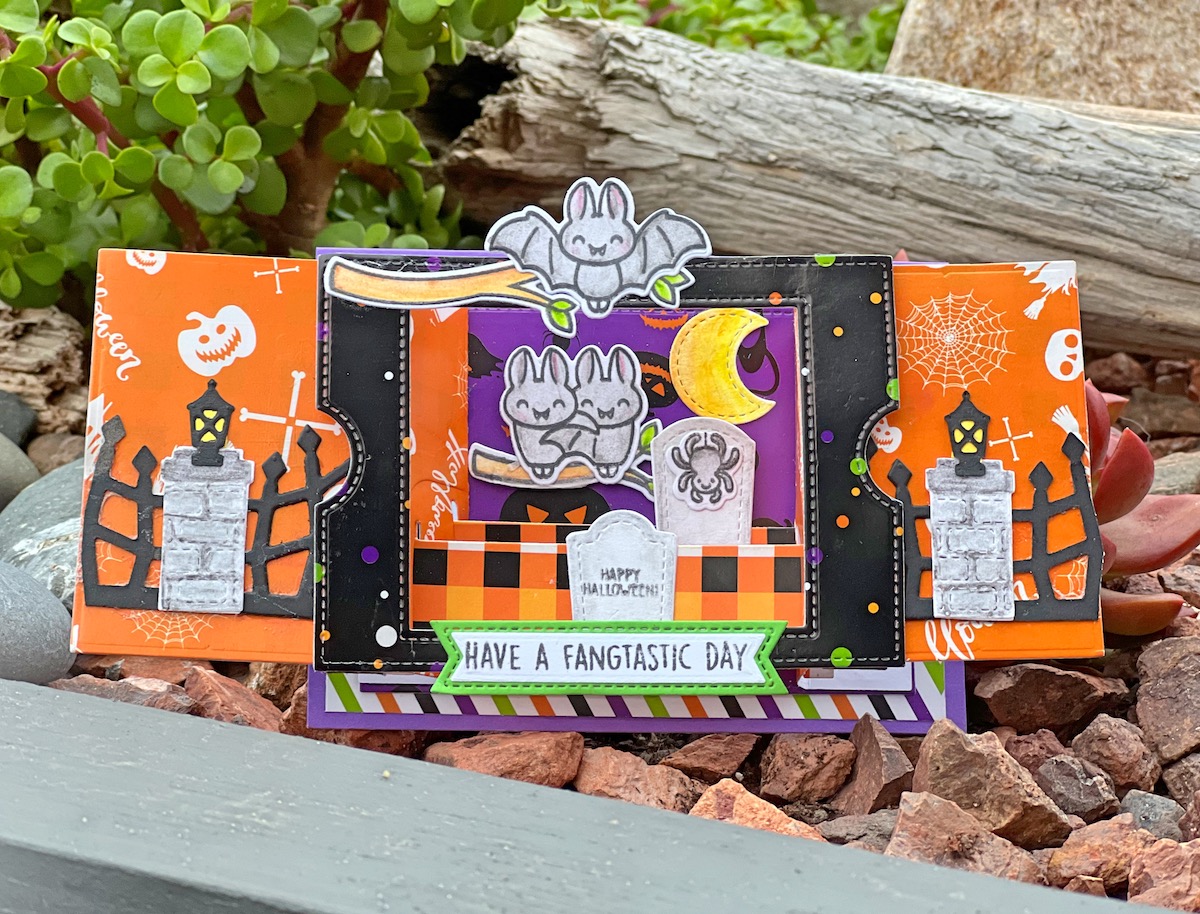
Pull on each of the side panels to open the card as shown. Now it’s time to decorate!
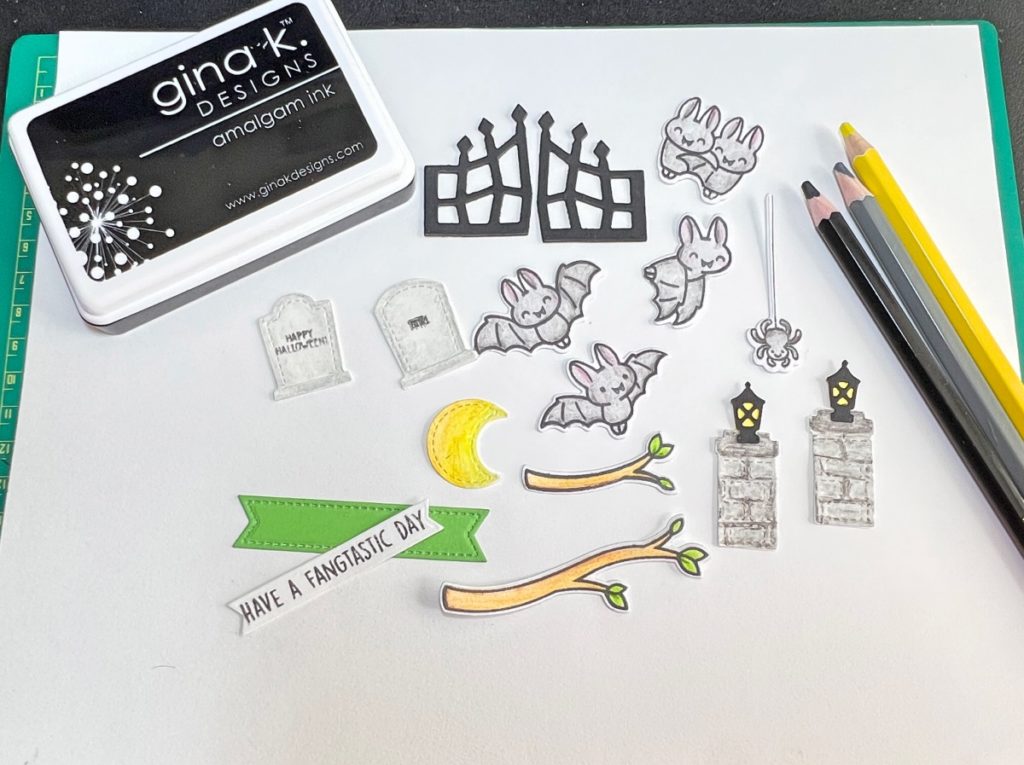
To finish the card, use a black inkpad to stamp the bats and tree branches, and then watercolor the images and die cut them out. Die cut the gate, lanterns, pillars, and tombstones. Watercolor the pieces if desired. Die cut the two banners and stamp the wording. Adhere the images to the card as shown in the finished photos or arrange them as desired.
Fangtastic Halloween Card
- Patterned Paper, Halloween Theme
- Cardstock: White, Black, Green, Purple
- Watercolor Pencils
- Inkpad, Black
- Spray Adhesive
- Zip Dry Paper Glue
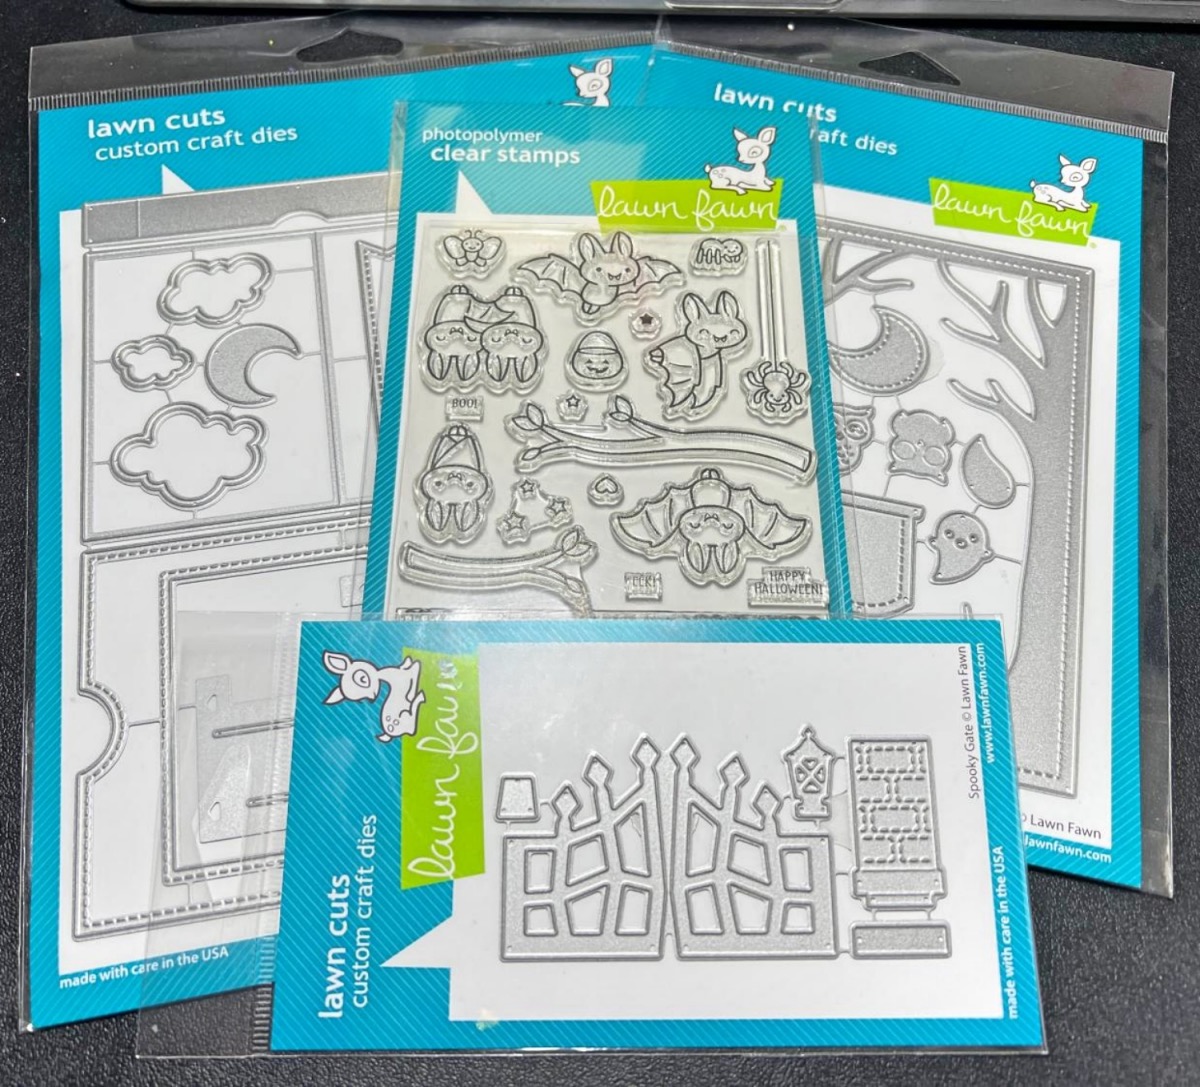
- Fangtastic Friends Stamp Set by Lawn Fawn
- Big Shot Die Cutting Machine
- Ta-Da Diorama Die Set by Lawn Fawn
- Spooky Forest Backdrop Die Set by Lawn Fawn
- Fangtastic Friends Die Set by Lawn Fawn
- Spooky Gate Die Set by Lawn Fawn
- Paintbrush
One more PIN of the Fangtastic Halloween Card to share