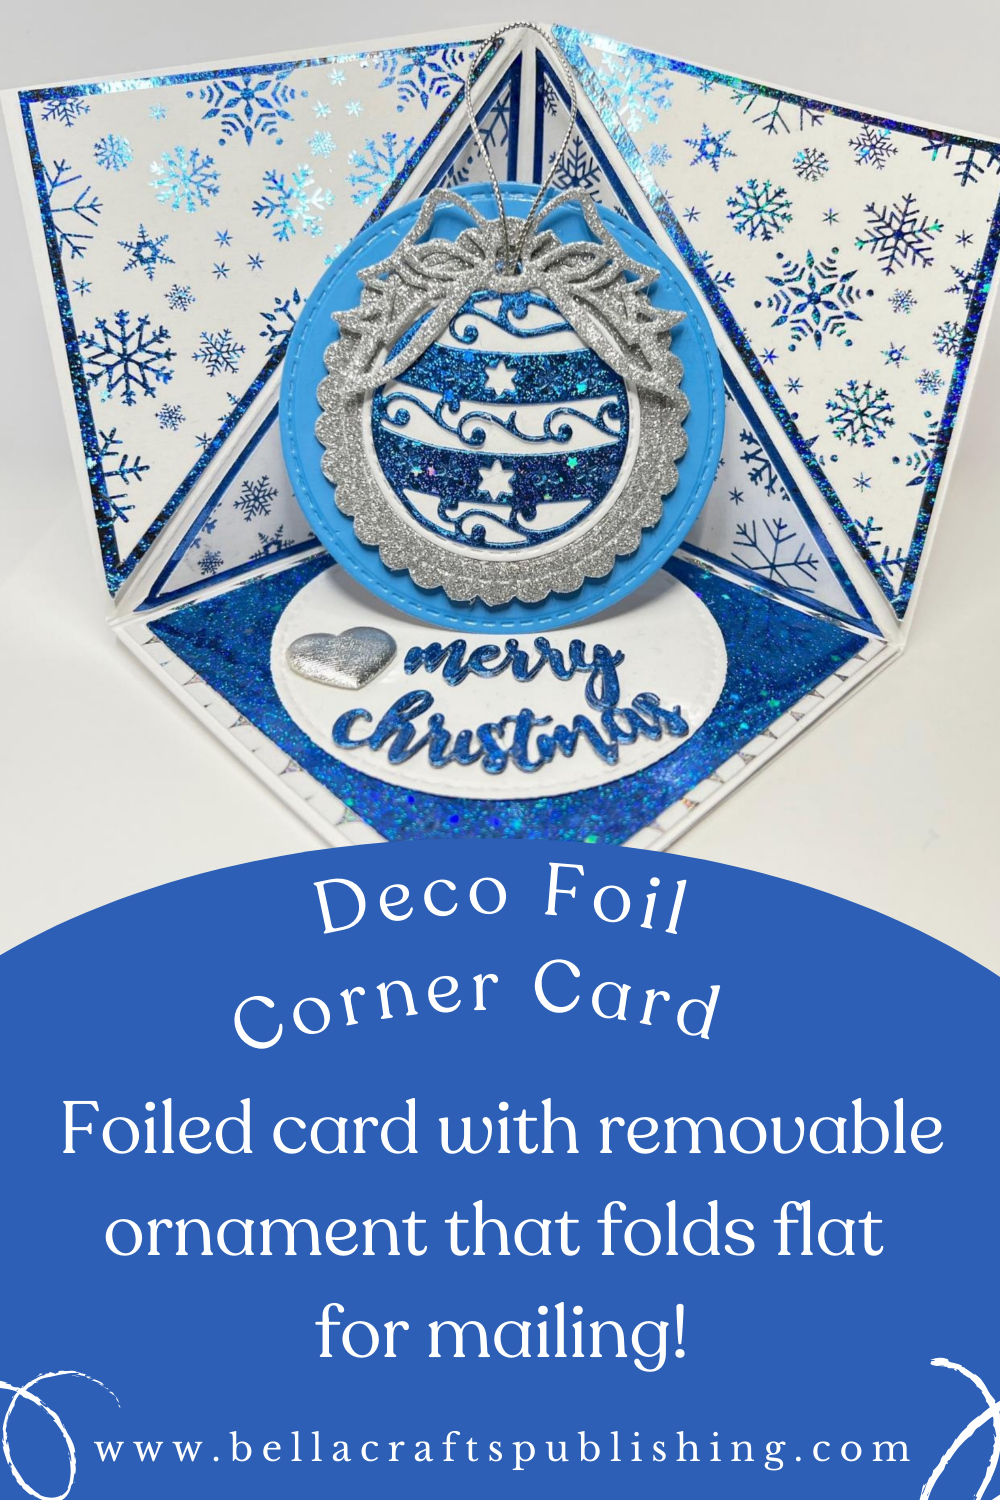
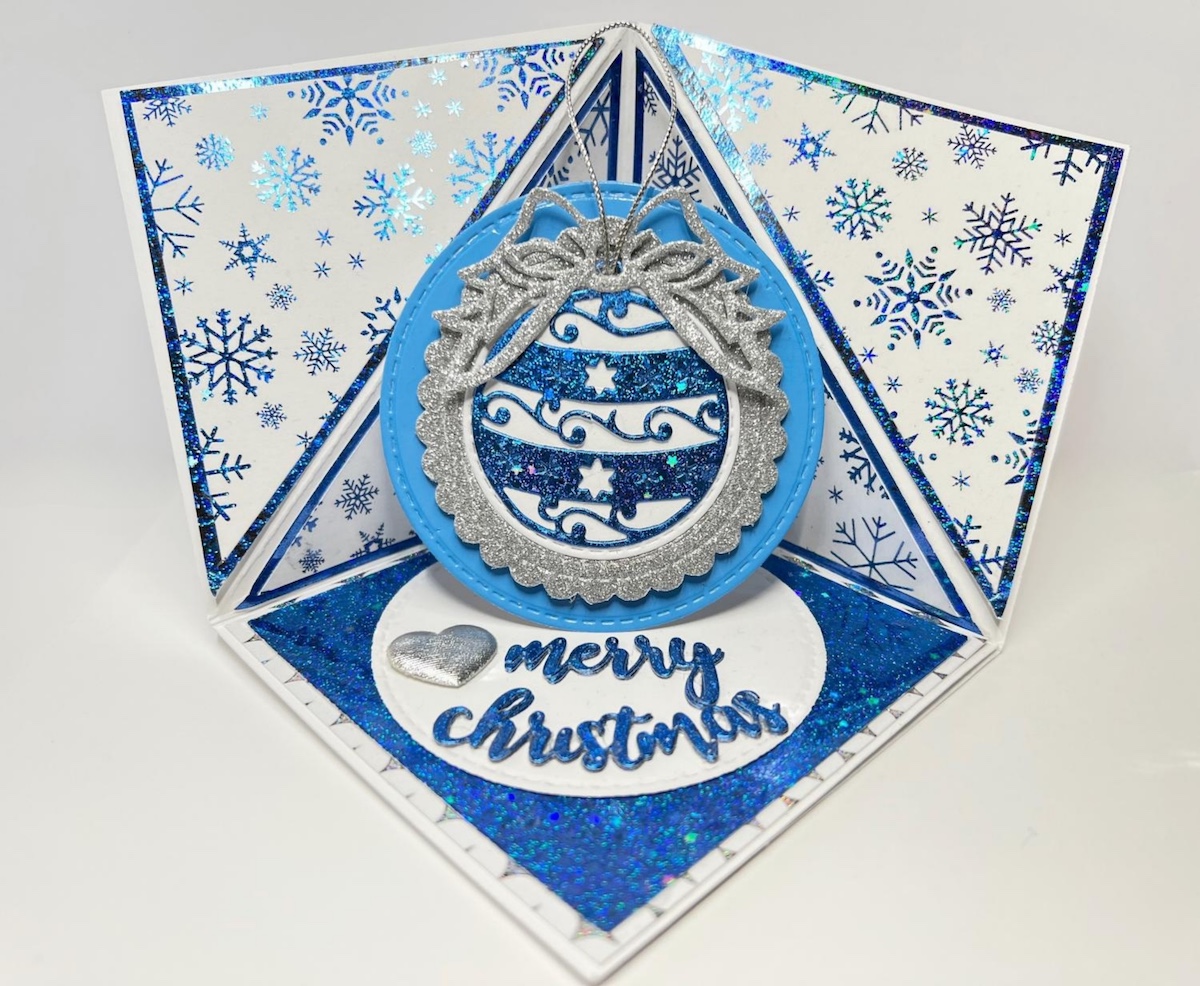
Celebrate the season in shimmering style with our Deco Foil Holiday Card. This card brings a touch of glamour to your warm wishes along with a special gift of the detachable ornament!
Please note: This post contains affiliate links. If you use these links and make a purchase, we earn a commission at no extra cost to you…
My Deco Foil Holiday Card has everything! It has the glittering look of the Deco Foils, the detachable ornament that can hang on a tree, and the fun fold that makes it perfect for display! It also folds flat for easy mailing. I hope you give it a try. Have fun! Lisa~
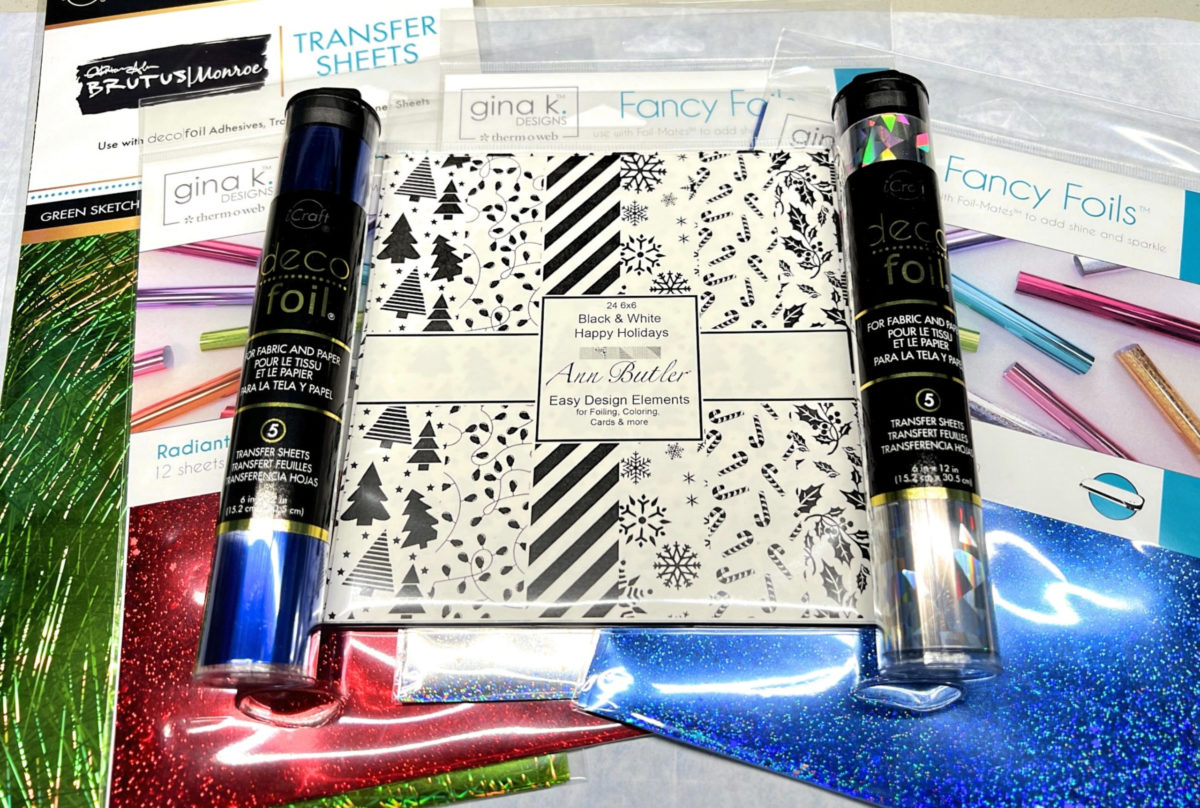
Supplies for Deco Foil Corner Card
Steps One, Two, Three:
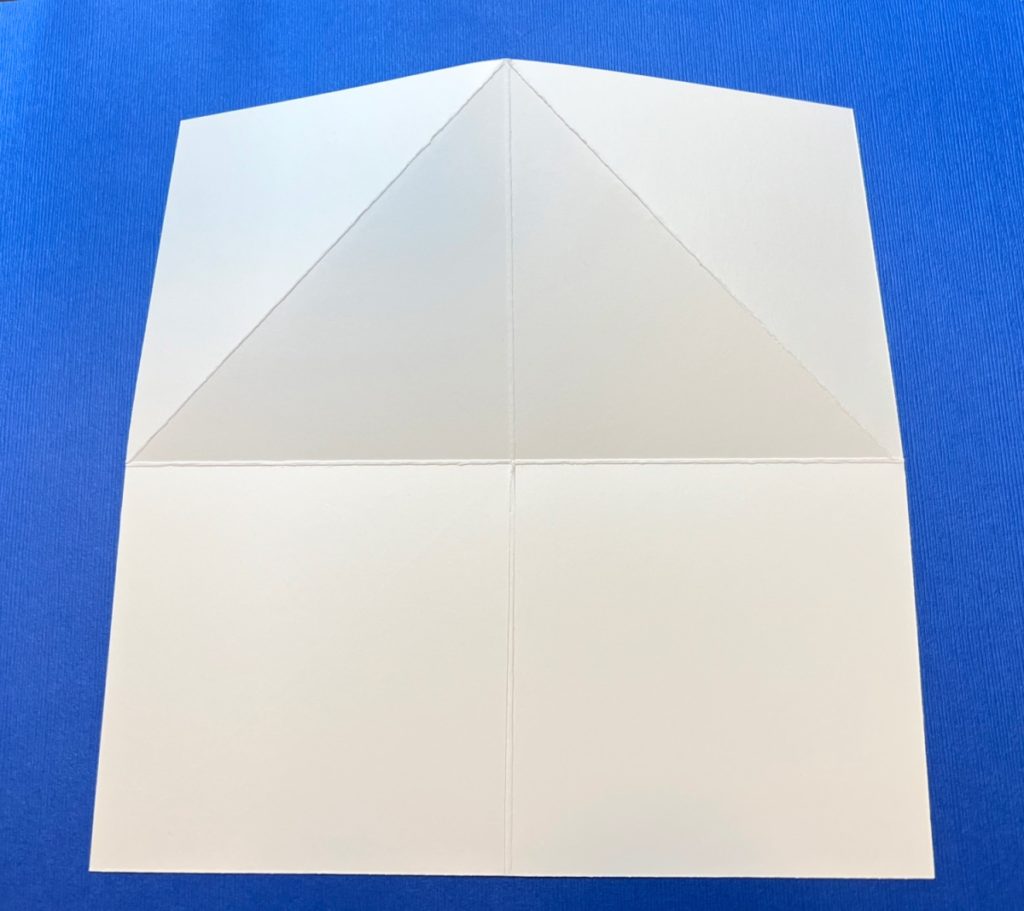
Cut a piece of white cardstock 8″ x 8″. Score at 4″ down and 4″ across. Next, score and fold the top piece as shown in the photo, and then cut the score line from the bottom of cardstock to the center fold.
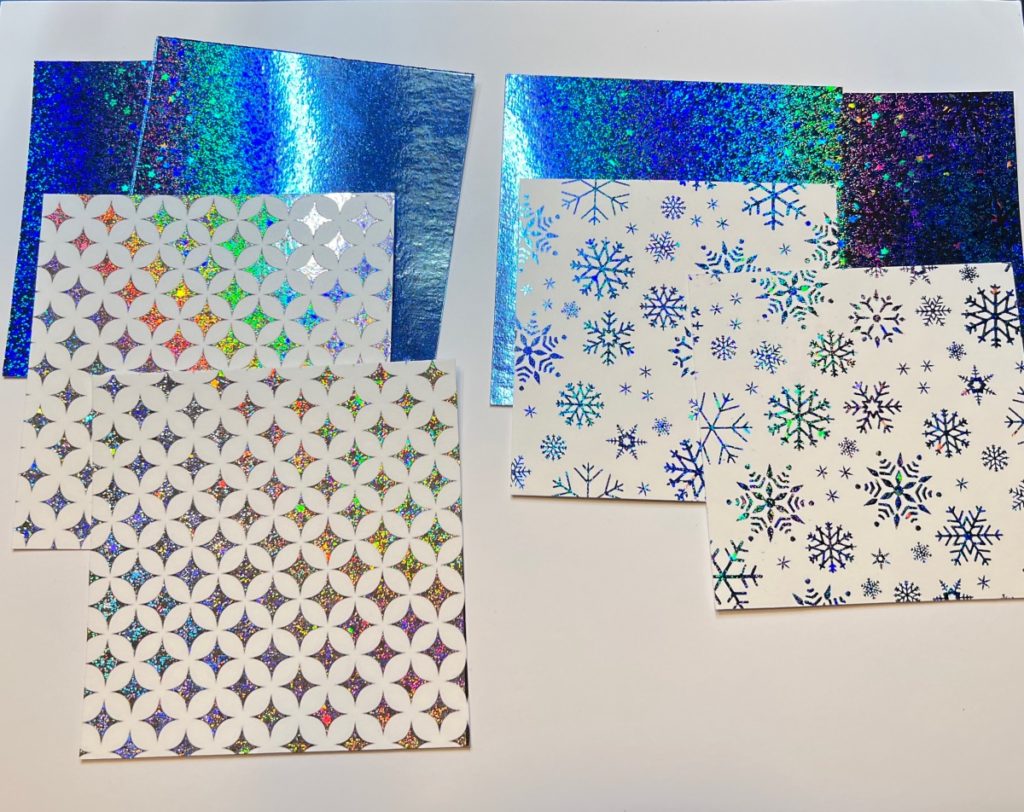
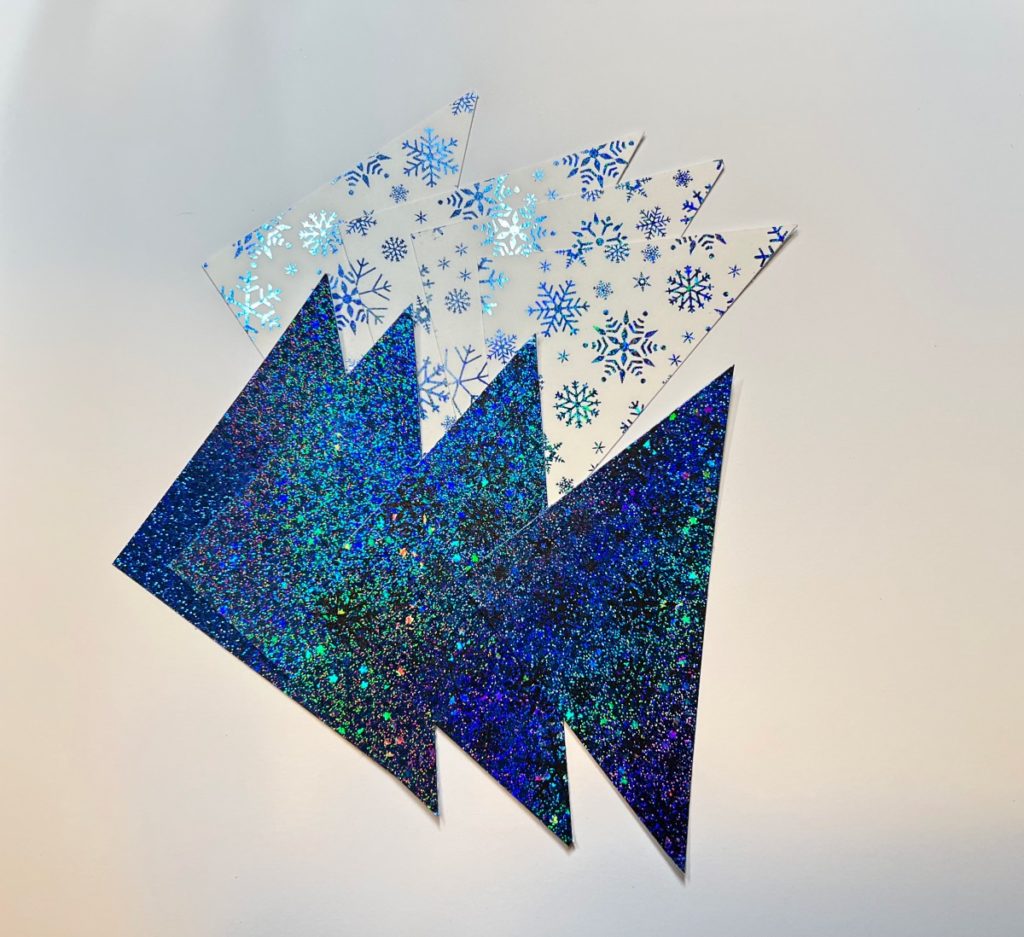
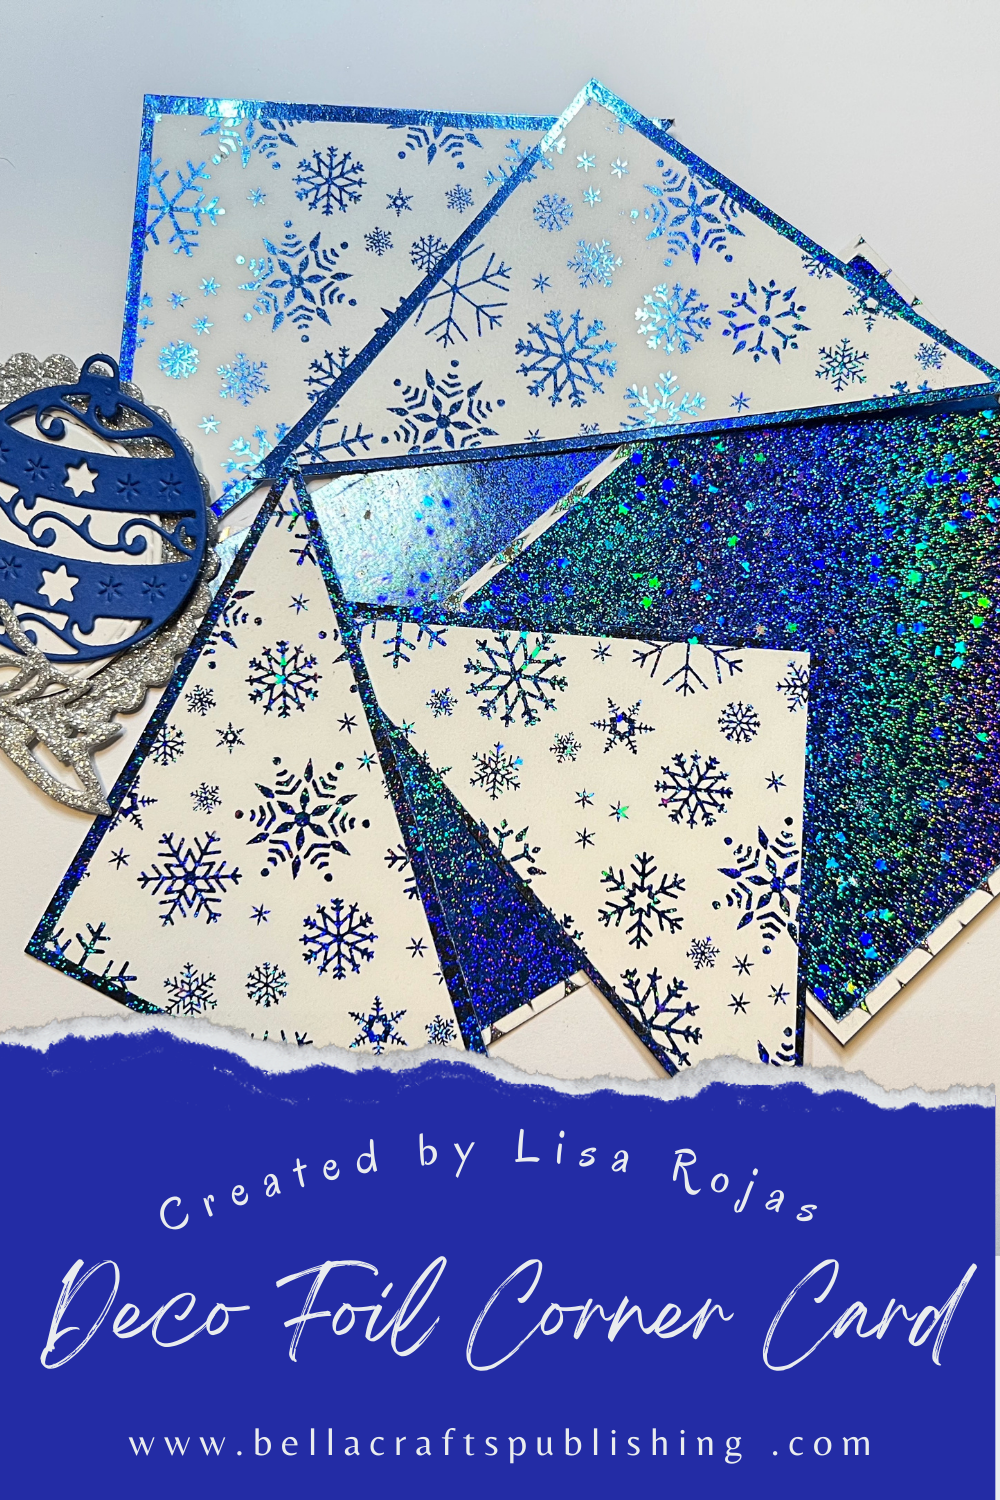
Apply the Brilliant Blue Deco Foil to two pieces of the Snowflake toner papers and two of the Star toner papers. Place them separately into a piece of parchment paper and put them threw a hot laminator one at a time. Peel the foil from the papers once they’re done. Repeat the process, adding the Brilliant Blue foils to four pieces of black toner paper. Next, cut the papers as follows: Brilliant Blue 3 3/4″ x 3 3/4″ (4), Snowflakes 3 1/2″ x 3 1/2″ (2), and Stars 3 7/8″ x 3 7/8″ (2).
Cut two pieces of the Brilliant Blue and Snowflake papers into triangles as shown.
Steps Four, Five, Six:
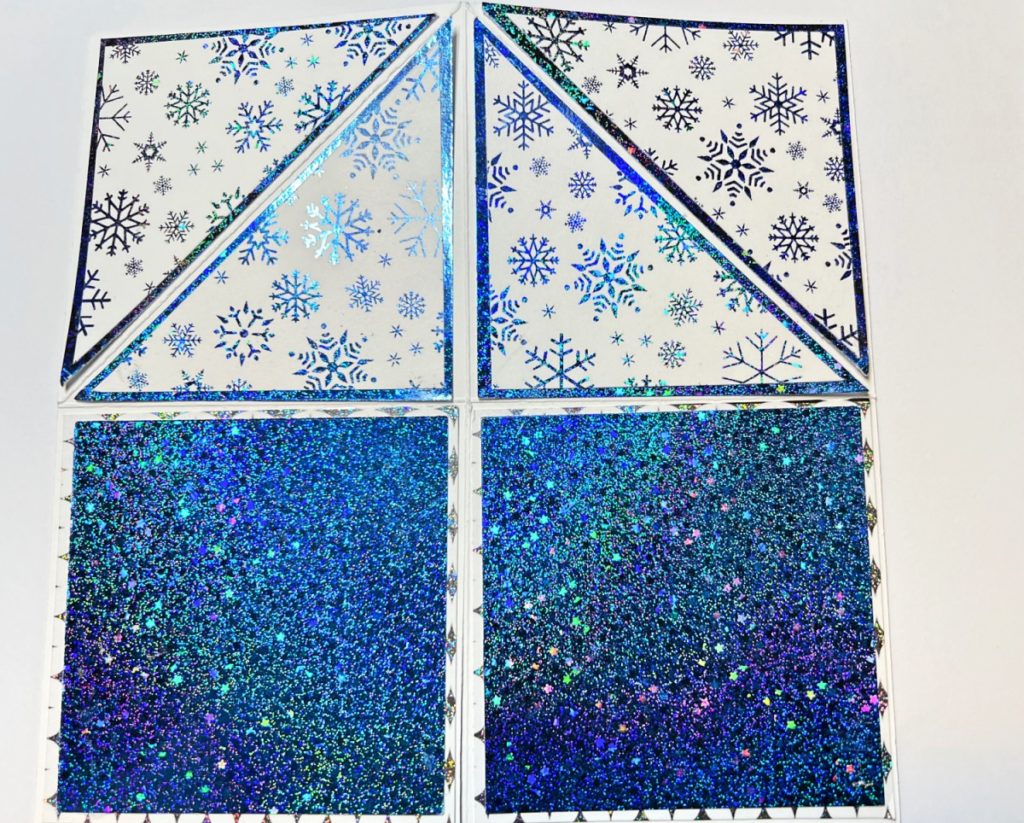

Adhere the two squares of Brilliant Blue papers to the Star papers, and adhere the triangles together. Next, adhere all the layered pieces to the white cardstock base.
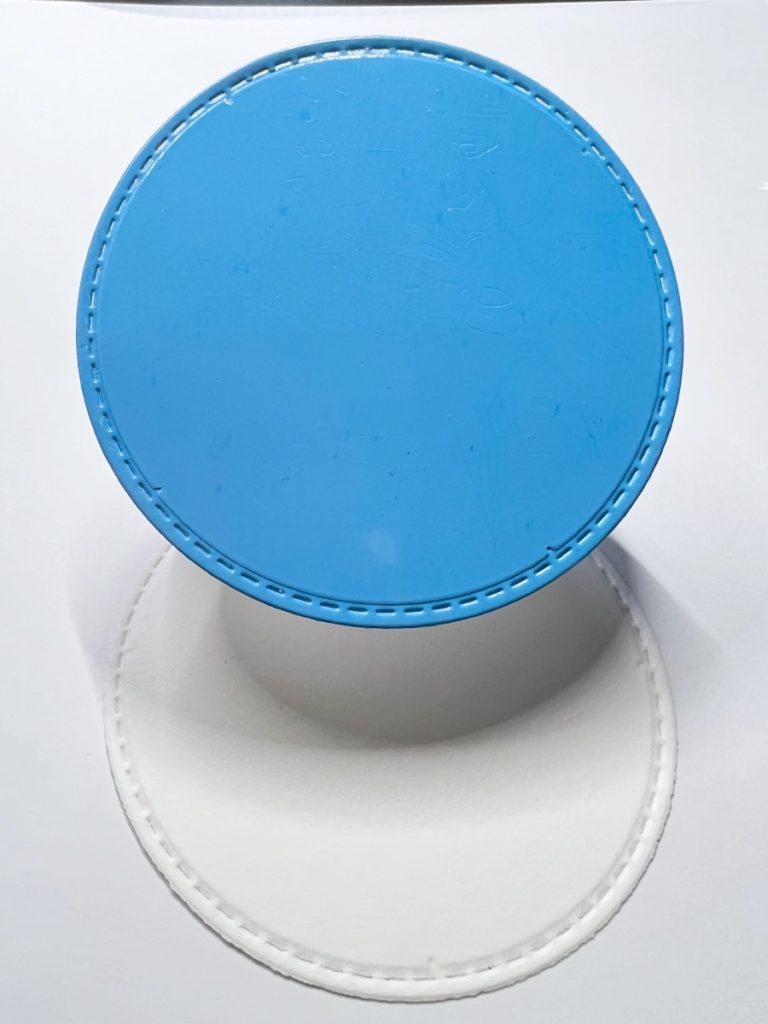
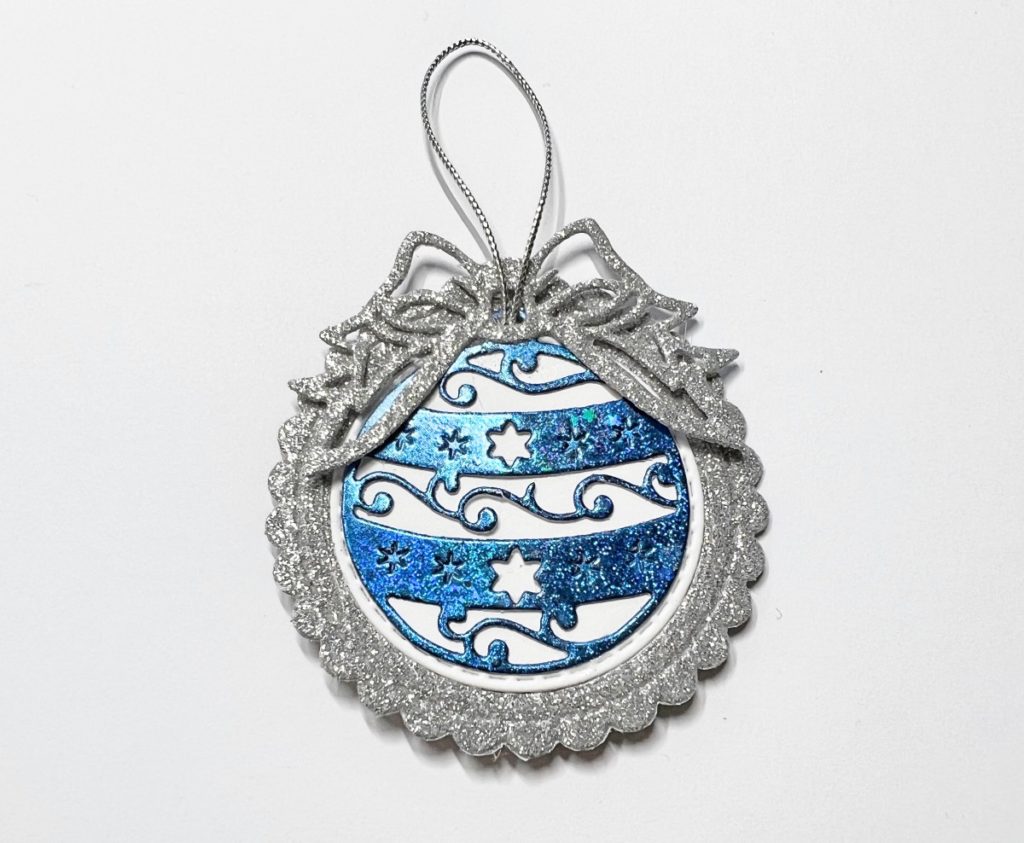
Die cut a 3″ circle from blue cardstock, 2 1/2″ scalloped circle and a bow from glitter paper, a 2″ circle from white cardstock, and the ornament from a scrap piece of the Brilliant Blue paper.
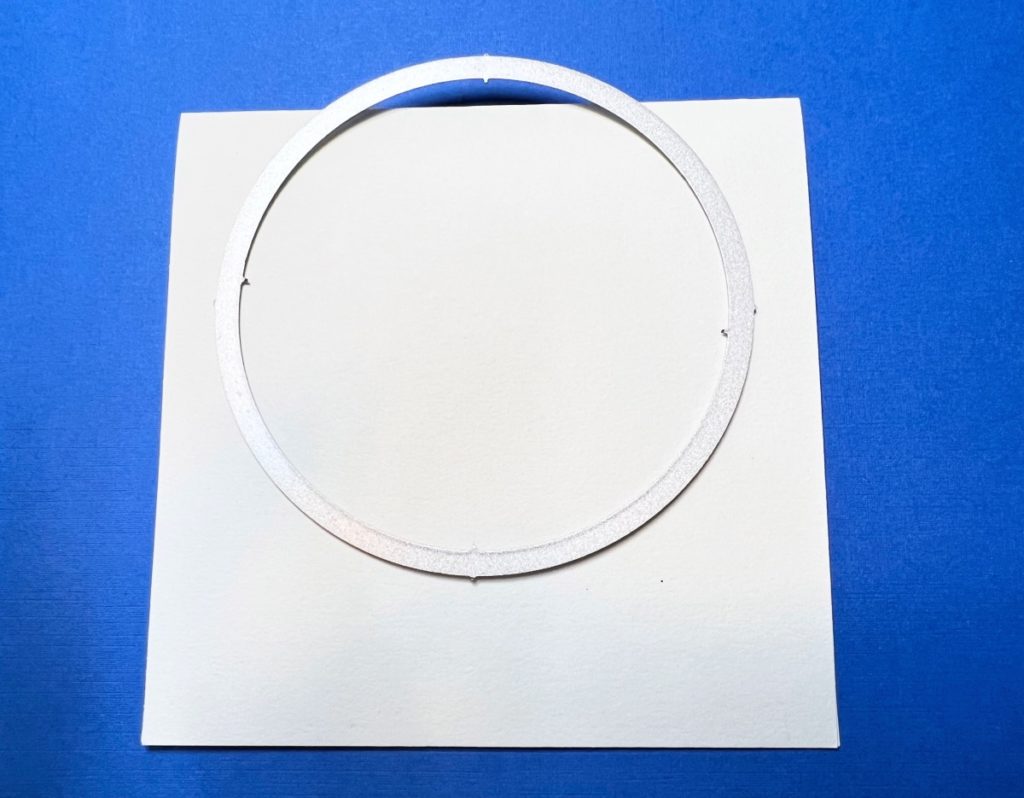
To create the circle pop-up, cut a piece of white cardstock 4″ x 8″ and fold in half. Place the 3″ circle on the white cardstock as shown and cut it out.
Steps Seven, Eight, Nine:
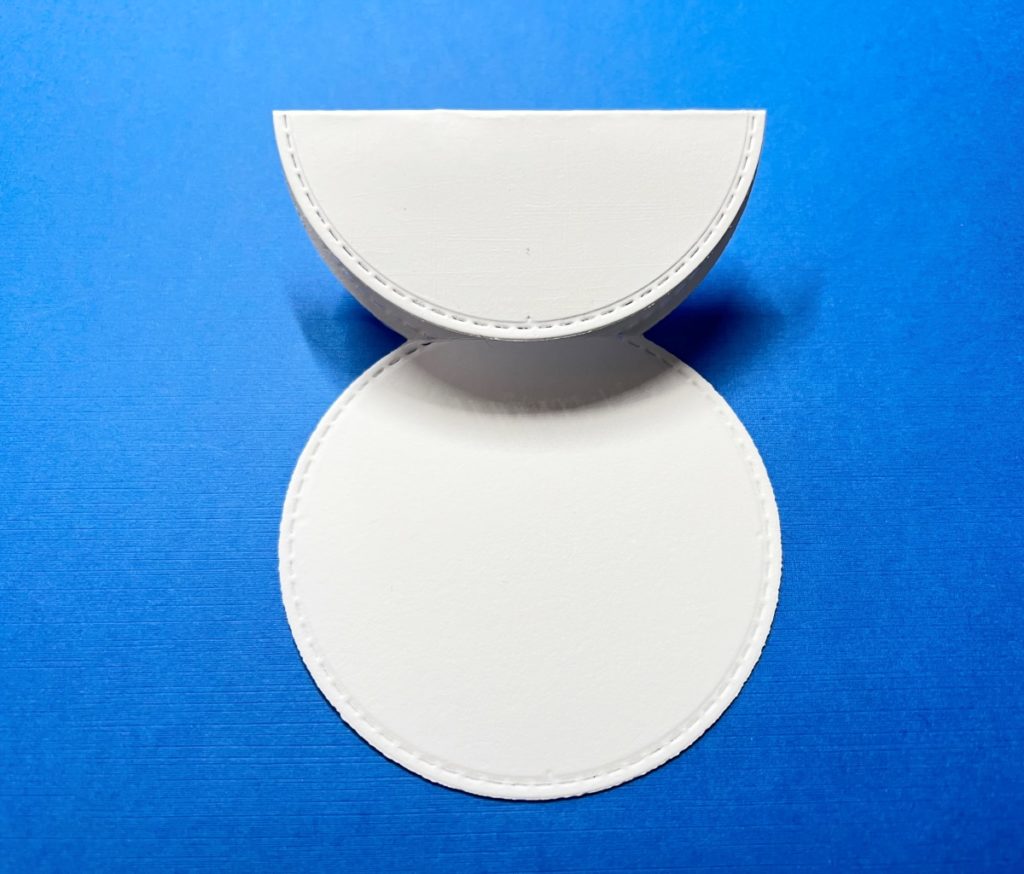
Fold the top part of the circle in half.
Adhere the blue circle to the bottom half of the white cardstock.
Put the ornament together by adhering the glitter circle, white circle and the blue circle. Adhere a hanger with silver ribbon, the bow, and then add the scalloped circle. Place one part of a small Velcro dot to the back and the other part to the middle of the blue circle.
Steps Ten, Eleven:

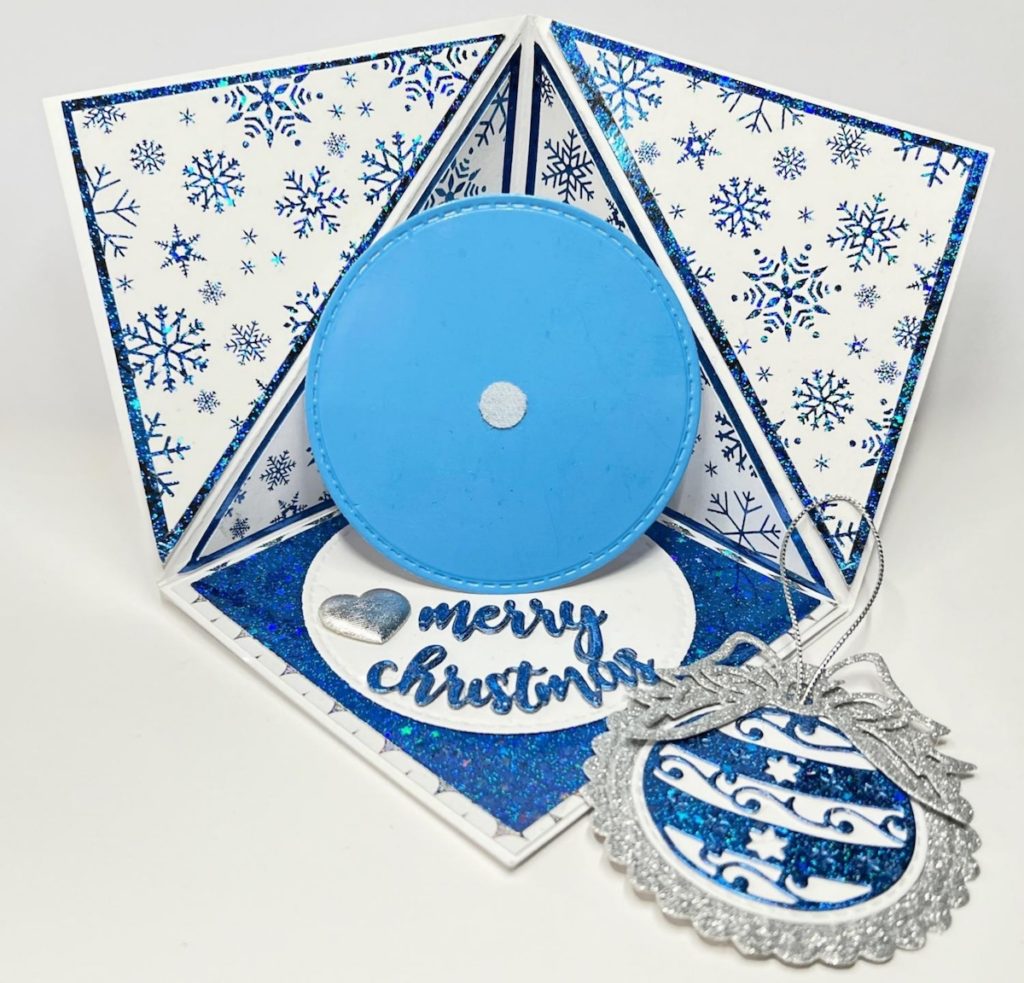
Die cut Merry Christmas three times from a scrap piece of the Brilliant Blue paper.
Layer the words together, adhere them to the base of the pop-up circle and add the heart as shown.
Deco Foil Corner Card
- Cardstock: White, Light Blue
- Ann Butler Designs Black & White Toner Paper, Happy Holidays by Emerald Creek
- Ann Butler Designs Toner Paper, Black
- Ann Butler Designs Toner Paper, Geometric
- Gina K. Designs Fancy Foils, Brilliant Blue by Therm-O-Web
- Glitter Paper, Silver
- Silver Heart
- Thread, Silver
- Zip Dry Paper Glue
- Velcro, Mini Dots
- Circle Frame Die Set by Newton’s Nook
- Christmas Ornament & Bow Die Set from Amazon
- Holiday Sentiments Dies from Amazon
- Paper Trimmer
- Big Shot Die Cutting Machine by Sizzix
One more PIN of the Deco Foil Corner Card to share
Trackbacks/Pingbacks