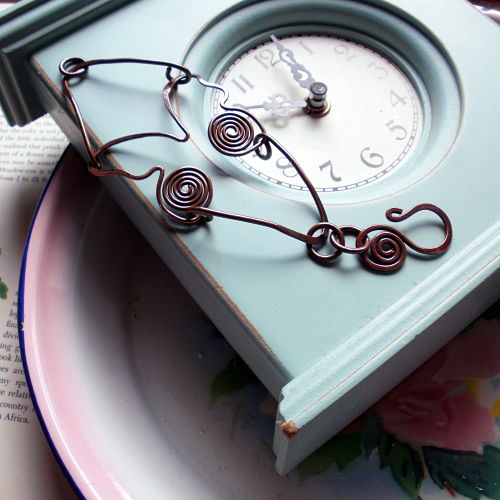
Wire is a fantastic way to add texture and interest to your jewelry designs, but many people are intimidated by it. This simple copper wire wrapping butterfly bracelet tutorial is a great project to give you more confidence as you master your wire working skills.
Materials needed:
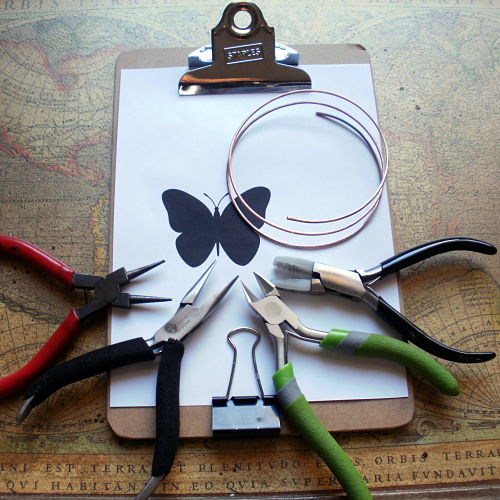
- Print-out of a silhouette butterfly (I Googled ‘butterfly silhouettes’, copy and pasted one into my word processing program, and resized it to approximately 2″ wide)
- 42″ of 12g dead soft copper wire
Tools needed:
- Jewelry-making pliers: needle-nosed, round-nosed, nylon-jawed and wire cutters
- Clipboard or other hard surface to hold butterfly picture still
- Sharpie or other permanent marker
- Optional tools: large spring clamp, chasing hammer and steel bench block, metal colorant/patina
[Tweet “Learn how to make a #copperwire #butterfly bracelet. Great tutorial!”]
To make the butterfly component:
- Cut 24″ of 12g copper wire. Using the Sharpie, mark your wire 6.5″ from one end of the wire and create a 90 degree bend. Start a wire spiral from that end of your wire and continue spiraling until you reach the bend.

- Now the fun really starts! Set your wire on top of your butterfly picture and, using your pliers and your fingers, gently shape your wire around the outline of the butterfly silhouette. Hint: I find it easier to manipulate the wire if I use a large spring clamp to hold the wire securely over one side of the picture while I am working on the other side.
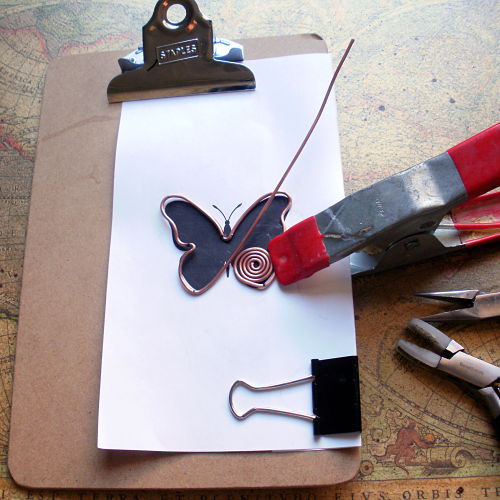
- When you reach the bottom of the second wing of the butterfly, create another bend in the wire. Trim your wire to 6.5″ long from the bend and create your second spiral.

- Optional: Using your chasing hammer and bench block, hammer out the top and side portions of the wings, and then gently hammer the spirals. Hammering the wire gives the wire texture and interest while hardening it at the same time, making it more structurally sound. If you don’t have a chasing hammer and bench block, you can use a regular hammer or a rawhide hammer (be very gentle!) and a hard surface as substitutes.

- Step back and pat yourself on the back – you have your butterfly!
Now let’s make the rest of the bracelet:
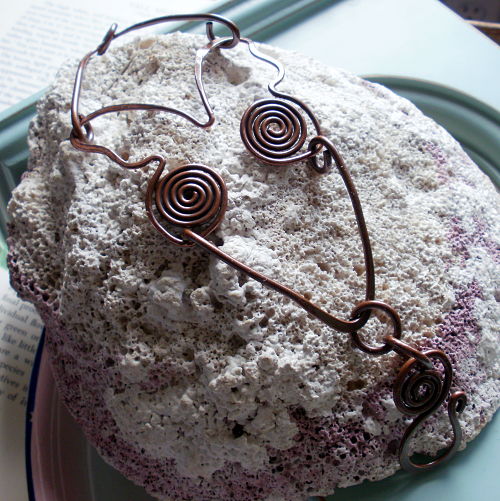
- For the sides: cut two 6.25″ lengths of wire. Create a bend in the center of each piece, create closed loops at each end of the wire pieces and attach them to each end of the butterfly’s wings. You may need to do a little manipulating here to make sure the wire is at the correct width and that there is enough room below the spirals. Just gently move the wire until you are able to fit the closed loops around the bottom of the spiral where you made the bends in the wire below the spiral.
- For the clasp: cut a 6″ piece of wire. Bend one end around the Sharpie pen to create the hook end of the wire. On the other end, start a spiral just like you did for the butterfly. As you get closer to the hook end, create a bend in the wire and push the spiral up against the hook, making sure you leave room for the jump ring to fit.
- To make the jump rings: Wrap the remaining wire around the Sharpie marker to make a coil. Pull the coils off and cut them apart using your wire cutters. Attach the clasp to the jump rings and one side of the bracelet, and another jump ring to the other side of the bracelet.
This bracelet is beautiful on its own, or you can patina it, add beads to it, or more wire or fiber to it. Have fun!
Have you ever tried wire wrapping? We’d love to hear what you’ve created. Tell us in the comments.
Beautiful bracelet Molly! I have to say I’ve never tried wire wrapping before. Your tutorial makes it look much easier than I thought!
xxDaniella
Thanks Daniella – you should try it!
Love this project, Molly! You could consider me wire-challenged, but your tutorial makes me want to give it another try. Thank you for the inspiration.
Theresa – Give it a try and let me know how it goes!
This bracelet is great and the tutorial is very easy to follow. Thank you Molly for sharing your talent with us! I will try soon. Hugs!
Great Martha – post a picture when you try it – I’d love to see what you make!
This is so beautiful Molly! I love butterflies too, so I would definitely wear this.
Thanks Carmen!
This is just stunning Molly! Thank you so much for sharing it!
Thanks Lisa!
LOVE the butterfly bracelet! As a wire worker have to tell you that your tutorial is excellent…..truly shows everything to do to complete the project.
Love and light,
Michele
Thanks so much Michele!