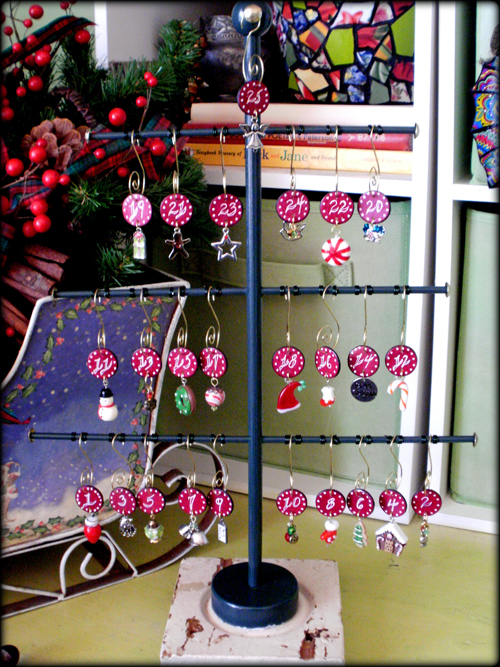
This is Molly Alexander back again with a Charming Advent Calendar Tree project to get you ready to welcome the Holiday Season with your family! With a few inexpensive materials, you can make a sweet Advent calendar of your own to enjoy starting on December first. Let’s get started, shall we?
[Tweet “Learn how to create a “Charming” Advent Calendar Tree – a new project on the Bella Blog! #Advent #Calendar”]
Supplies/Tools:
- 16″ wooden tree form
- 3/4″ round wood circles (25)
- dark green spray paint
- deep red acrylic paint
- black stamp pad or marker (for edging the circles)
- dark green craft wire (optional)
- various Christmas and holiday charms
- rosette moulding piece
- gold-colored ornament hooks
- gold upholstery tacks (7)
- clear silicone adhesive
- opaque white pen
- small hole punch
Instructions:
- Assemble your unfinished wooden tree and spray paint it dark green. Allow your tree to dry thoroughly.
- Adhere your tree base to the rosette using a thick coating of the silicone adhesive and set aside to cure overnight.
- While the adhesive cures, start decorating the charms. Paint both sides of all 25 of the 3/4″ circles using the deep red acrylic paint and allow to dry thoroughly.
- Using the small hole punch, make two holes in each wooden circle, one each in opposite ends of the circle.
- Color the edges of the circles black using a black stamp pad or a black marker and allow each circle to dry to avoid smudging.
- Using the white pen, write the numbers 1 – 25 on the circles and decorate around the numbers. Hint: I like to use little doodled dots to decorate with because they are cute and easy.
- Hang each circle from one of the ornament hooks, making sure the hooks are all facing the same way.
- Hang your Christmas and holiday charms from the bottom hole of each circle.
- After the adhesive holding the tree to the rosette has cured, add the thumbtacks to each end of the tree branches and one facing the front from the wooden ball at the top of the tree.
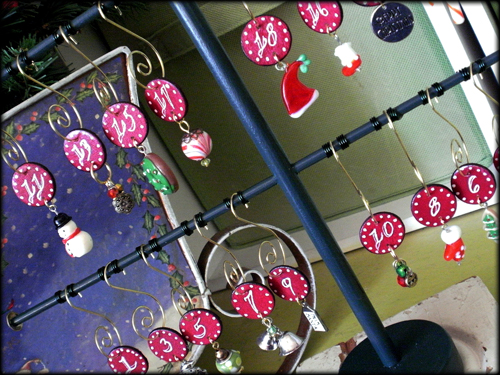
- Optional: to keep the charms evenly spaced, you can coil craft wire around the branches a couple of times for each charm (see close-up photo above).
- Your tree is ready for you to start hanging your charms. To keep it even, you can hang 5 charms each on the bottom branches, 4 charms each on the middle branches, 3 charms each on the top branches and the final charm from the tack at the top of the tree.
I hope you have fun creating your own Charming Advent Calendar Tree. It would be fun to try different color combinations and types of charms. With this project, anything goes!
Fun project Molly.
Love and light,
Michele