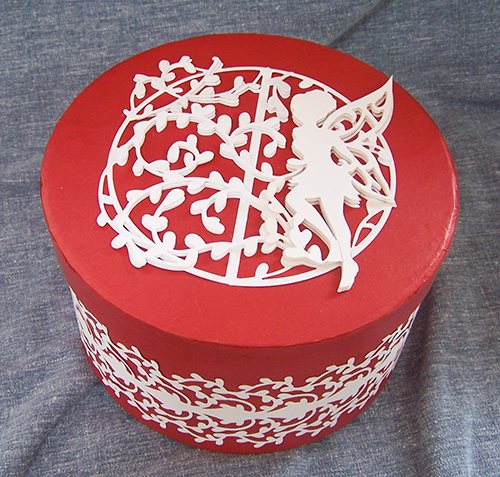
Fairy Treasure Box
Turn a simple paper mache box into a fairy treasure that little girls and big girls alike will love to receive
~~~~~~~~~~~~~~~~~~~~~~~~~~~~~~~~~~~~~~
I have fond childhood memories of being told stories of the wee “fairy folk” who lived in the forests and glens back in the old country. My maternal great grandfather’s folk were from Ireland……and passed down those stories that we still tell and share today. The treasure box will be a gift for a new addition to the family to keep all her treasures in and hope that she will remember the stories to pass on to her kids.
Supplies:
Tonic® 437 E “Eternal Glade” Indulgence Simi Die set, Tonic® 678E “Wild
Vine” Border Punch8” round paper Mache box
Spellbinders Grand Calibur™ die cut and embossing machine
Tonic paper trimmer and scissors
Several sheets of white card stock.
8” round paper mache box
DecoArt American Acrylic paint: Red
1” foam paint brush
Tonic® Craft Tacky glue, double sided foam tape
Instructions:
Paint the box inside and out with the red acrylic paint. Allow the paint to dry. Wash the brush.
Die cut the “Eternal Glade” in whole plus 2 extra of just the fairy.
Center & attach the whole die cut to the box lid. Layer the two extra fairies with tiny pieces of foam tape between layers and place on top of the whole die cut.
Cut strips of the white card stock 3 ½” wide (you will need enough to go around the box). Punch both sides of the strips, carefully lining up the design on each edge.
Attach the punched border to the outside of the box (lining up and overlapping where needed) with Tonic Tacky Craft glue.
Place some white paper shred inside of the box and fill it with “treasures”. ~ Michele Emerson-Roberts


Such a sweet project Michele – thanks for sharing!
Thanks Molly….it was fun to create.
Love and light,
Michele