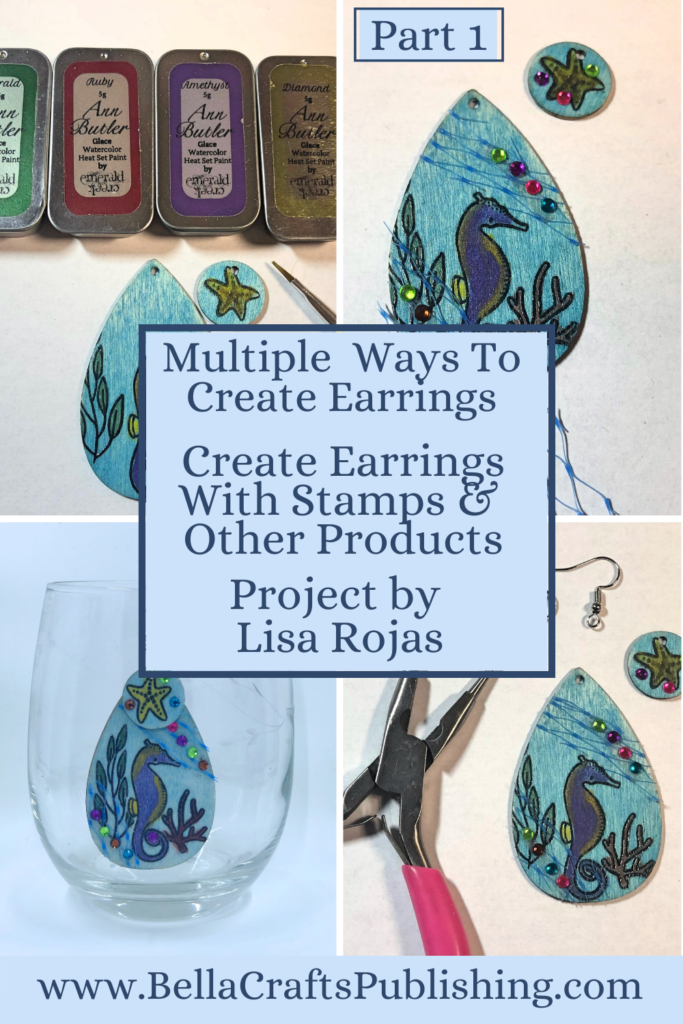
Welcome to Multiple Ways To Create Earrings Part 1 of this three part series~
Please note: This post contains affiliate links. If you use these links and make a purchase, we earn a commission at no extra cost to you…
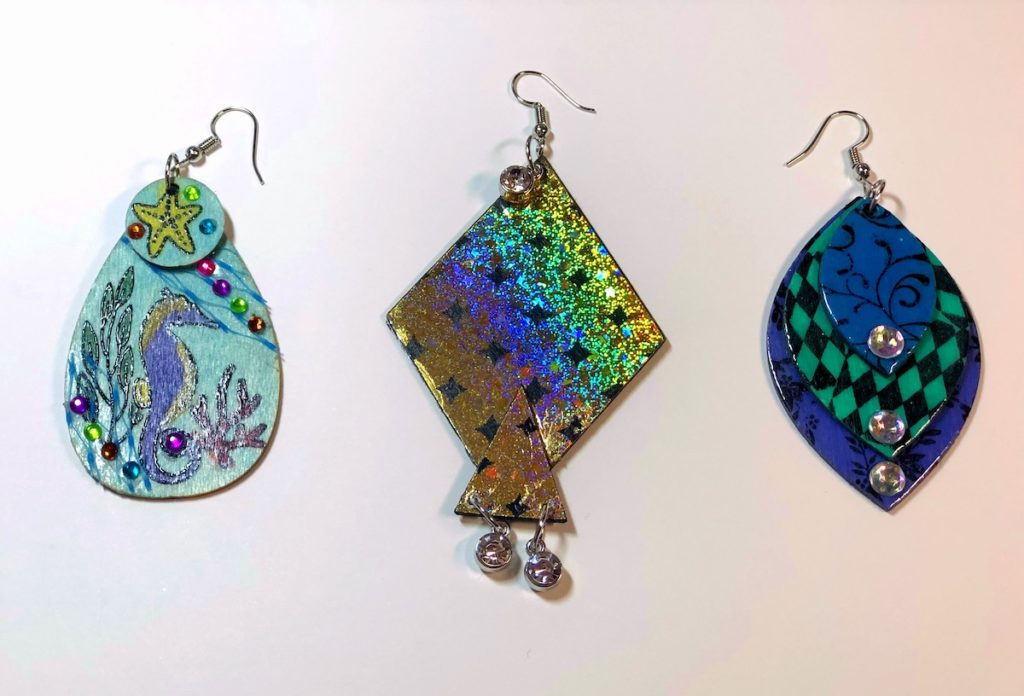
In this post, Multiple Ways To Create Earrings Part 1, I’m going to introduce you to stamping and watercoloring on wood earrings. But, I have to admit that although I’m not a jewelry maker by trade, I had a wonderful time creating the earrings in this series. All three designs of the earrings were created with different product lines from my business partner, Ann Butler. I made the earrings in a Facebook Live video and because I was working on all three earring designs at once, you’ll notice I only created one earring of each design, so all of the instructions in this blog post and the two upcoming ones, will need to be doubled. Lisa~
Supplies for Ocean Themed Earrings
Check out the full list of supplies at the end of this post.
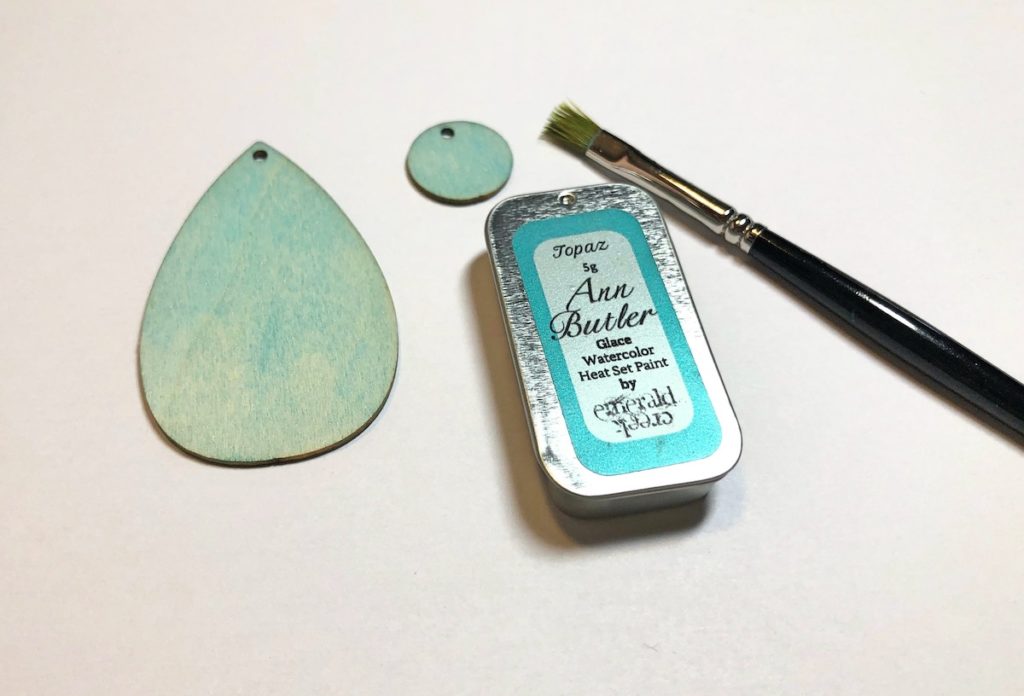
Step One:
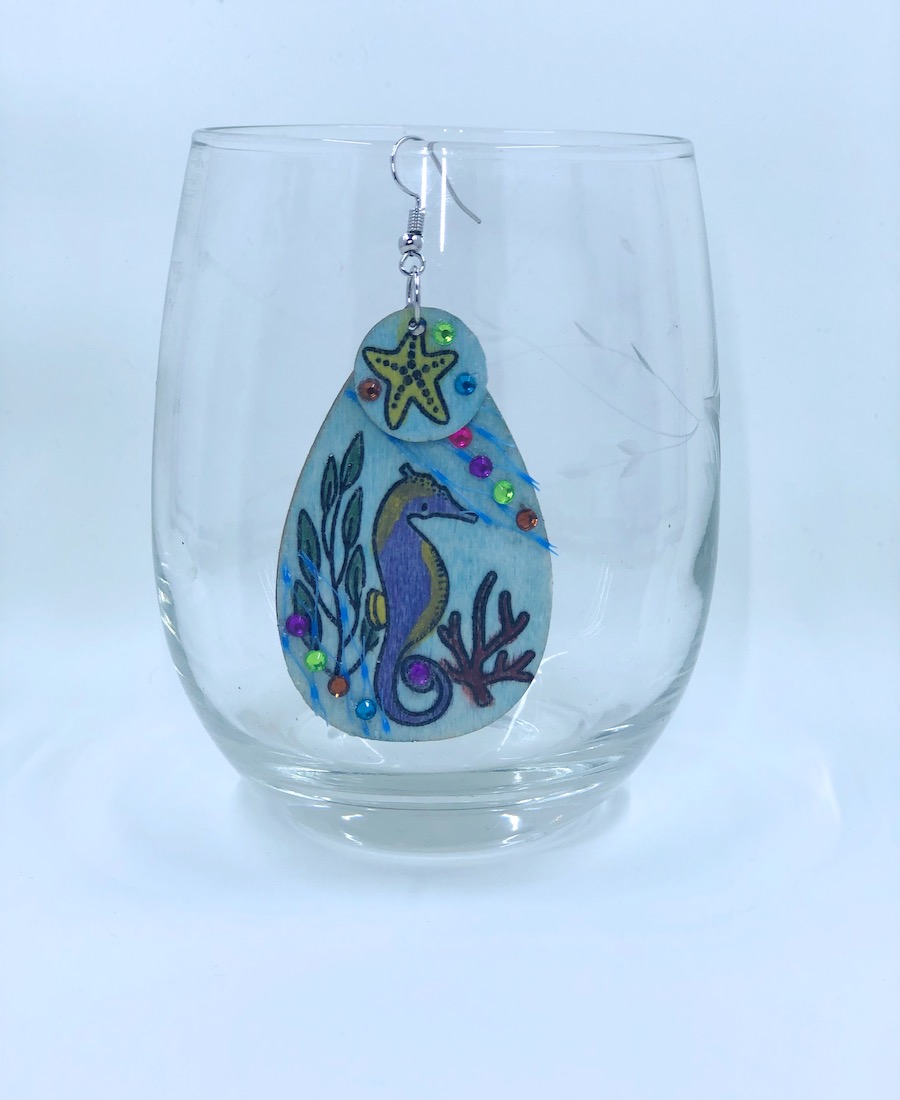
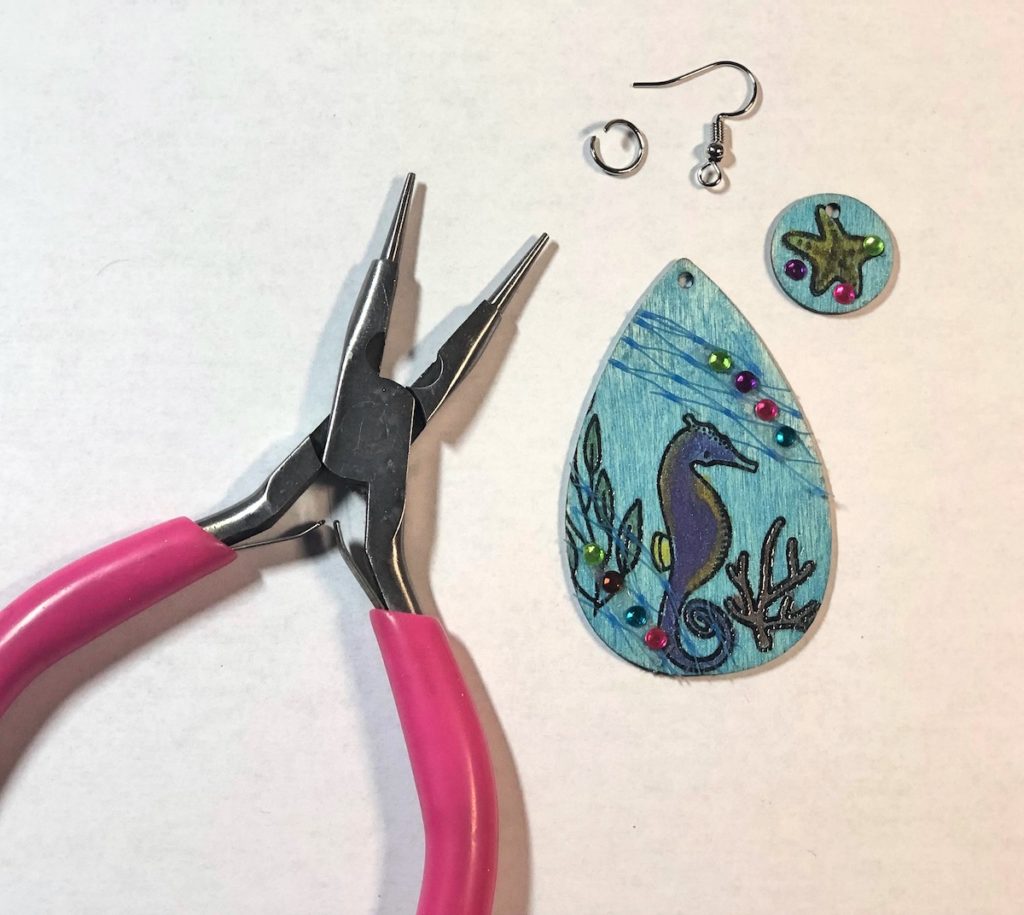
Paint both pieces of the wood earring with Topaz watercolor. Be sure to repeat on the other side. Heat set with heat tool.
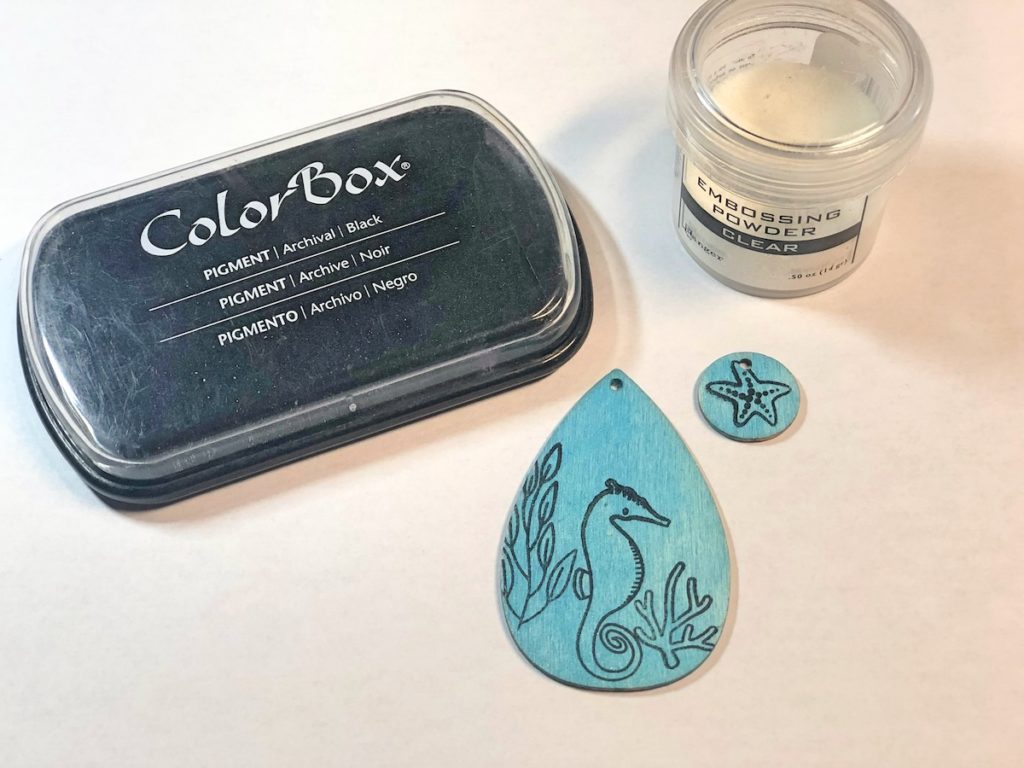
Step Two:
Using a black pigment inkpad, stamp the images onto the wood pieces. Sprinkle them with clear embossing powder, put the remaining powder back in the jar. Heat set.
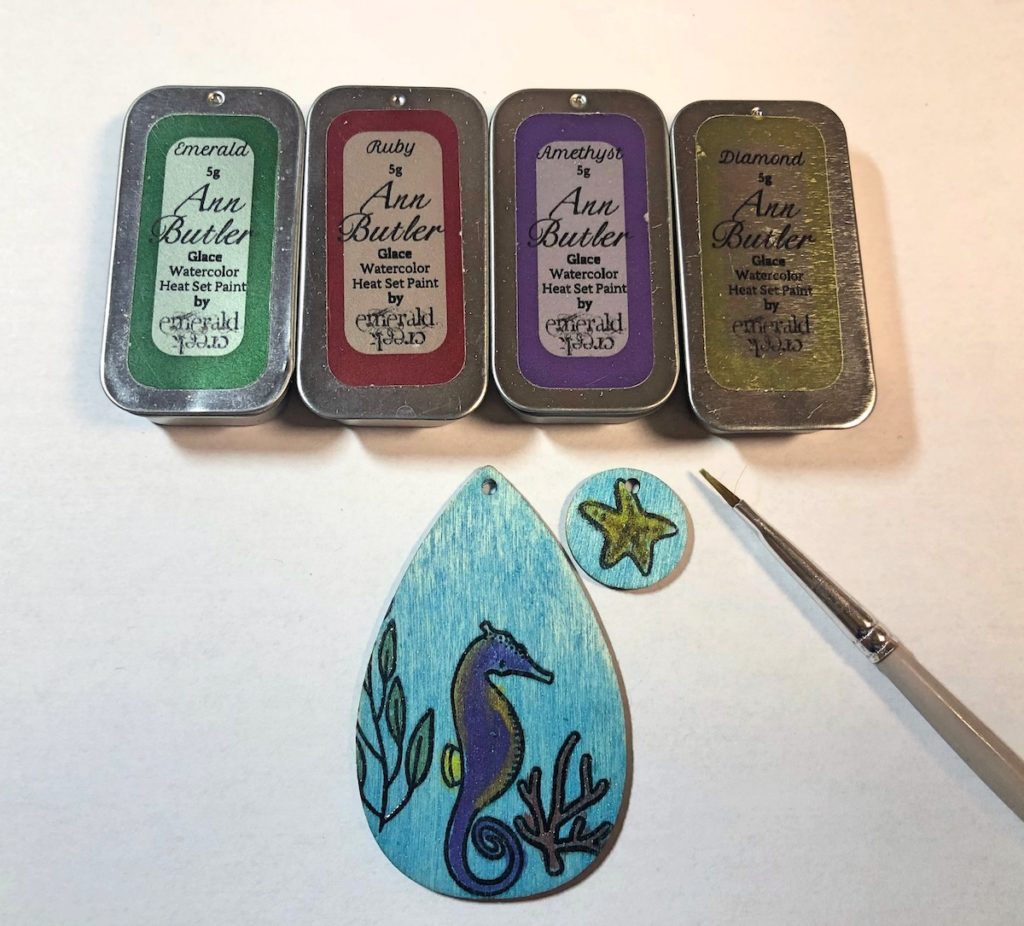
Step Three:
Watercolor the images as follows: Starfish in Diamond, Corral in Ruby, and Plant in Emerald. For the Seahorse, paint it with Amethyst and heat set. Apply the highlights in Diamond. NOTE: When the watercolors are heat set you can add colors on top of each other without the colors blending together. Spray with a sealer.
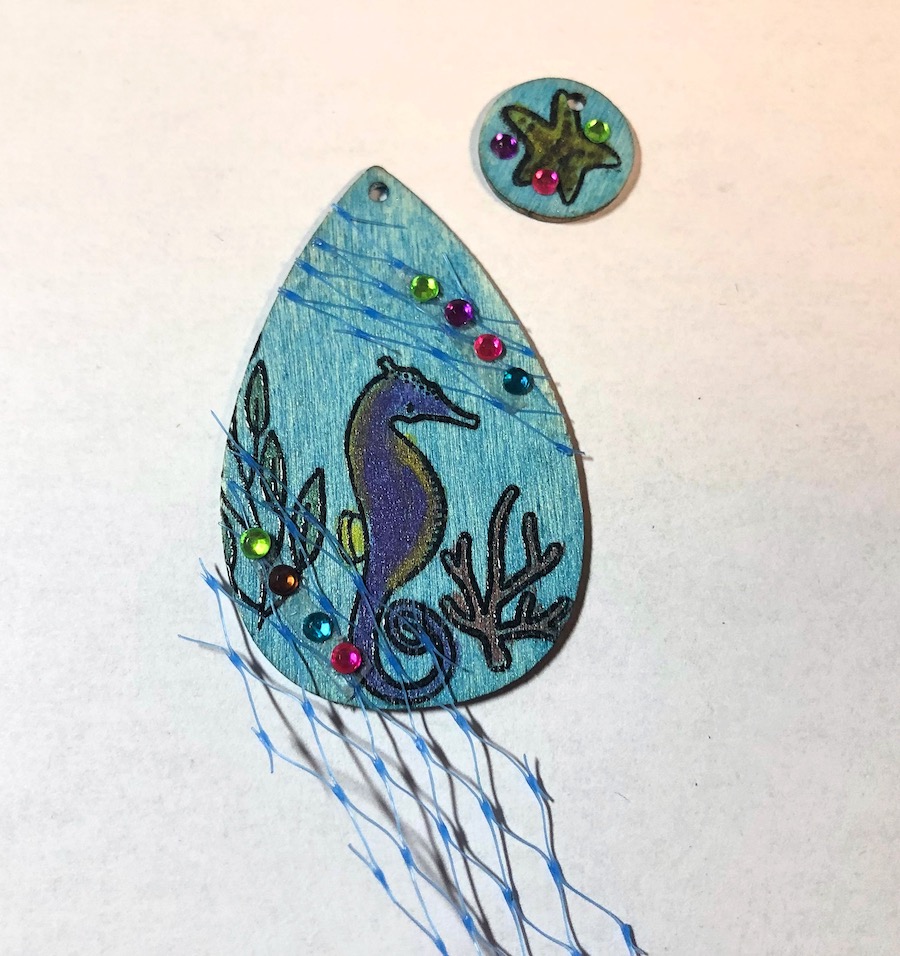
Step Four:
Apply glue to the areas that you want to attach the mesh. When the glue dries, trim the mesh with scissors. Adhere the gems to both wood pieces.
Step Five:
To finish the earrings, glue the small wood circle to the other wood piece, lining up the holes. Attach a jump ring and earring finding to the wood pieces. Repeat all of the steps for a second earring.
Here’s Another PIN For You To Share~
Ocean Themed Earrings

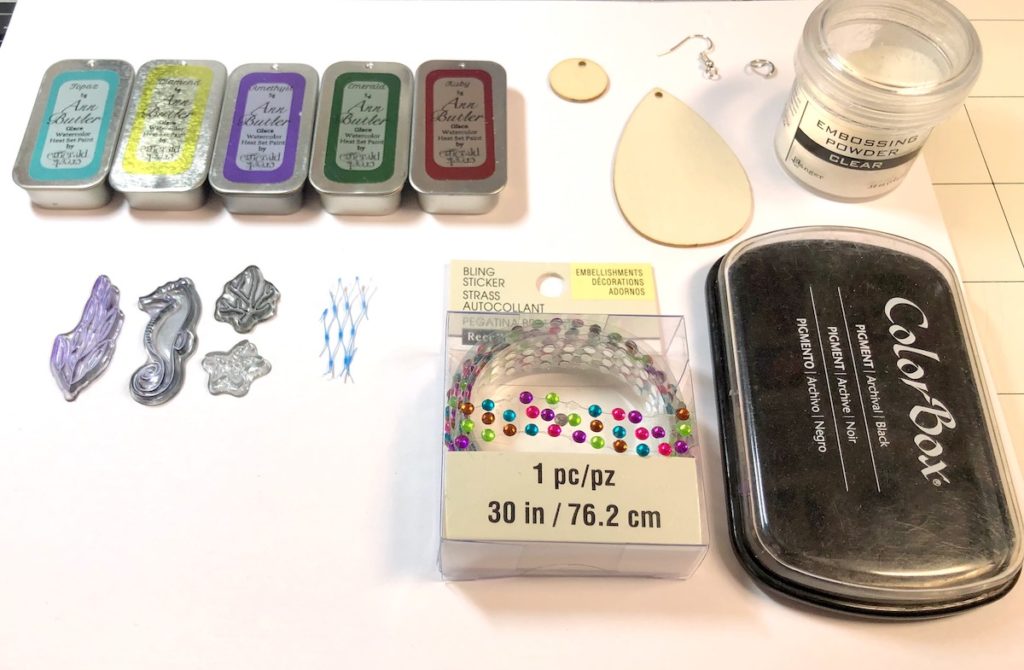
Supplies for Ocean Themed Earring
- Wood Earring Pieces
- Earring Findings (Included in the Wood Earring Package)
- Emerald Creek Watercolors by Ann Butler Designs
- Mermaid Mail Stamp Set by Waffle Flower
- Mesh
- Colored Rhinestones
- Black Pigment Inkpad
- Clear Embossing Powder
- Zip Dry Paper Glue
- Round Nose Jewelry Pliers
- Paintbrush
- Heat Tool