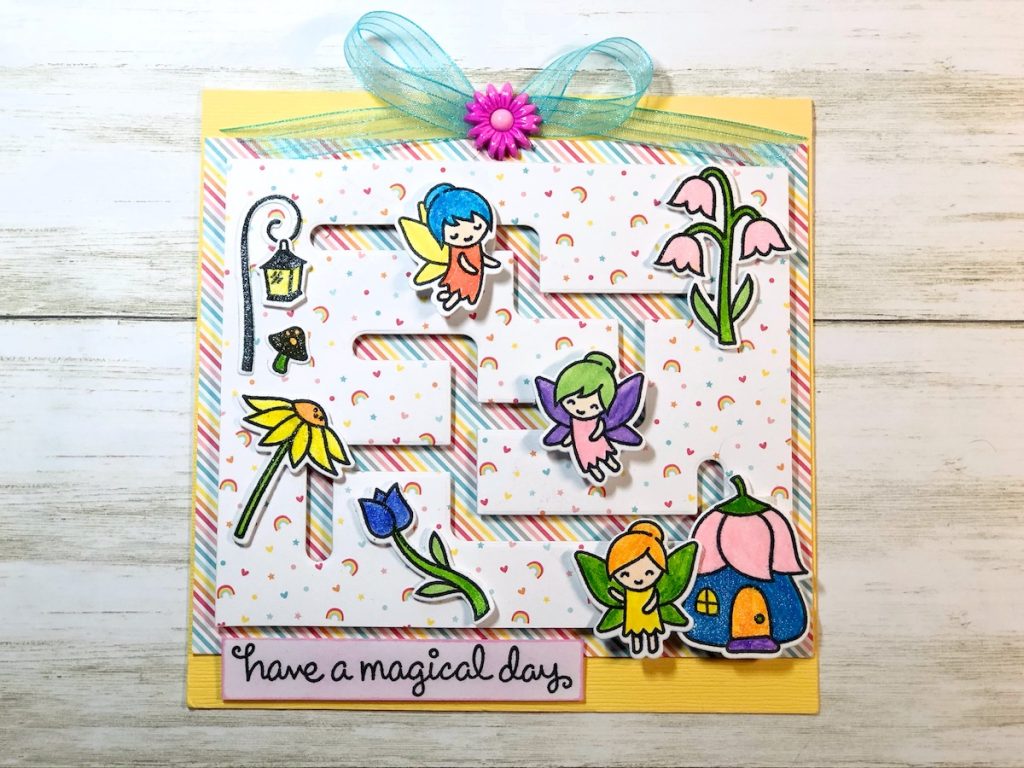
Handmade cards are always a great way to let someone you love know that you’re thinking about them. But, giving them a card like this Magical Fairy Fun interactive card adds a little extra surprise that is bound to give a giggle too!
Please note: This post contains affiliate links. If you use these links and make a purchase, we earn a commission at no extra cost to you…

When I began stamping many years ago, I started out creating cards and then found myself wanting to do interactive cards. From there I went into stamping on different surfaces creating home decor and now it seems I’m back creating cards. Interactive cards will always be my favorite! Let’s get crafty and I’ll show you how to make this one~
Check out the full list of supplies at the end of this post.
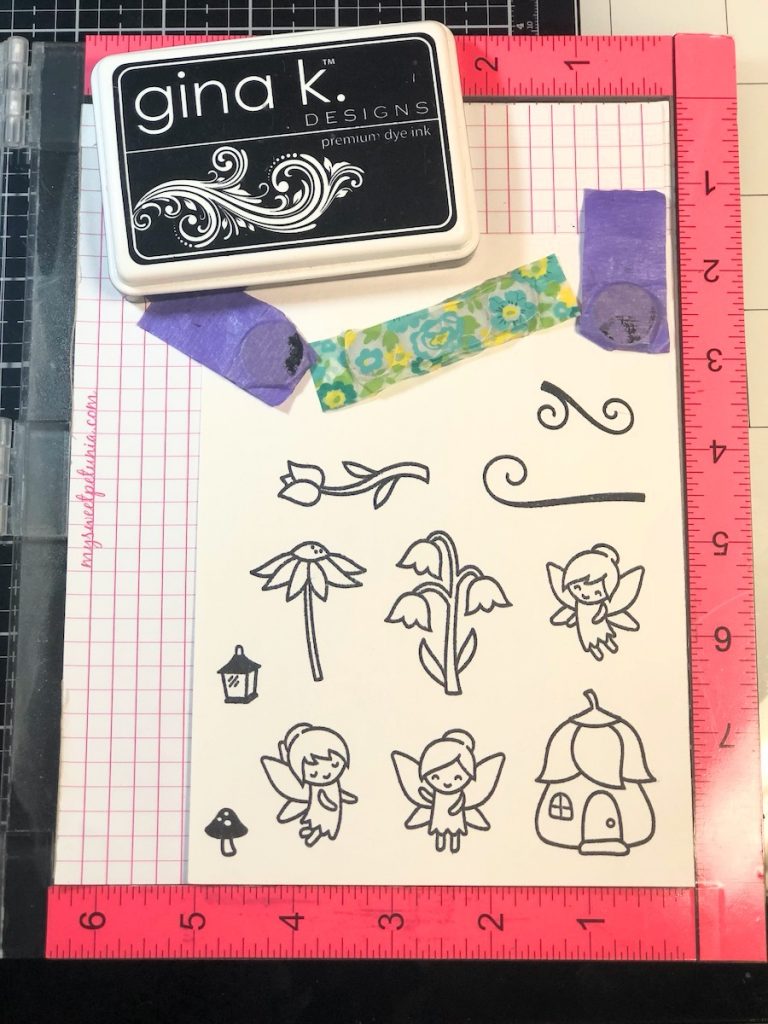
Step One:
Stamp images on white cardstock with a black inkpad.
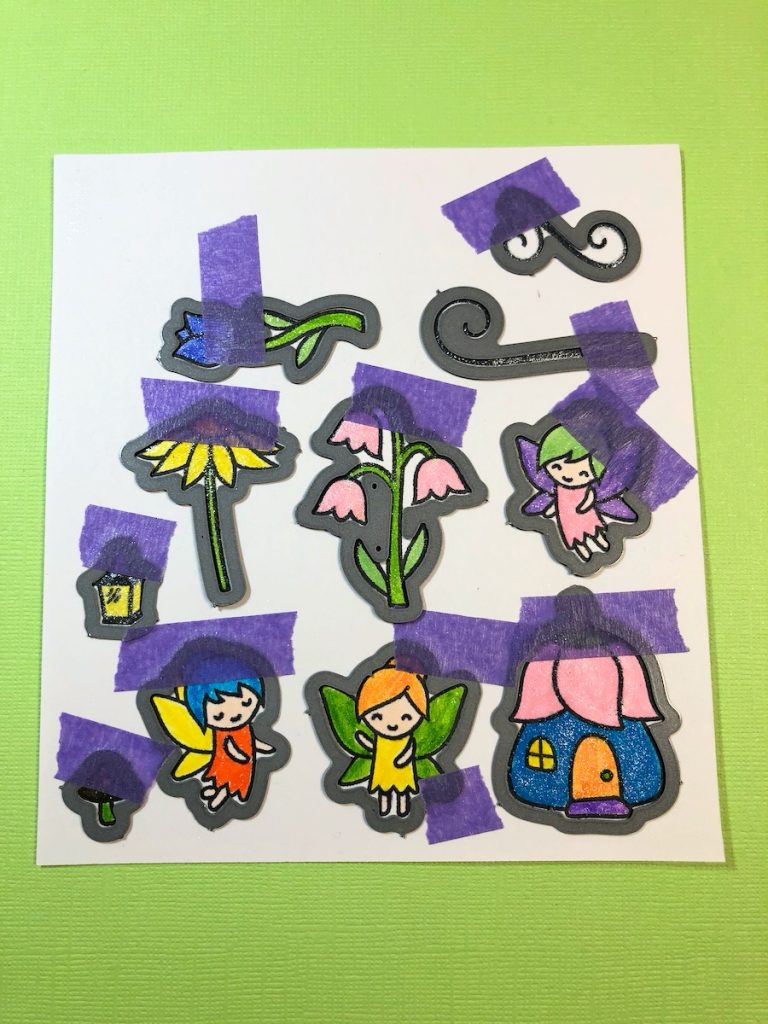
Step Two:
Color the images with markers. I used Wink of Stella markers because they have a shimmer in them that I love for this project.

Step Three:
Die cut the stamped images with a die cutting machine.
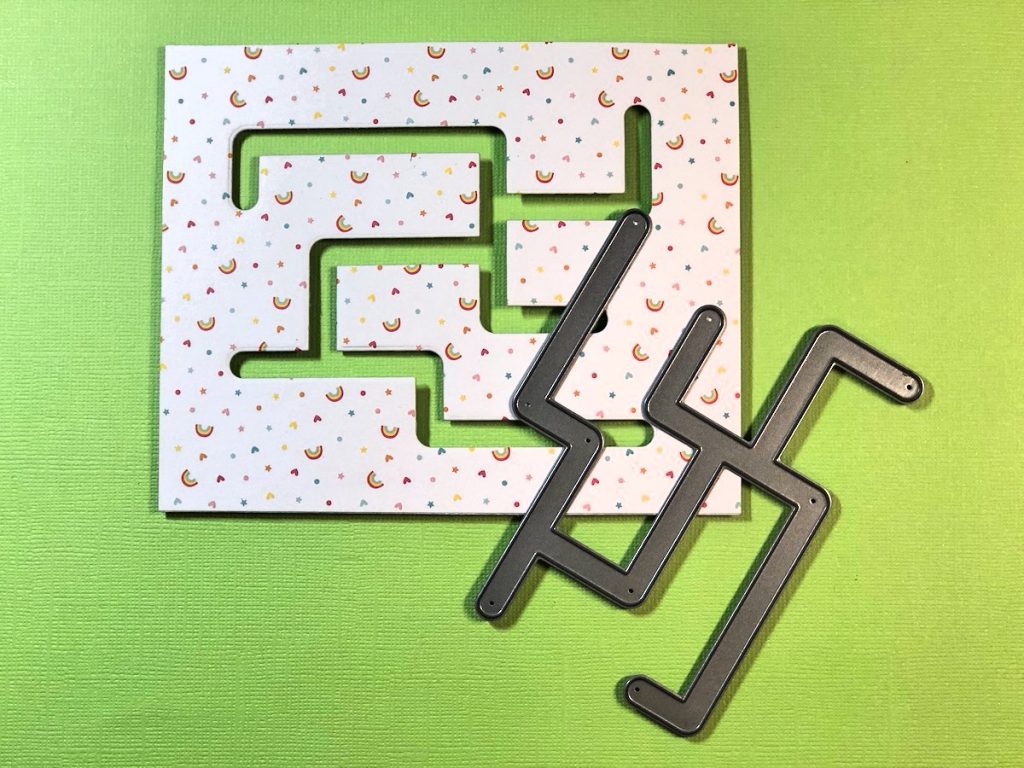
Step Four:
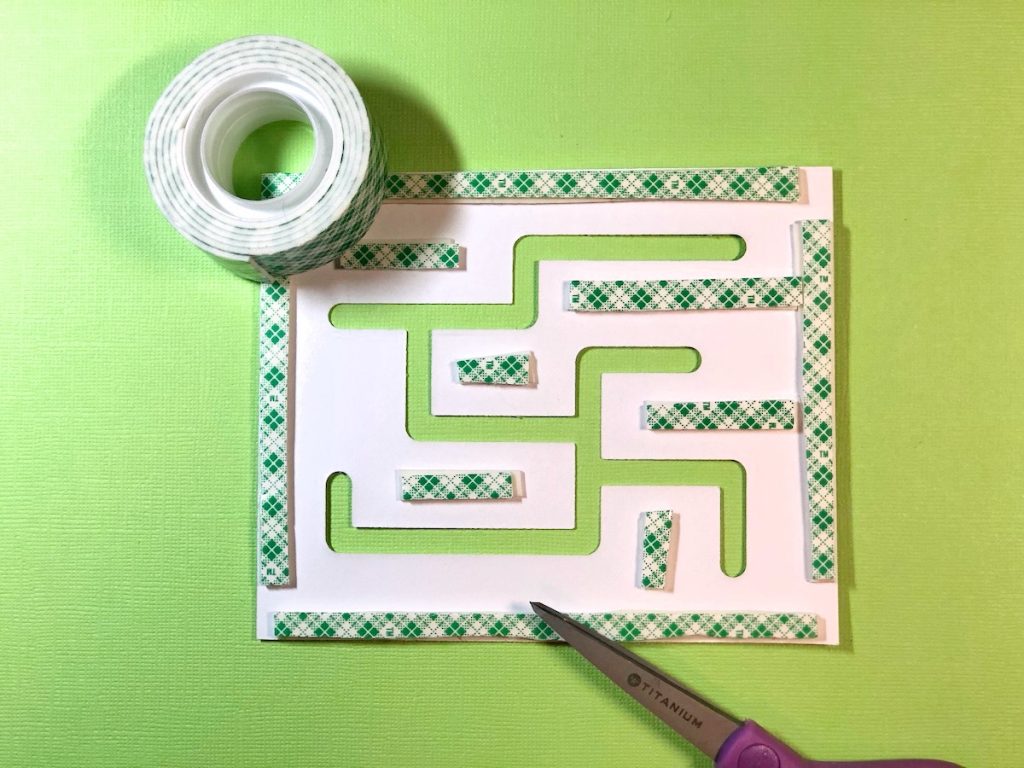
Using the maze die, die cut it on a piece of patterned paper 5 1/2″ x 4 1/2″.
Step Five:
Adhere foam tape to back of maze paper leaving enough room for the buttons to move freely.
Step 6:
Apply two layers of foam tape to the back of the buttons.

Step 7:
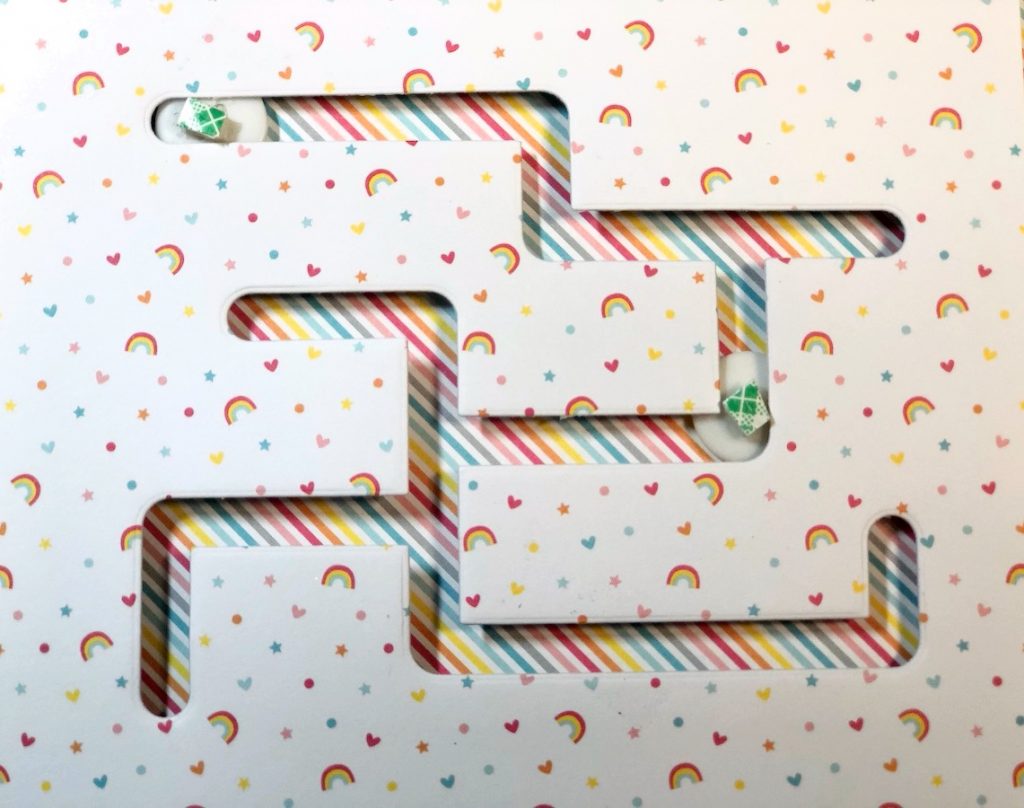
Cut another piece of patterned paper 6″ x 5″. Place your buttons down and then lay your maze paper on top making sure the buttons are in place before adhering the maze paper down completely. Adhere smaller buttons on top of the other ones.
Step 8:
Adhere two of the fairies to the buttons making sure the move around the maze. Next, adhere the stamped images to the front of the maze. Cut a card base from yellow cardstock 6″ x 12″ and fold in half. Adhere the maze papers on top. Stamp the word image on white cardstock, cut out and attach to the card front. Add a bow and button to finish.

Magical Fairy Fun Interactive Card
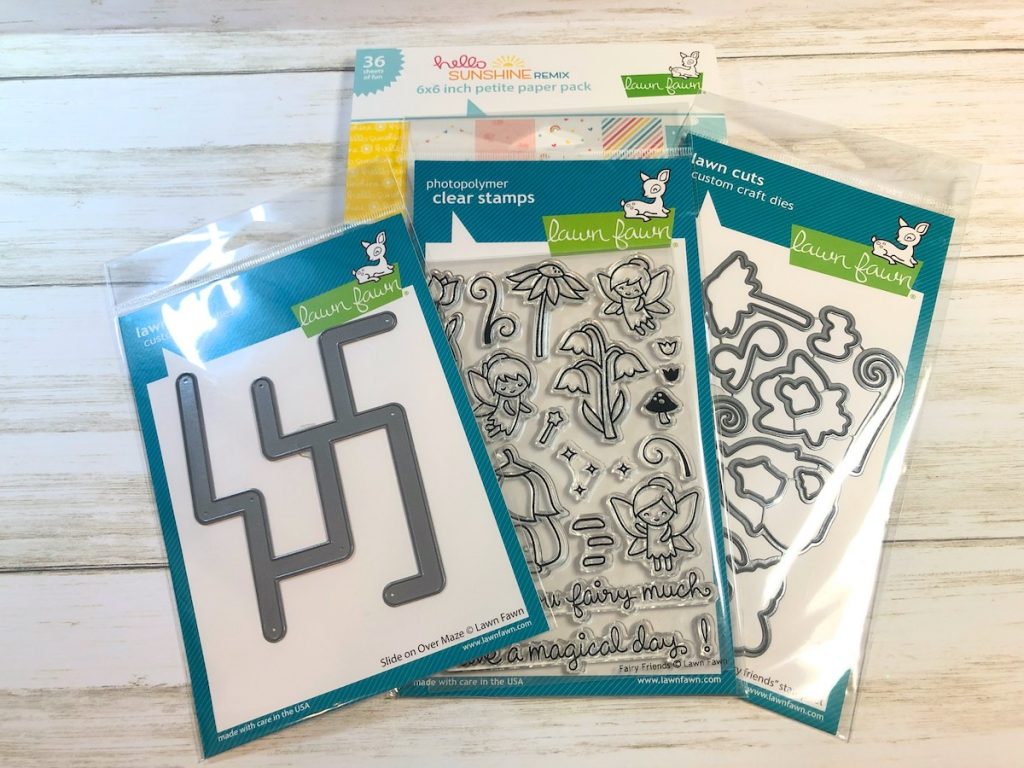
Supply List
- Fairy Stamps by Lawn Fawn
- Fairy Dies by Lawn Fawn
- Slide on Over Maze by Lawn Fawn
- Patterned Papers by Lawn Fawn
- Cardstock, White & Yellow
- Glitter Markers by Wink of Stella
- Inkpad, Black by Gina K. Designs
- Ribbon
- Buttons
- Foam Tape
- Zip Dry Paper Glue by Beacon Adhesives
- Paper Trimmer
- Die Cutting Machine
Is there a way to connect with Lisa Rojas other than Facebook ?
Tamiclutter@hotmail.com
Thank you, Tami Trimm