Good morning, friends. Larissa here with you today how to make embellished clips for planners and organizers. The new craze seems to be planners.
Everywhere you look there are planners. Everyone is planning and organizing! People are using washi tape, stickers, colored pens, etc. on their planners. It is almost like scrapbooking your daily diary. I have been using my iPhone for years to keep my planner and now I have taken the plunge and have joined the new craze. It is actually a lot of fun.
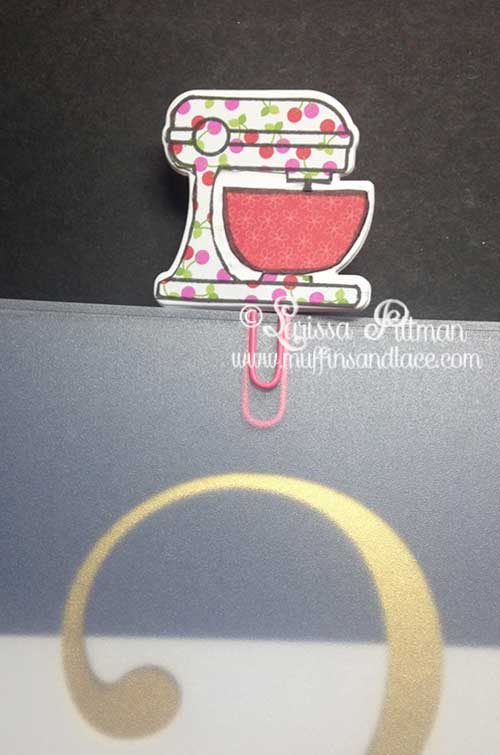
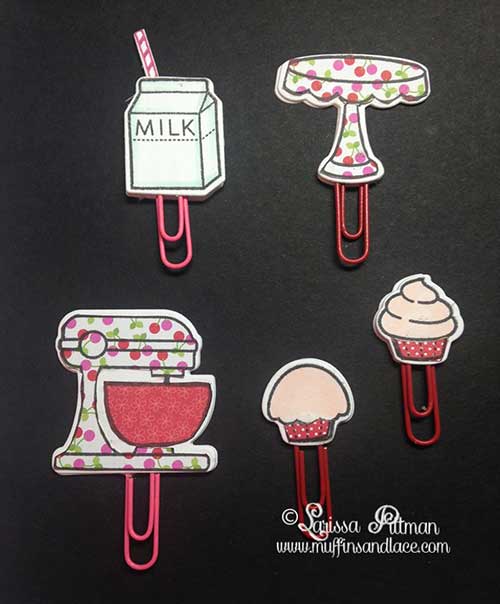
I have seen so many planner clips being sold and thought I can make those.
[clickToTweet tweet=”How To Make Embellished Clips for Planners and Organizers” quote=”How To Make Embellished Clips for Planners and Organizers”]
Materials:
- Stamp set with matching dies
- Pattern paper and heavyweight cardstock
- Your favorite adhesive ( I used e6000)
Embellished Clips for Planners and Organizers Instructions:
- Cut two of each image you are using.
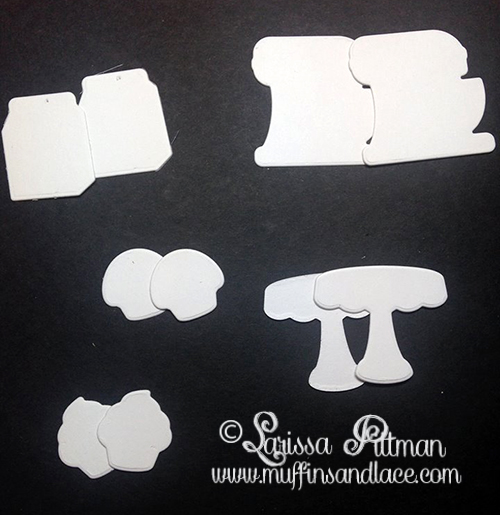
- Stamp the images on pattern paper.
- Cut the image with a pair of detail scissors and adhere it to the front of one of the die cuts.
- Add a little glue to the second die and place the paper clip on it where you want it to be.

- Adhere the front die to the second. Once the glue dries which isn’t very long you can add any embellishments you want. Rhinestones, glitter, enamel dots, pearls, etc. The possibilities are endless with these little planner clips. You could even die cut a piece of glitter paper to use as your image. You can have them for every holiday. If you don’t have die cuts don’t worry just stamp the image on a piece of heavy weight cardstock and cut it out. Remember to cut on the outside of the stamp.
I hope you enjoyed my post today. I hope your planners and organizers will be full of awesome little clips soon. Remember you can make just about anything you want with a little time and patience. These planner clips will take you about 15 to 20 minutes to make.
Have a wonderful, crafty day, friends.
Larissa
Love the clips. Great tutorial, Larissa :)
Thank you Roberta. Glad you liked it. :)
Larissa, I too have taken the planner plunge, & now that I have my new Cuttlebug I can even cut out all of the cute designs for my clips! Thanks for the amazing idea!
Molly
Oh the possibilities are endless. You are going to have so much fun. You will have to show me what you do. :)
Oh, these are so stinkin’ cute, Larissa! Think I best be heading out in search of a planner so I can get with the new craze too! Thanks for such awesome ideas. These are great!!
Thank you Sylvana. :)
These are adorable! I may have to start a planner just to use these!
Thank you Carmen. You will get addicted quickly.
What a cute idea! Need to make some for my planner.
Thank you Lisa. Yes you do.
Greetings,
I have to laugh at the whole “planner” thing………if I take the time with the “planner” then I have no time left for the “creating”………kind of like the social media” stuff….if I’m do it there is no time left for the creating……….oh well…..still a fun idea and project!
Love and light,
Michele
Thank you, Michele. Yes, the planner thing is not for everybody.
Larissa, this idea is too cute and great for planners. Thank you for sharing this with us!!!