Nothing is better than spending craft time having fun with die cuts!
Please note: This post contains affiliate links. If you use these links and make a purchase, we earn a commission at no extra cost to you…
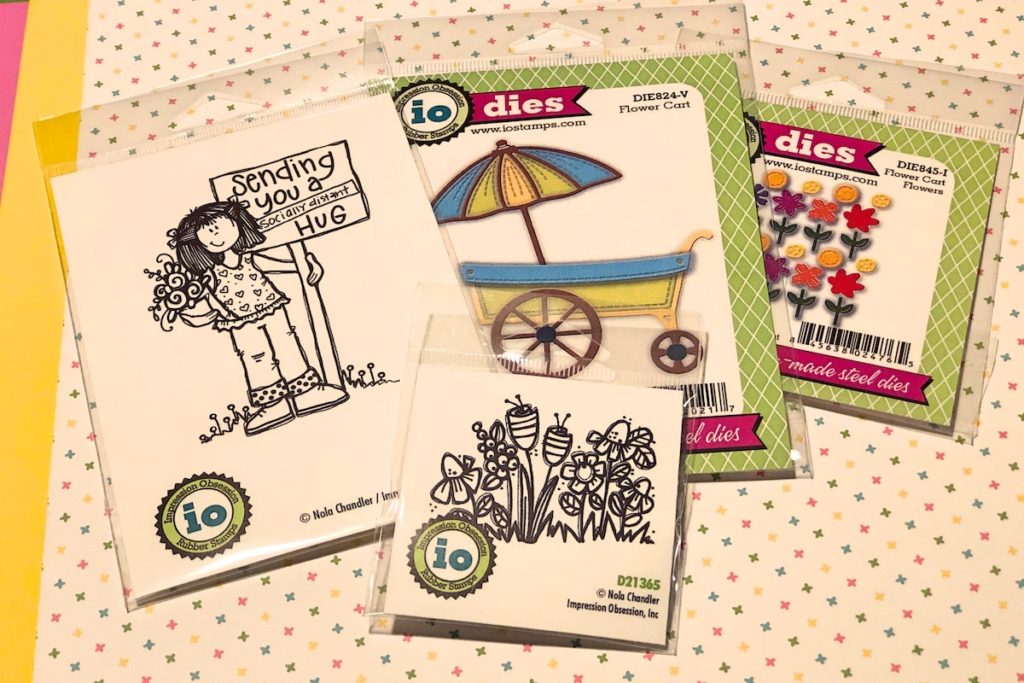
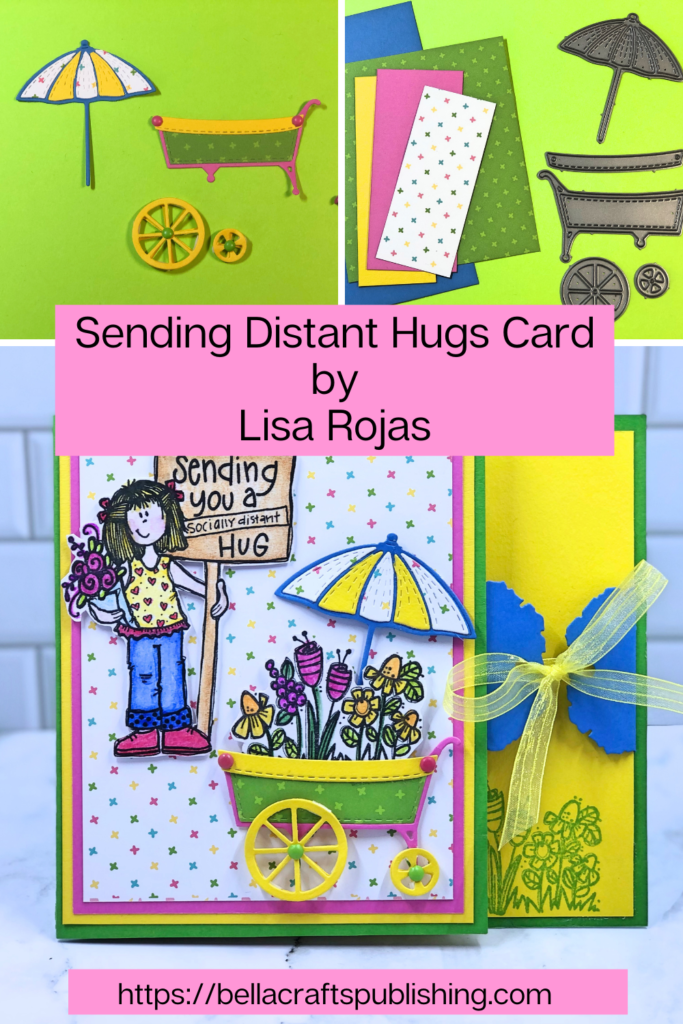
What can I say? Having fun with die cuts is one of my favorite ways to spend my craft time. I’m so lucky to be able to do this for a living so I basically craft every day! But, I have to say that aside from my rubber stamps, I have the most fun with dies. This flower cart die set from Impression Obsession. They have an adorable flower die set that you can see in the materials photo that I didn’t use for this project but I will definitely use it in another one. I hope you enjoy this project and make one for yourself! Lisa~

Supplies for Sending Distant Hugs Card
Check out the full list of supplies at the end of this post.
Step One:
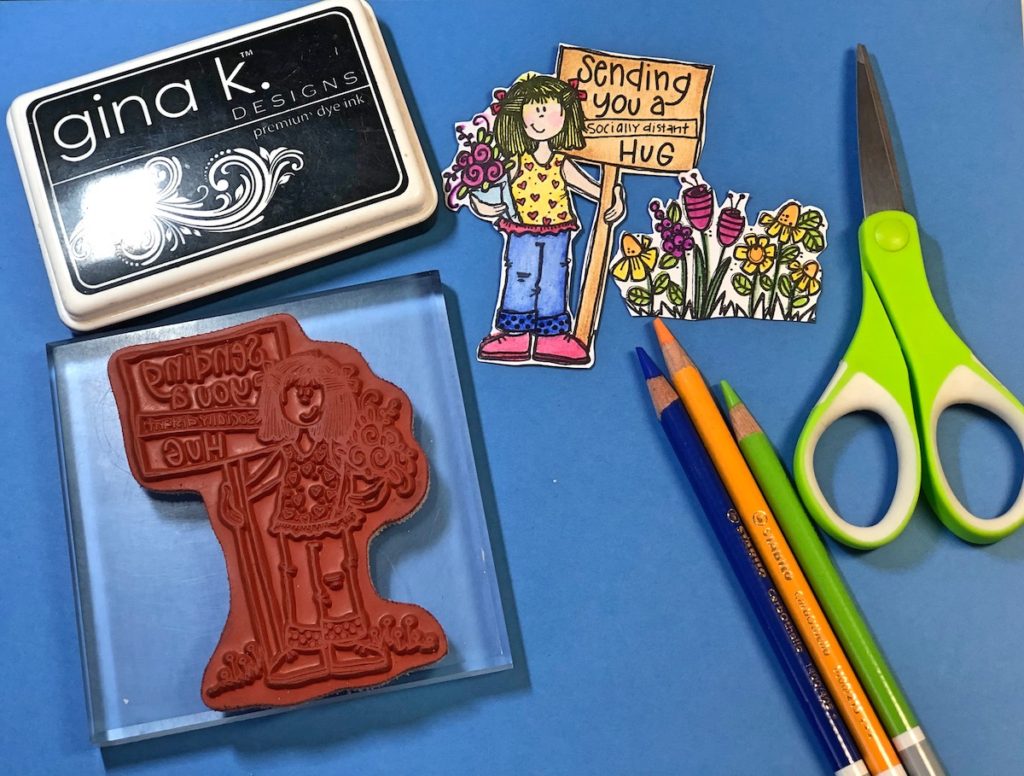
Stamp the images with the black inkpad, color them with the chalk pencils and cut them out.
Step Two:
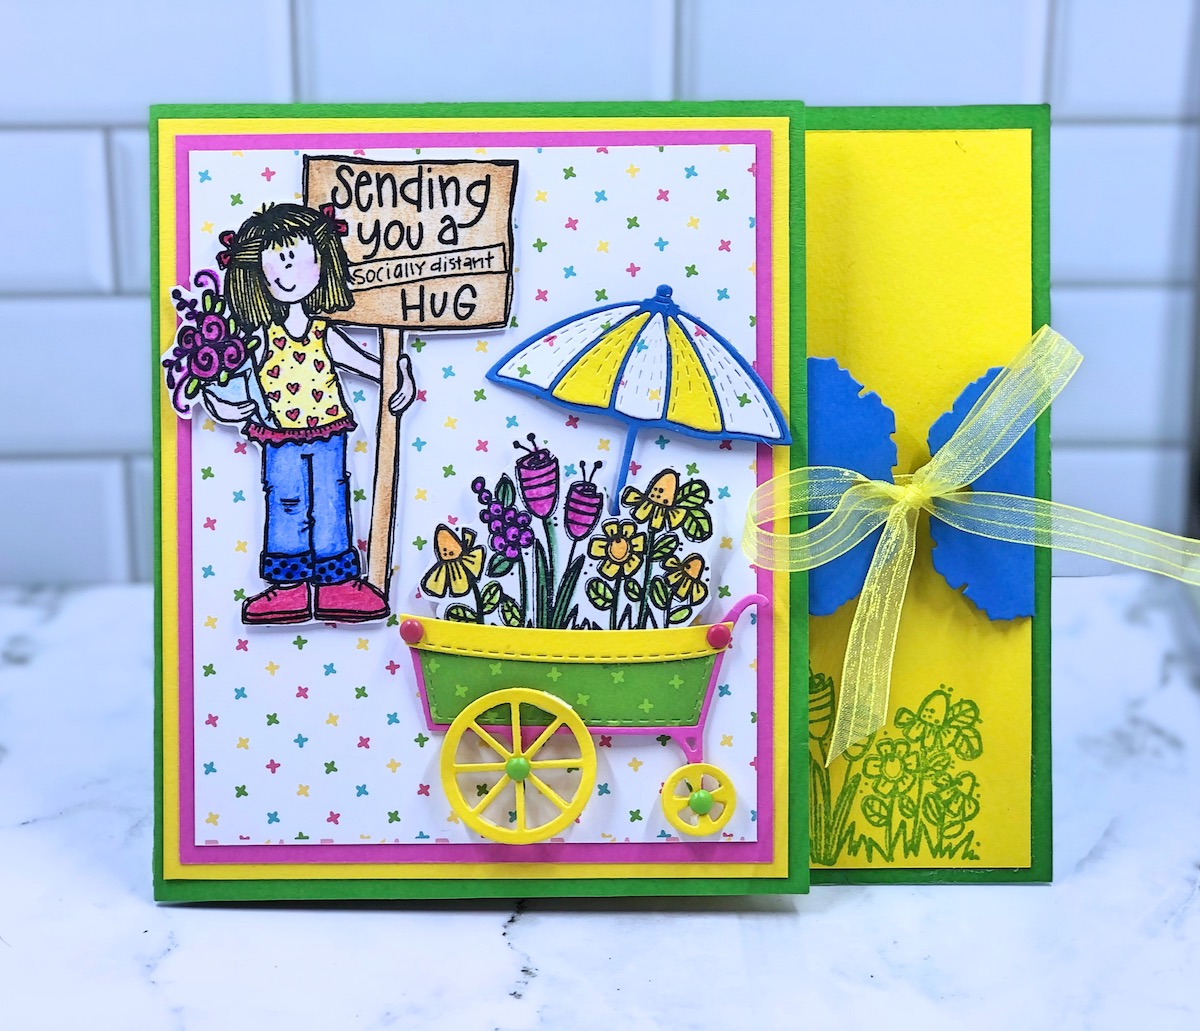
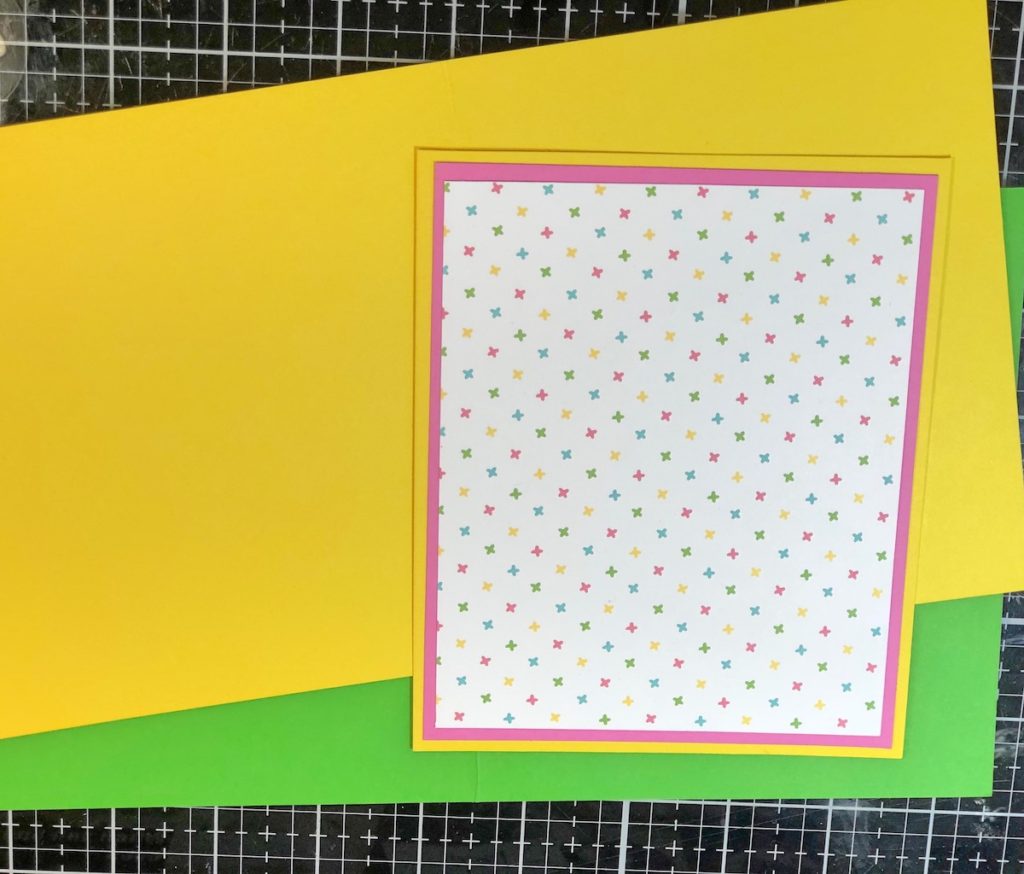
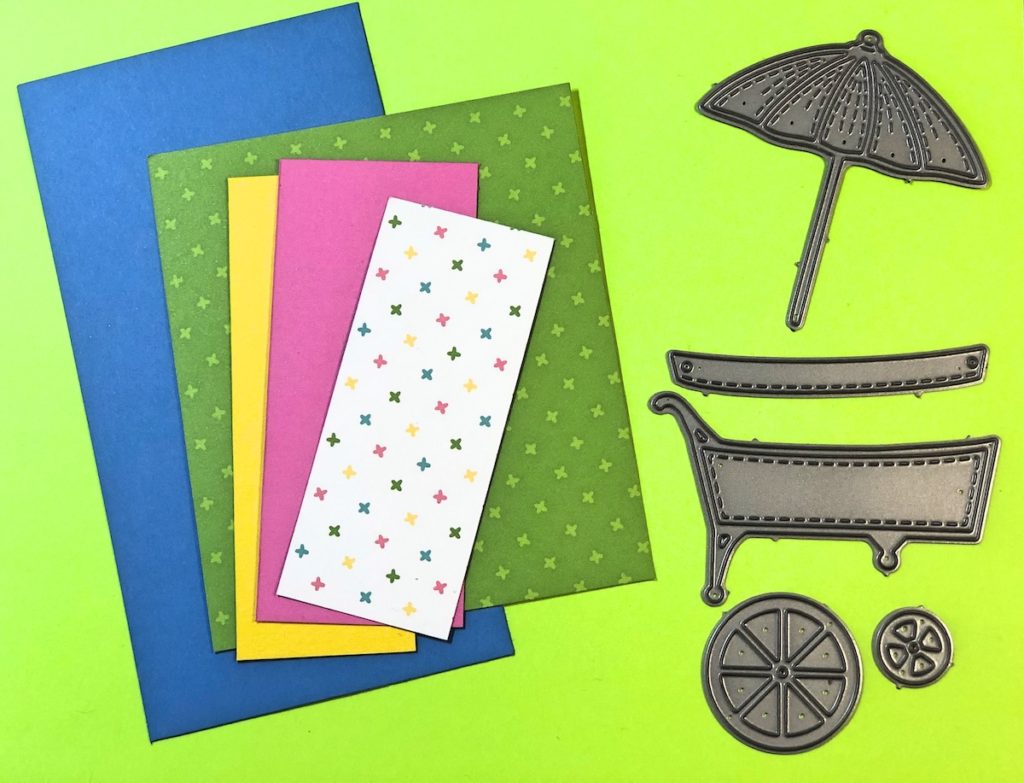
Cut the papers as follows: Green cardstock 6″ x 12″, Yellow cardstock 5 3/4″ x 11 3/4″ (these are the base card). Score both pieces at 5″ from the left side. Next, cut, layer and adhere the cardstock as follows: Yellow 4 3/4″ x 5 3/4″, Pink cardstock 4 1/2″ x 5 1/2″ and patterned paper 4 1/4″ x 5 1/4″. Adhere the layered papers to the front of the Green cardstock base card. The large Yellow cardstock is for the inside of the card and does not get glued in until the very last step.
Step Three:
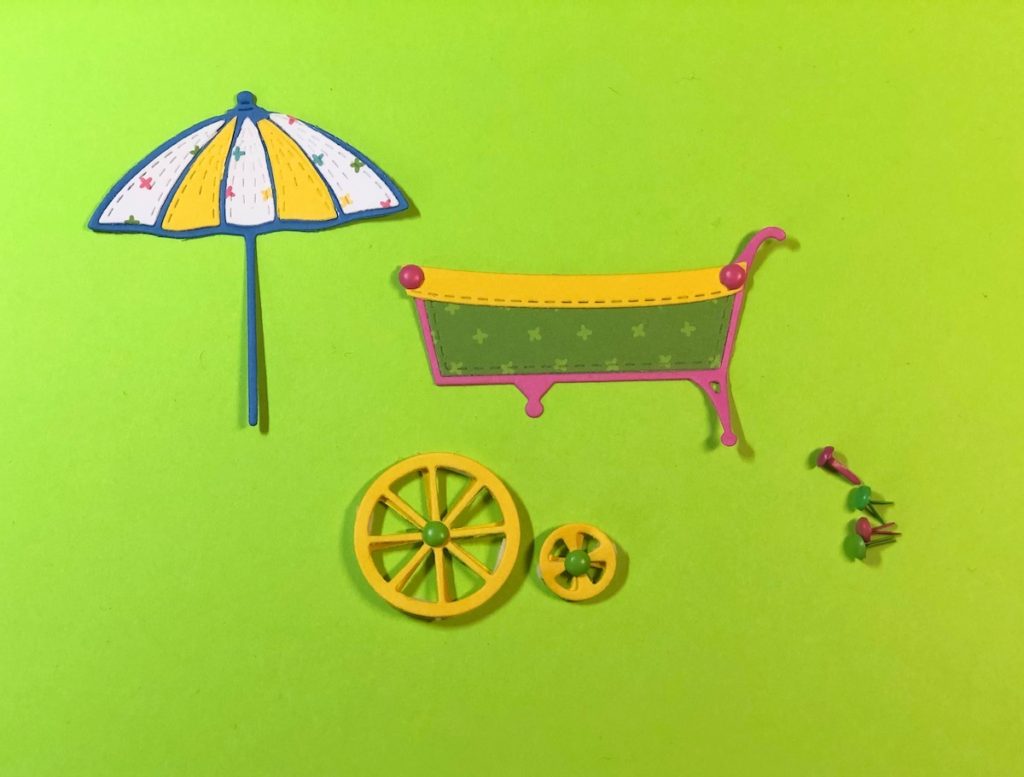
With paper scrapes, die cut the whole umbrella one time with blue cardstock. Run the top part of the umbrella two more times with the yellow cardstock and patterned paper. Die cut the cart one time with the pink cardstock and again with the green patterned paper. Next, die cut the wheels twice and the top part of the cart with yellow cardstock. Adhere the pieces together and attach mini brads using the finished project photo for placement.
Step Four:
Adhere the pieces together and attach mini brads using the photo for placement. Adhere the stamped flowers to the cart. Apply foam tape to the backs of the girl, cart and umbrella and attach to the front of the card. Use finished project photo for placement.
Step Five:
To finish the project, die cut the tag twice with blue cardstock. Cut the tags in half. Stamp the flower image with Green inkpad along the bottom part of the Yellow cardstock. Adhere the tags to the back of the Yellow cardstock and adhere it to the inside of the card. Fold the tag on the right side of the card over. Attach a piece of ribbon to the tags and tie in a bow to close.

Sending Distant Hugs Card

Supplies for Sending Distant Hugs Card
- Cardstock: Green, Yellow, Pink and White
- Patterned Paper
- Rubber Stamps & Dies by Impression Obsession
- Inkpads: Black, Green by Gina K. Designs
- Chalk Pencils by Stabilo
- Zip Dry Paper Glue by Beacon Adhesives
- Foam Tape
- Mini Brads: Pink, Green
- Ribbon, Yellow
- Paper Trimmer
- Die Cutting Machine
- Scissors
Trackbacks/Pingbacks