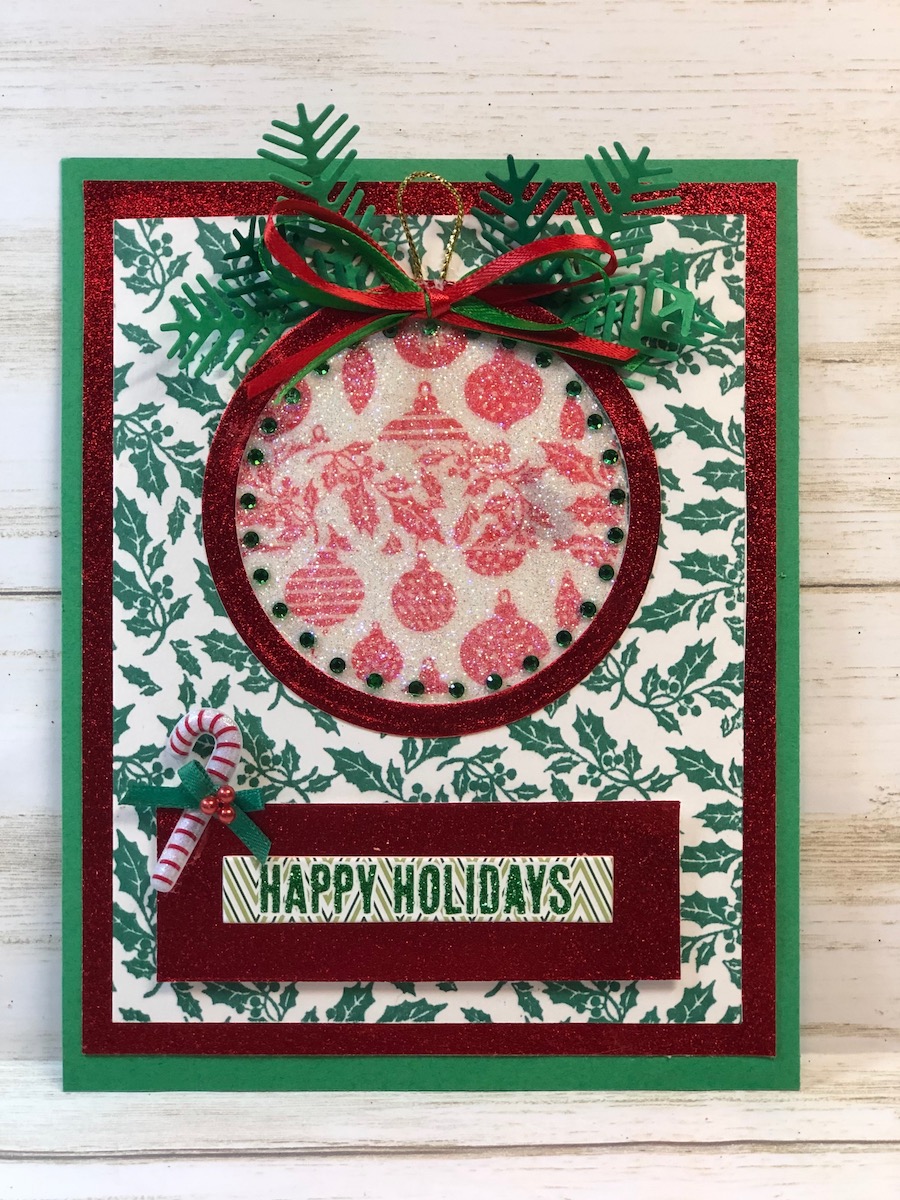
This Glitter & Bling Ornament Card will have the people on your holiday card list say, “Wow! How’d she do that?”
Please note: This post contains affiliate links. If you use these links and make a purchase, we earn a commission at no extra cost to you…
I know that we live in the technology world with the Internet and emails but even so, I still love sending out Christmas cards every year. The Glitter & Bling Ornament Card that I created for this year is probably one of my favorites! I hope you give it a try~ Lisa


Supplies for Glitter & Bling Ornament Card
Check out the full list of supplies at the end of this post.
Step One:
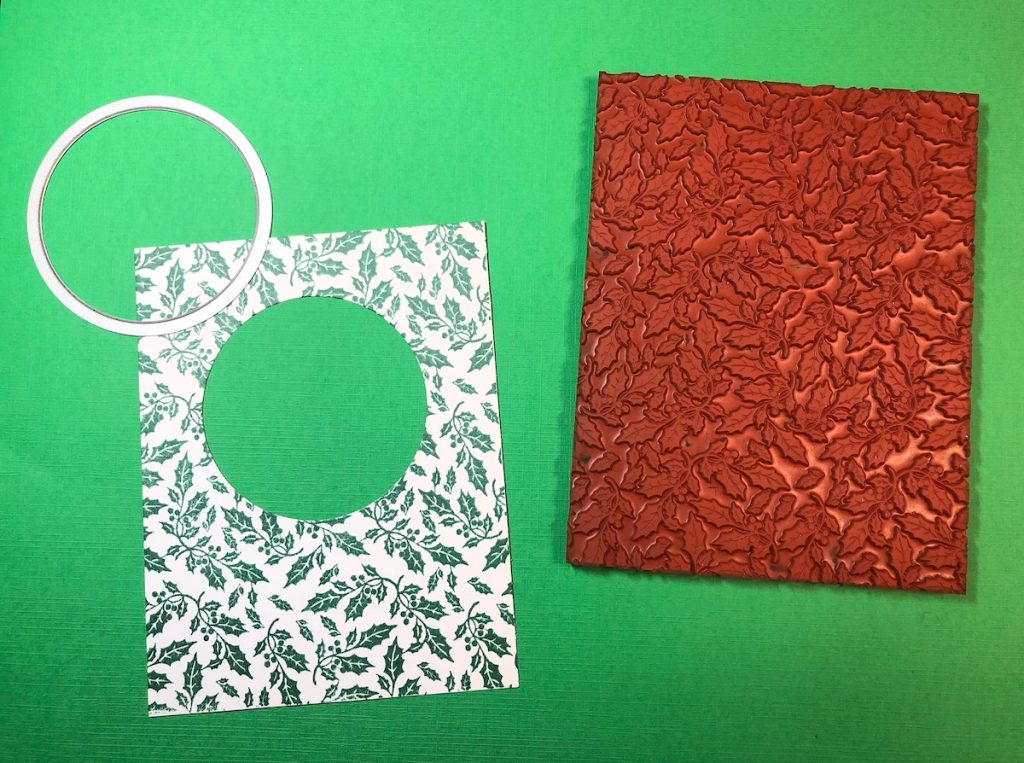
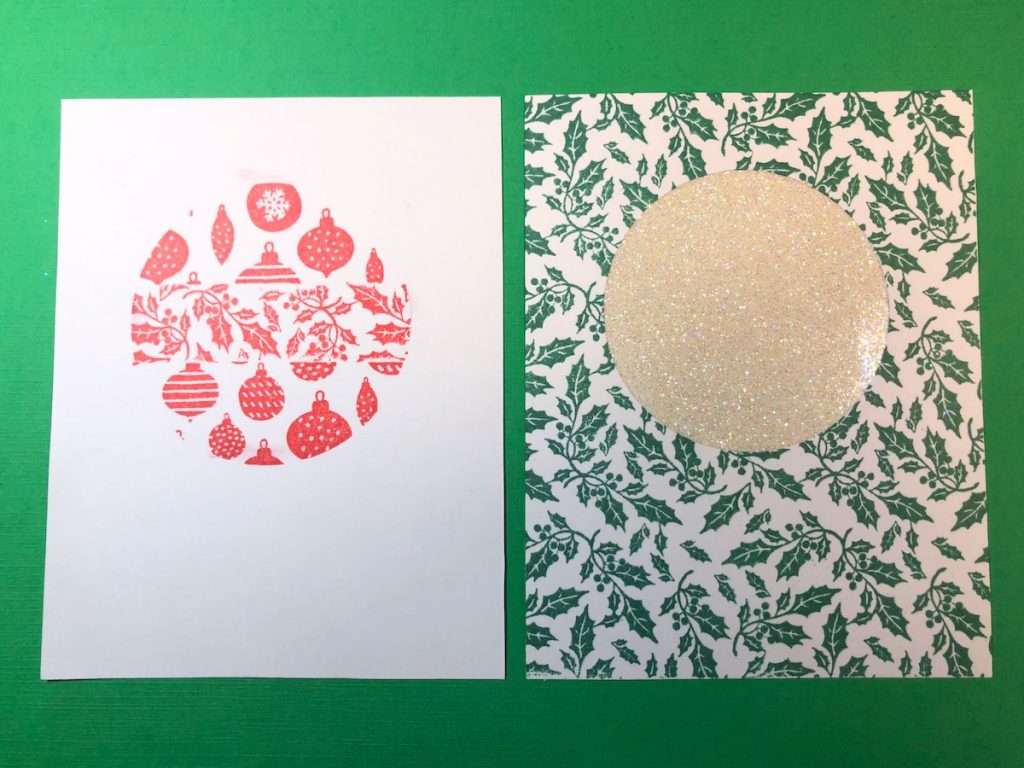
Cut the papers as follows: Dark Green 4 3/4″ x 6″, Red 4 1/2″ x 5 3/4″, White 4 1/8″ x 5 1/4″ (2). Stamp Holly onto White cardstock with green inkpad. Die cut a 2 1/2″ circle.
Step Two:
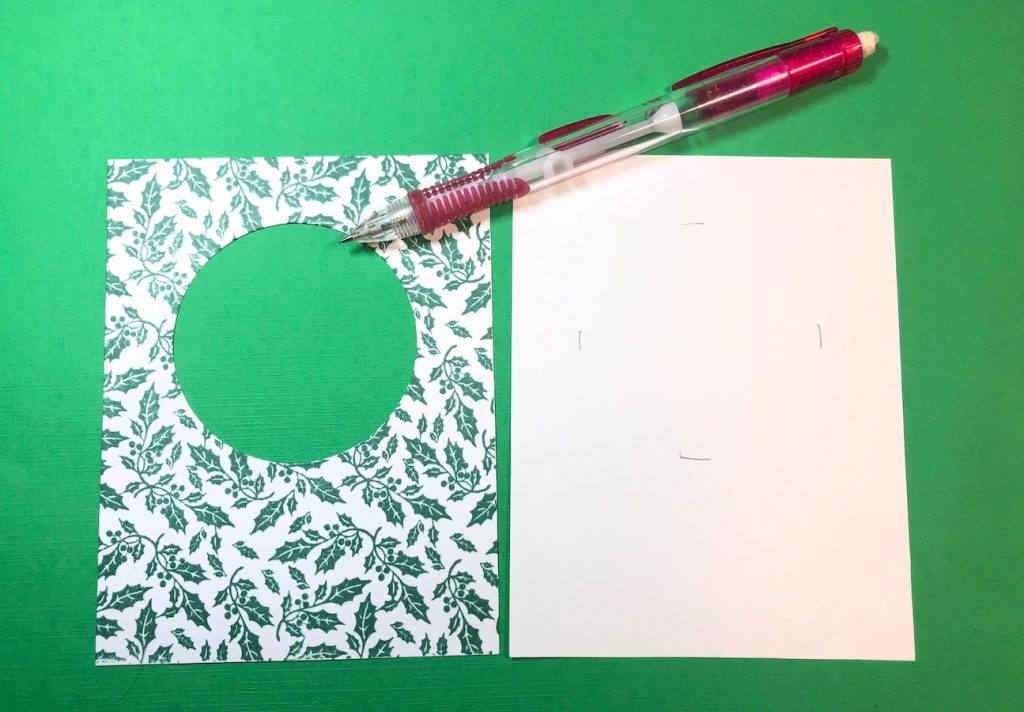
Use a pencil to mark the circle on the second piece of White cardstock.
Step Three:
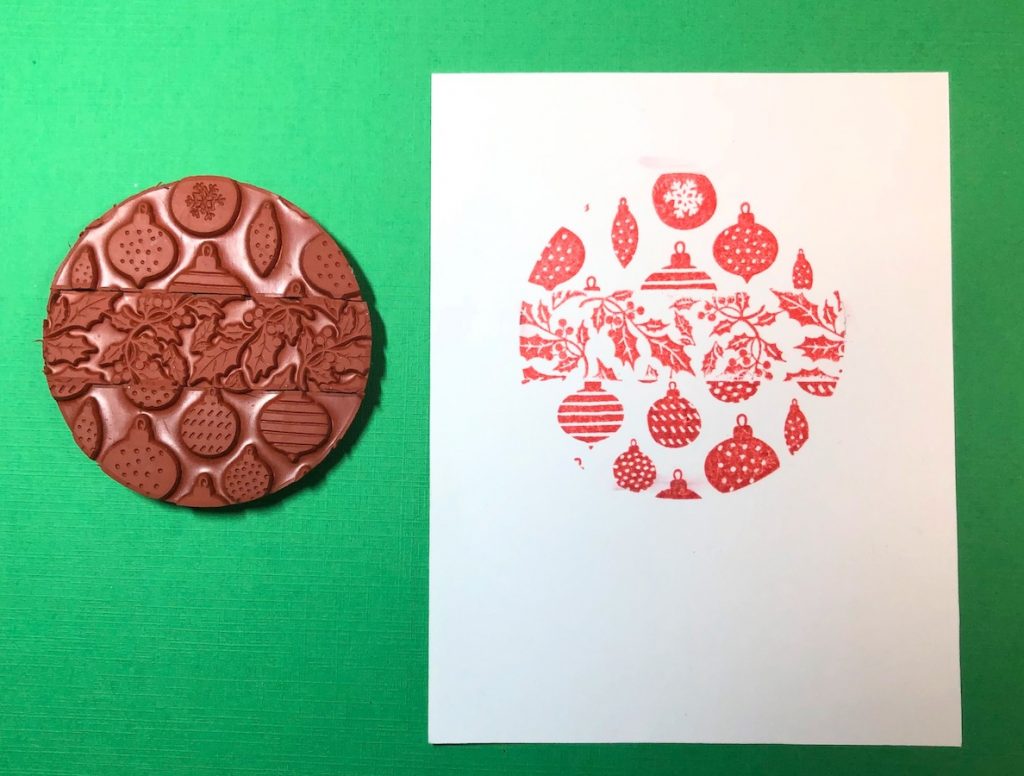
Stamp the Ornament Builders on the White cardstock with red inkpad.
Step Four:
Apply double-sided adhesive paper to the back of the holly cardstock. Turn it over to the front and apply the glitter, press it down with your finger. Shake off the excess and put it back in the container.
Step Five:
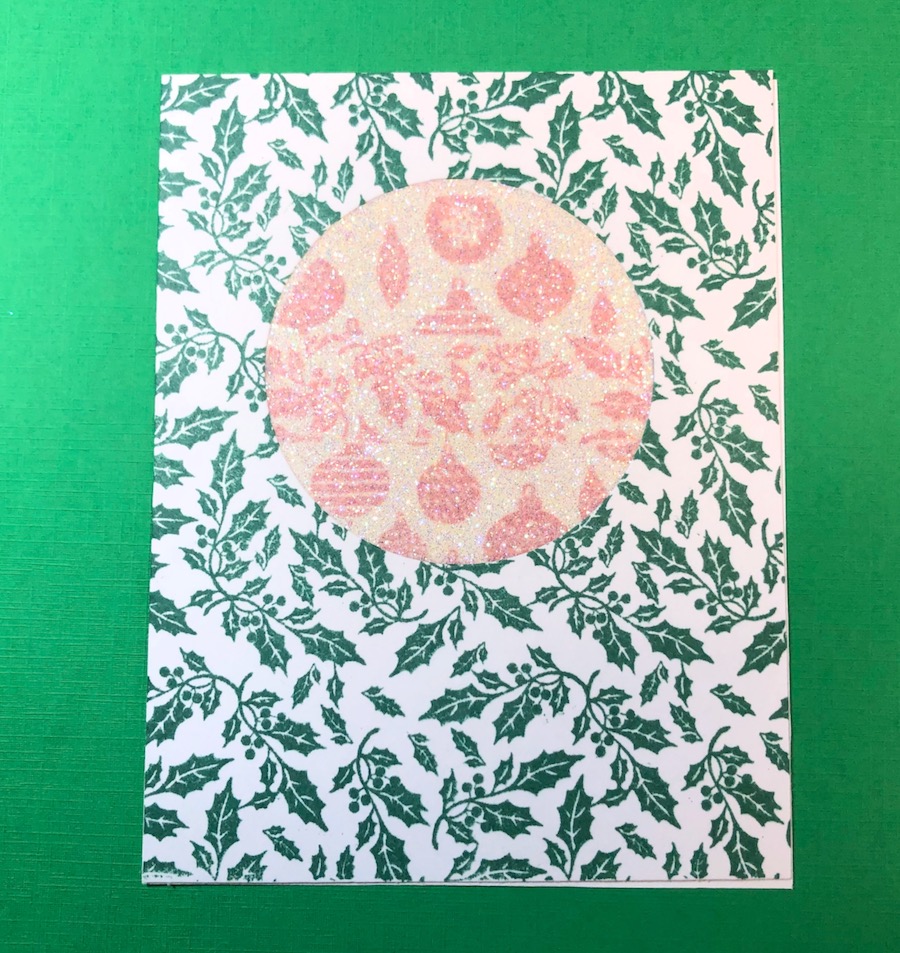
Adhere the two pieces of cardstock together.
Step 6:
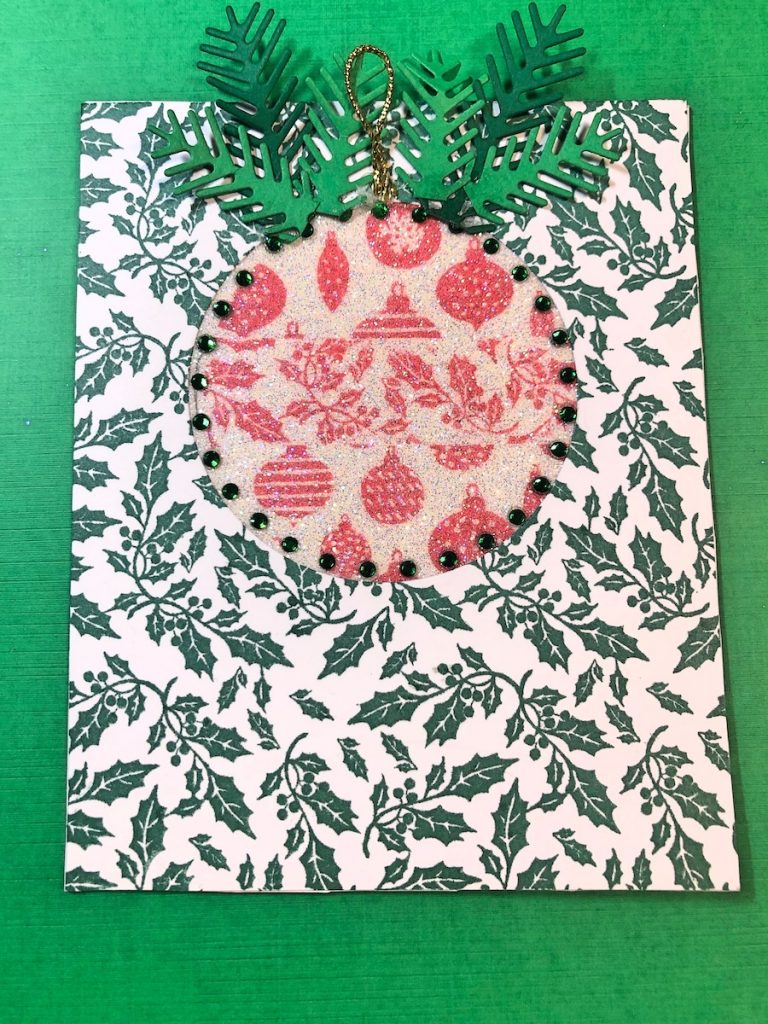
Follow the instructions from the Rhinestone Genie tools and the circle template. Use a dry, hot iron to adhere the circle of rhinestones to the stamped cardstock.

Step 7:
Finish off the card by adding the die cut pine pieces and Gold string. Die cut a 3″ circle from Red glitter paper and adhere to the card front. Cut Red glitter paper 3 1/2″ x 1 1/4″and attach the candy cane and Happy Holidays. Attach to the card front with foam tape. Adhere the bows to the top.
Glitter & Bling Ornament Card

Supplies for Glitter & Bling Card
- Cardstock: Dark Green, Light Green, White
- Glitter Paper, Red
- Adhesive Paper
- Ornament Builders Stamp by Unity Stamp Co.
- Holly All Around Background Stamp Unity Stamp Co.
- Inkpads: Green, Red by Gina K. Designs
- Rhinestone Genie Kit
- Rhinestone Genie Circle Template
- Glitter, Clear
- Ribbons
- Foam Tape
- Glue Gun
- Zip Dry Paper Glue
- Die Cutting Machine
Trackbacks/Pingbacks