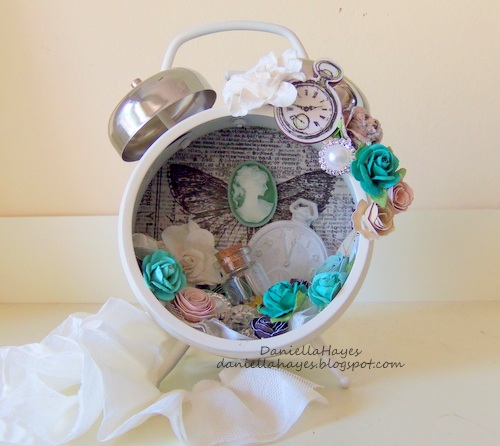
I love altered art, both making it and admiring it. I like to call it “Artistic Transformation” because there is no users manual and no right or wrong way to do it.
It is completely up to you and your artistic side. This clock is cheating a bit. It came out of the package ready to alter but I still had a great time transforming it!!
SUPPLIES:
- Tim Holtz Idea-Ology Assemblage Clock and Tissue Wrap
- Gel Medium
- Prima Flowers and Embellishments
- Misc. items from my stash
- Acrylic Paint [Tweet “How to alter a clock #crafts #alteredart “]
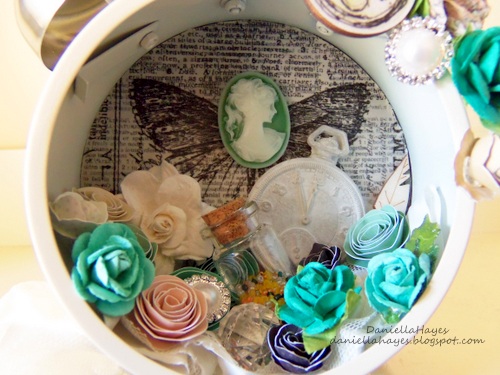
 To start, I removed the glass and the “bells/chimes” from the top of the clock and painted it an off white color. I reattached them when the paint was dry. I applied old dictionary paper to the back of the clock and added the tissue wrap on top with gel medium. I also adhered my embellishments to the back of the clock and replaced it.
Then I had fun looking through all of the goodies I have for just the right ones to put inside, and on, the clock.
*Design Tip: To make it easier to replace the glass to the front, glue your inside pieces to a hidden piece of paper on the bottom of the clock. This way, you can remove them without disturbing the design and put the glass back in.
I started my inside design with a piece of ruffled ribbon on the bottom. Then I layered flowers, buttons, gems, wood embellishments and a little jar inside. When I was satisfied, I decorated the outside.
This is a super easy project that is a ton of fun. I hope you make an “Artistic Transformation” today!!
xxDaniella


This is beautiful Danielle! It would make a great gift. Thanks for sharing!
I love the mood it inspires in me. So light and pretty, Daniella!
Beautiful Danielle. Thank you for sharing the details.
Absolutely beautiful Daniella! I have a clock that I haven’t used yet. Wonderful inspiration!
Such a super-fun and beautiful project Danielle. You’ve got me thinking of all kinds of ways to make this project my own!
Great project! I can see these done so many ways……..thanks for the inspiration.
Love and light,
Michele