Hello everyone! Martha Lucia here with a great technique to share with you on how to create your own background using distress inks and stencils.

Materials:
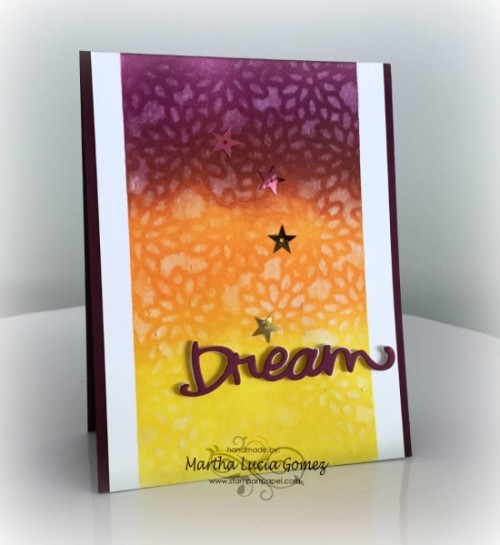
- Blackberry Bliss Cardstock
- Whisper White Cardstock
- Distress Ink Seedless Preserves, Spiced Marmalade and Mustard Seed.
- Peony Blossoms Memory Box Stencil
- Dream Die Cut by Little Yellow Bicycle
- Baby Wipes
- Blending Tools
- Masking Tape
- Fun Foam
- Star Sequins
- Snail Adhesive
Instructions:
1. Align and secure a piece of whisper white cardstock using masking tape. If you want you can create a lineal border with the masking tape, for this option you only need to leave the same space in both sides.

2. Apply the distress ink using the blending tool. You can mix and combine all the colors that you want. In my model I only used three. Cover the entire surface of the paper.

3. Put your stencil over the inked piece of paper and secure the stencil with masking tape.

4. Take a baby wipe and pass it carefully over the stencil to fade the ink on the open areas of the stencil. As you can remember the distress ink is soluble in water and for this reason it works with baby wipes. If necessary, you can lightly rub the wipe over the stencil but be careful with the paper. Take off the stencil and masking tape and let the paper dry.
 [Tweet “#howto create background using distress inks and stencils #crafts”]

To finalize your card you can use a card base and a die cut sentiment. To add more dimension to that sentiment you can cut this in fun foam also and paste it behind of the cardstock. Decorate with some sequins.
 I hope you’ve enjoyed this technique and try it in your projects. Remember to come back and visit us often! We’re always up to something crafty. See you soon!
I love this technique Martha! It has a fabulous ombre look to it and can be used on any substrate. Thanks so much for sharing!
Oh my goodness – I am absolutely going to try this technique on my next project! The background is stunning, and I love the colors you chose – beautiful!
:) Molly
Love it. Looks amazing. The colors are gorgeous. Thank you for sharing. :)