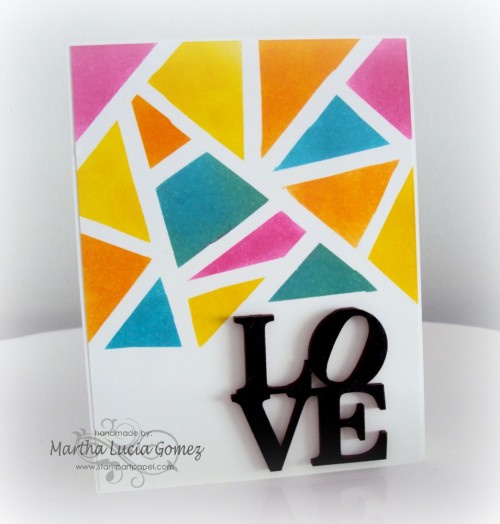
I love Clean and Simple cards and I also absolutely love experimenting with techniques. Today I am showing you both things in one card, sometimes this is hard but it’s not impossible. On my card I am creating the background into the foreground!
This background technique can cover the whole card or just a portion of the card. The most important material is your creativity and personal design. To make this card you only need a few more elements:
- Tim Holtz Distress Ink Mustard Seed
- Tim Holtz Distress Ink Picked Raspberry
- Tim Holtz Distress Ink Peacock Feathers
- Tim Holtz Distress Ink Spiced Marmalade
- Washi Tape
- Ink Blending Tool
- LOVE Scrip Wood – Unique Laser Designs
- Black Acrylic Paint
- Cardstock Whisper White
- Snail Adhesive and Liquid Glue
Now let me show step by step how you can create the design. I used Distress Ink in specific colors but you can use any kind of ink in your favorite colors.
First, adhere thin washi tape strips to the card at various angles to create the triangles and select your colors and blending tools.
Second, apply ink to one triangle using an Ink Blending Tool. If you want you can also use a masking paper to avoid the color going to other sides. Repeat the process with each color.
After you finish the ink coloring, you can remove the washi tape. You will note how the white spaces help to enhance your design.
Paste the decorated layer over the base card using snail adhesive and now your card is ready to stamp a sentiment or to make and add another special decoration like I made with mine. For this I used a beautiful and unique laser cut from Unique Laser Designs. It’s called LOVE Scrip and it is a wood laser cut that I painted with black acrylic paint.
When my LOVE word was dry I pasted it over my card.
Now I want to share a tip to keep all my ink blending tools in place.
This is a clear and simple project is one of my favorites and I hope I inspired you to create your own background or foreground and use this technique in other kind of projects. If you want to know more about my style I will wait for you in my blog.
See you soon!


What a beautiful card, Martha!
Martha this is a beautiful card and fun technique!
Beautiful card, I love it!
What a fun and dramatic technique Martha – I’m going to try it on one of my mixed-media pieces!
Thank you ladies for your comments. I love this card!
Love this card Maria! And the technique is too fun!
Love this card!