The holiday’s are coming quickly and it’s time to start thinking about our holiday cards. Our guest blogger today, Denise Losczyk, who is one of our repeat guest bloggers, has a great craft project to share with us today. We love the idea of creating ornaments that you can put into your holiday cards. By doing this, the recipients of your cards not only have the lovely card that you made, but also an ornament that they can put on their trees. And each year when they pull out their holiday decorations they’ll see that ornament and think about you. That is a wonderful gift to give!
Holiday Greetings
I have started a tradition with myself. For the past two years I’ve made small ornaments to enclose in holiday cards. I like enclosing a little something to make my greeting memorable.
This year I’ve come up with the following design, using fibers which I wrote about in the Bella Crafts Quarterly Blog on July 28, 2014.
Embroidered Retro Feel Holiday Ornament /Gift Tag:
This project can be used as an ornament, gift tag, or stocking stuffer. Use contrasting paper for ornament front and back. You will want the front of the ornament to contrast with your thread choice and with the back. Choose colors which show up well against greenery (dark green would disappear into foliage). I accidentally chose light blue paper for my first ornament front, as you can see in the photo. The white thread disappears against the light blue paper. Dark blue paper shows off the stitching much better, and embroidery can be seen from a distance. Low contrast embroidery is useful in projects where you want to add texture with less noticeable stitching.
Materials:
- Strathmore Colored Art Paper, 65 lb., in pad of assorted colors. (use a similar paper)
- Gift Tag template (I used a vintage office supply tag as template)
- Yarn or embroidery thread – use a light weight yarn or No. 8 or 10 Perle cotton.
- Tapestry embroidery needle, with large eye to accommodate thick threads
- Paper glue
- Paper cutter and paper scissors
- Paper edge cutting scissors
- Sequins (I used vintage sequins, purchased in the 70s, from the Craft store’s older stock!)
- Using paper cutter, cut out the following for ornament backs:2 ½ inch x 4 ½ inch rectangles (cut out several, to make it easy to assemble many ornaments at one time.)
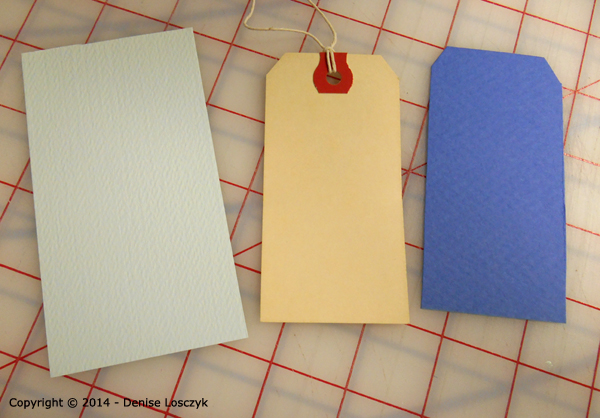
- Using paper cutter, cut out the following for ornament fronts: 2 inch x 3 ¾ inch rectangles – cut off the top two corners at an angle to make the tag shape.
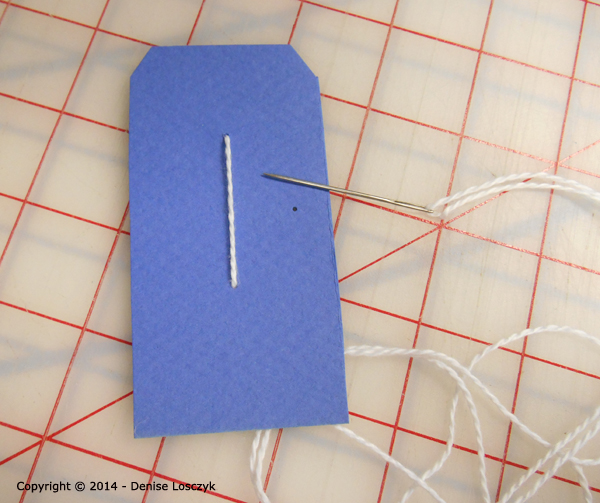
- Embroider Star stitch onto tag front. Eyeball the design as I have. I recommend poking holes into the paper from the front side, before bringing the needle up from the back. If using a pattern, poke all holes into the paper before you begin stitching.
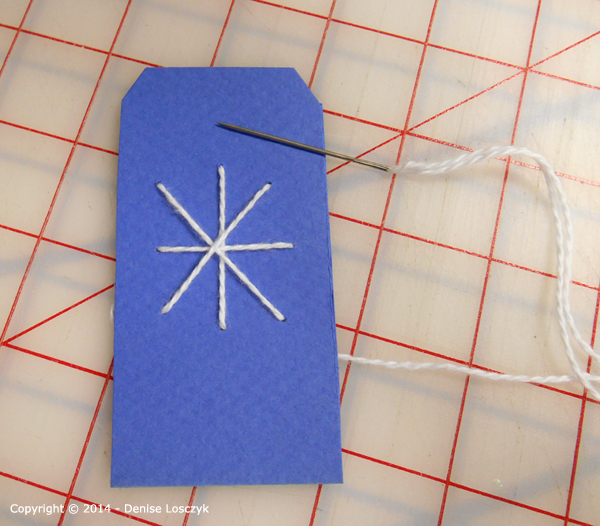
To create Star stitch, stitch one cross stitch, then another cross stitch over the first one (filling in spaces between the first cross). Then stitch another cross stitch in spaces left over. This is like stitching an asterisk shape. I varied lengths of the stitching, to give the design a Retro feel. If desired, stitch small cross in the center, to hold stitches in place. Take 2-3 stitches in threads on back, to secure stitching.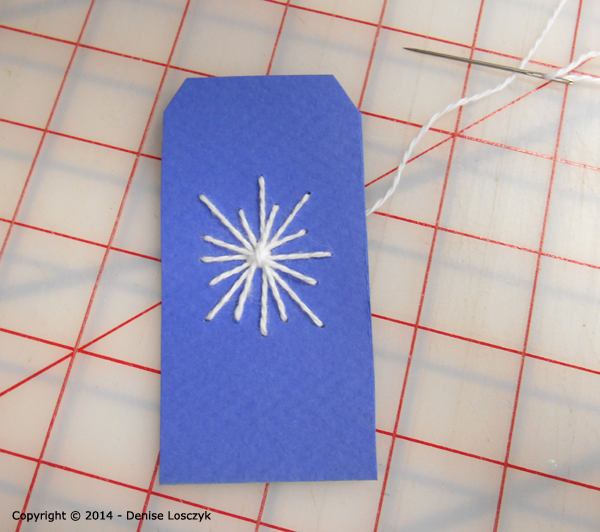
- Glue front of ornament to background rectangle, make sure edges are secured, with no gaps.
- Trim ornament edges with paper edge cutting scissors of your choice.
- Glue sequins onto front of ornament, as shown in photos. A small dab of glue will secure the sequins.
- Wait until glue has completely dried, then create hanger for ornament, by threading yarn through top of ornament and tying in a knot.
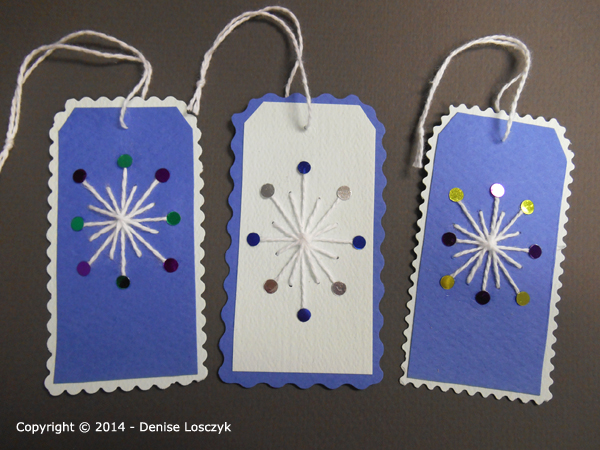
Your ornament is now ready to gift – add an inscription on the ornament back, or add the year and/or name to the ornament front.
Happy Holiday Gifting and Creating!
Denise A. Buchwalter-Losczyk
***Denise has a new essay published in Quilter’s Newsletter Magazine Dec. 14/ Jan. 15 edition. It is in the 300 Words about Quilting section, and is about Quilting for Competition, titled “Challenging Yourself.”***

