
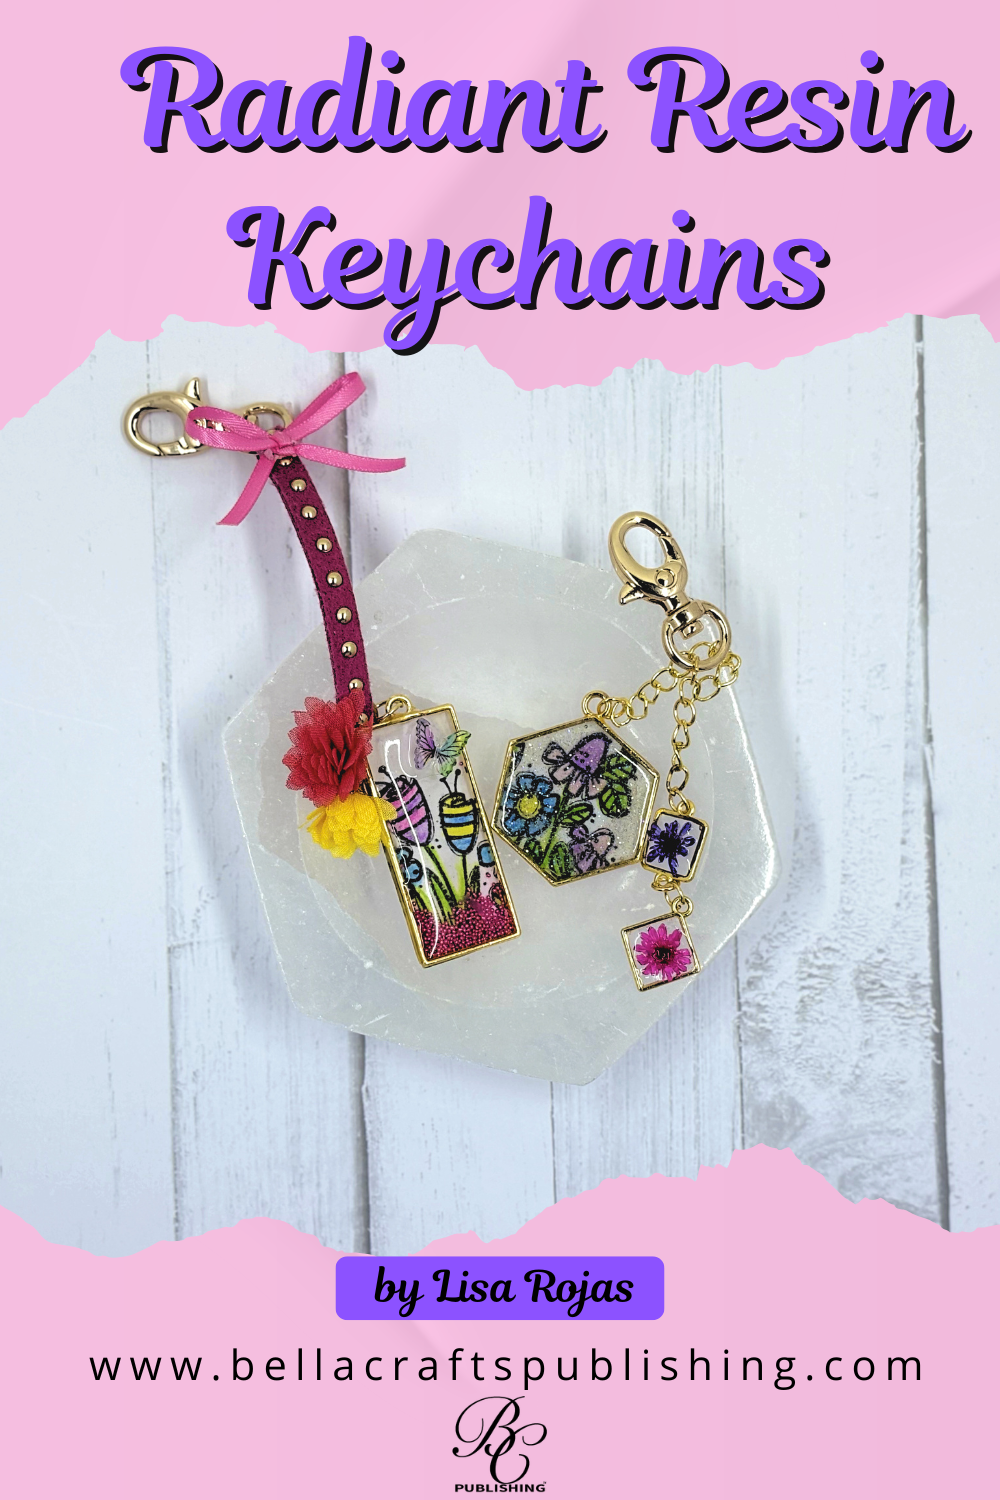
Discover the allure of our Radiant Resin Keychains, where rubber stamps and UV resin come together to create a stunning accessory that brightens your day.
Please note: This post contains affiliate links. If you use these links and make a purchase, we earn a commission at no extra cost to you…
It’s no secret how much I love paper arts and rubber stamps! So, anytime I can use my stamps with other products, I’m in crafting heaven! I also love the look of resin, but I never liked the mixing, etc, and waiting for it to cure. Then I found UV resin and it’s a game changer. It’s so quick and easy to use, even for beginners, and I promise you will be hooked if you give it a try. These keychains are the second project I created with UV resin but it definitely won’t be my last!!! Stay tuned… Crafty hugs, Lisa~
Check out the full list of supplies at the end of this post.
Step One:
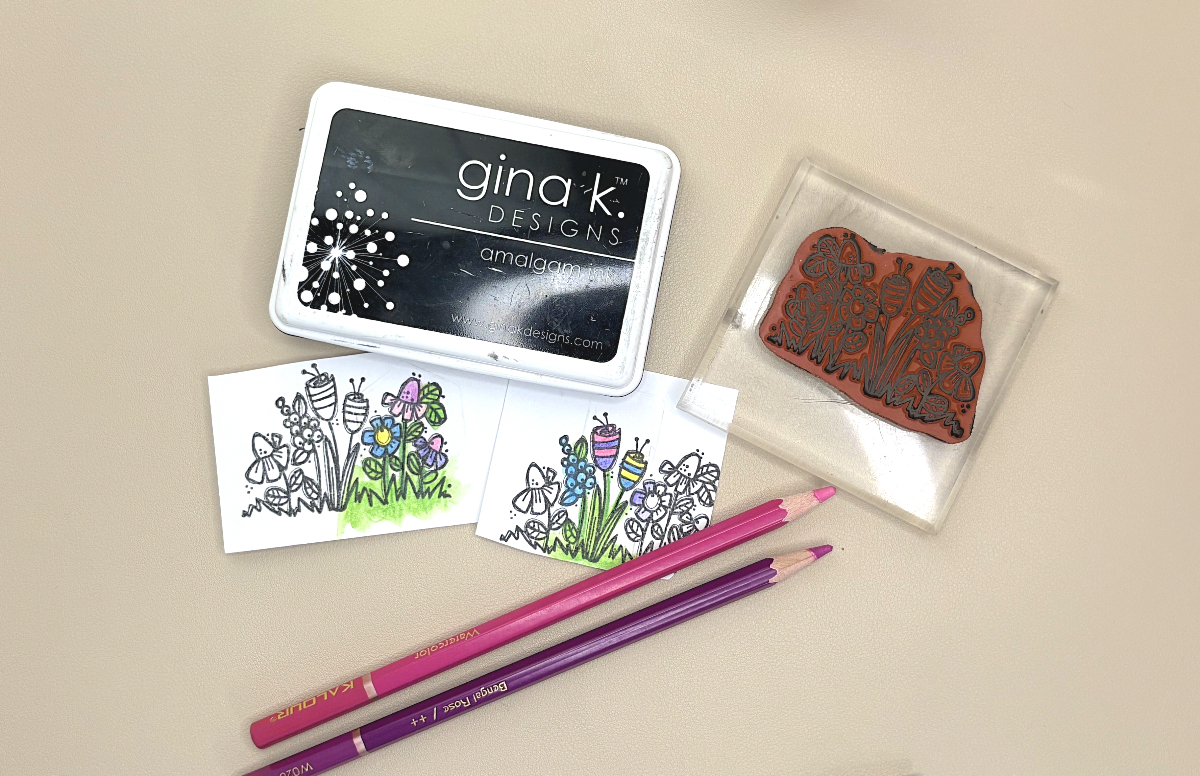
Stamp the images with the Black inkpad onto White cardstock. Use watercolor pencils to add color to the images.
Step Two:
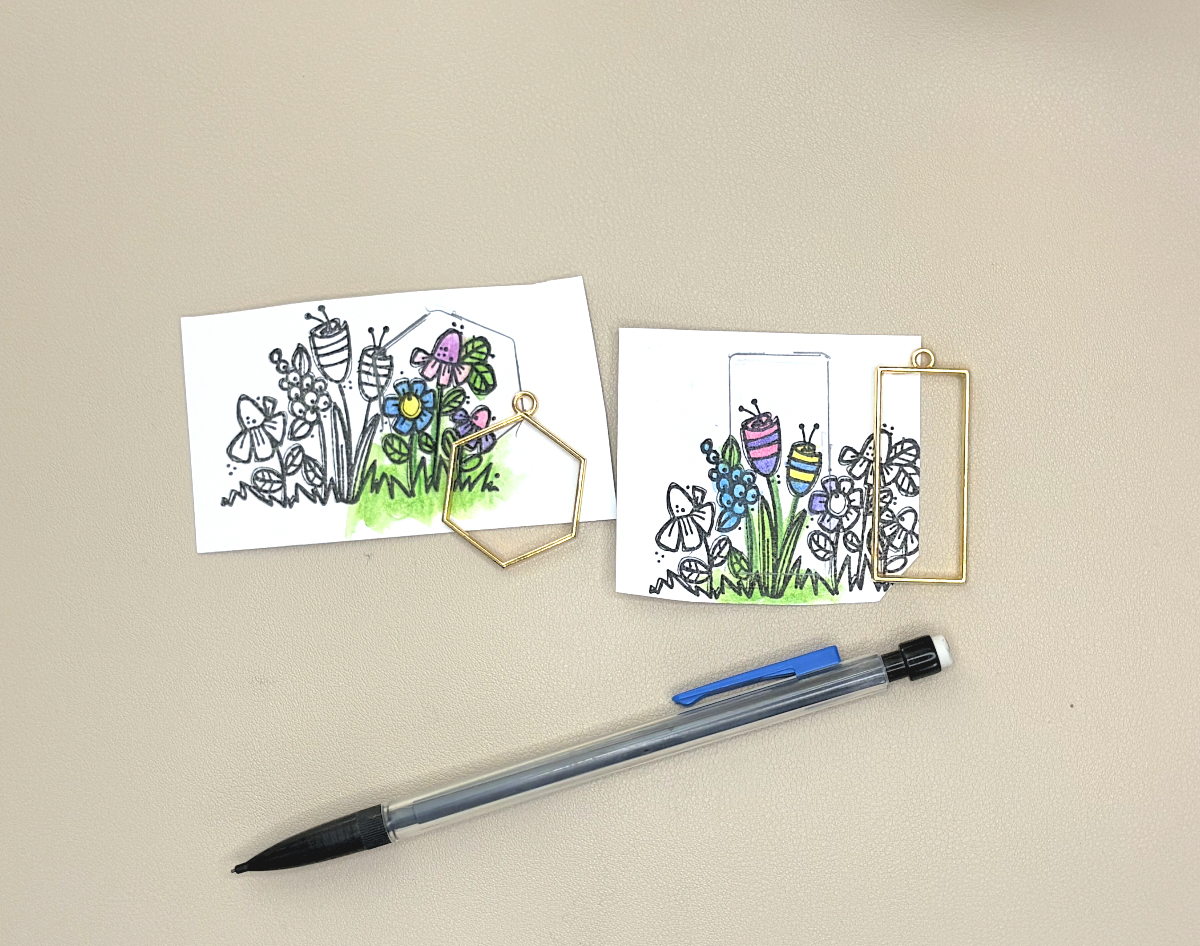
Lay the jewelry bezels onto the images. Trace them with a pencil and cut them out. Apply a light layer of resin to the images with a paintbrush. Press the bezels on top and place under the UV light for approximately 15 seconds, making sure you have a tight seal between the paper and the bezels. If not, the resin will pour out of the bezels. Apply another layer of resin onto the backs of the bezels and cure for 60 to 90 seconds.
Step Three:
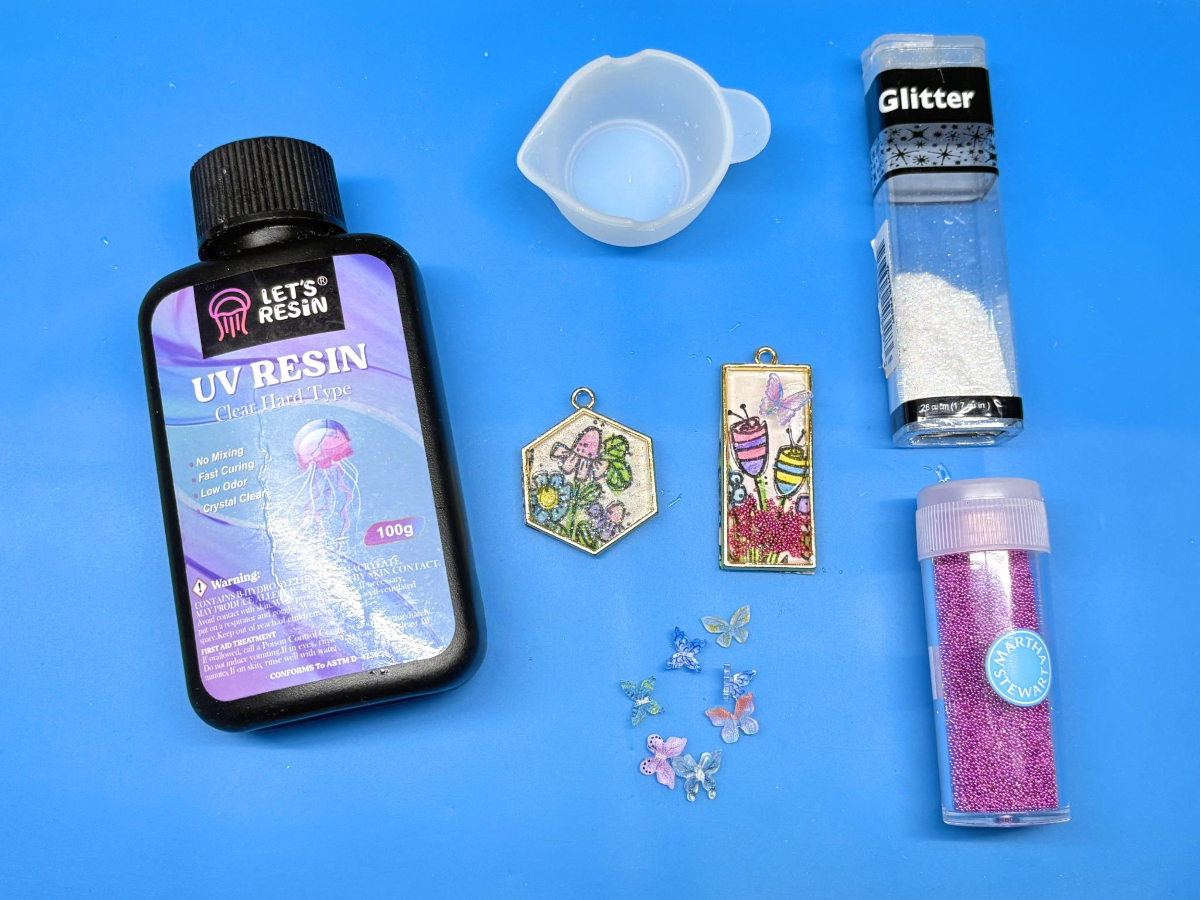
Add the glitter and colored micro beads into the bezels and fill the up with resin. Next, place them under the UV light and cure for 60 to 90 seconds. If the resin is still sticky, place the bezels under the light again. For the rectangle bezel add a tiny amount of resin to attach the butterfly and cure for a few seconds.
Note: The curing time for the UV resin will vary depending on the type of resin, how much fillers and dyes you add, the size of your project, etc. Follow the manufacturer’s directions for the resin you’re using. The more you use it, you’ll figure out the curing time for each of your projects. It really is very simple to use and you’ll be amazed with the results!
Step Four:
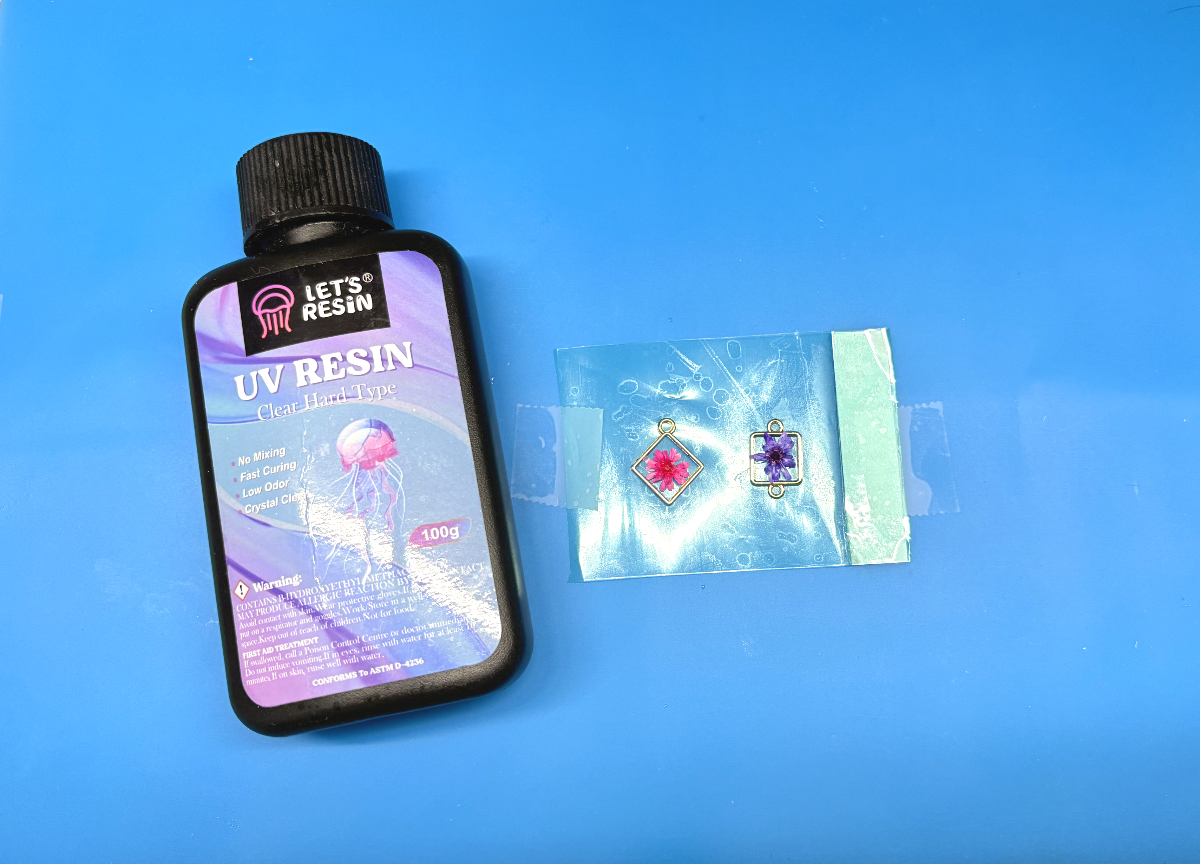
The two mini bezels I used do not have a paper backing so the technique is a little different. Cut a piece of heat resistant tape and tape it down on the silicone mat. Place the mini bezels onto the tape and press down, creating a tight seal between the tape and the bezel. Lay the dried flowers inside the bezels and fill them with resin. Put the bezels under the light and cure for 60 seconds. Once they are cooled, remove them from the tape.
Step Five:
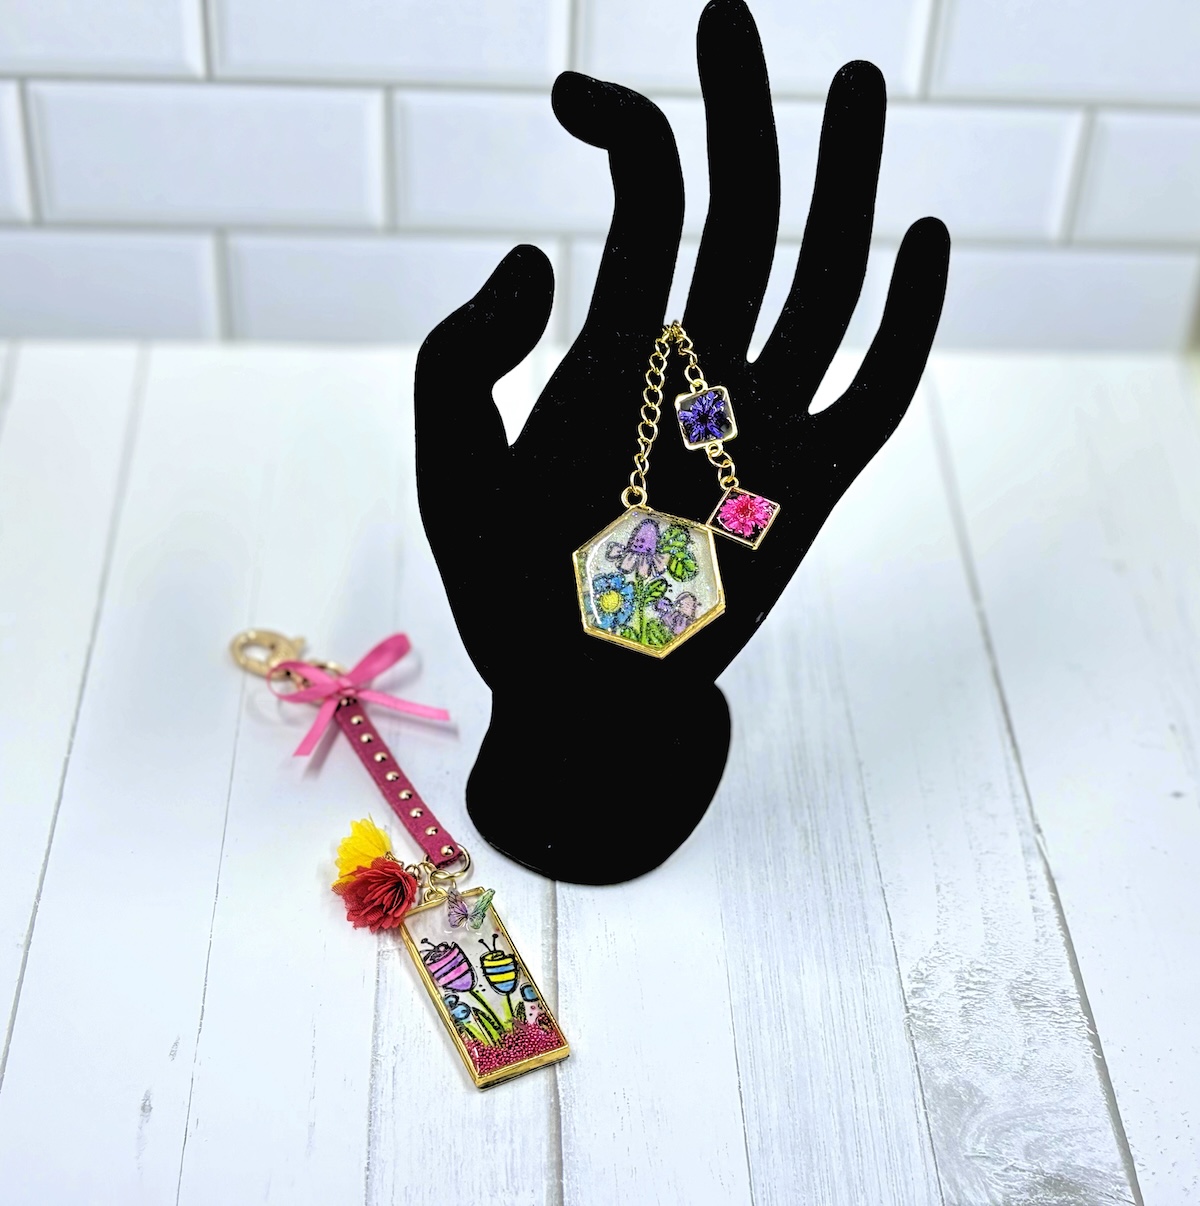
To finish the keychains, add them to a jewelry chain with jump rings and a lobster clasp at the top. For the rectangle keychain, cut a piece of suede ribbon 5″ long. Slip the lobster clasp onto the ribbon, fold it in half and glue, leaving the very end of the ribbon open. Place a jump ring in between the ends and glue them closed. Add tassels and the bezel to the ribbon with jump rings and adhere a small bow at the top.
Radiant Resin Keychains
Here’s Another PIN For You To Share!
Complete Supply List
- Cardstock, White
- Floral Rubber Stamp
- Gina K Designs Inkpad, Obsidian
- Watercolor Pencils
- Let’s Resin UV Resin Kit, Clear Hard Type
- Let’s Resin Jewelry Frames
- Let’s Resin Heat Resistant Tape
- Jewelry Chain
- Jump Rings, (8)
- Lobster Clasp, (2)
- Tassels, (2)
- Dried Flowers, Mini
- Glitter
- Micro Beads
- Butterfly, Mini
- Suede Ribbon
- Ribbon, Pink, 1/8″
- Paintbrush
- Scissors
- Jewelry Pliers
- UV Light- (Mine came in the kit)