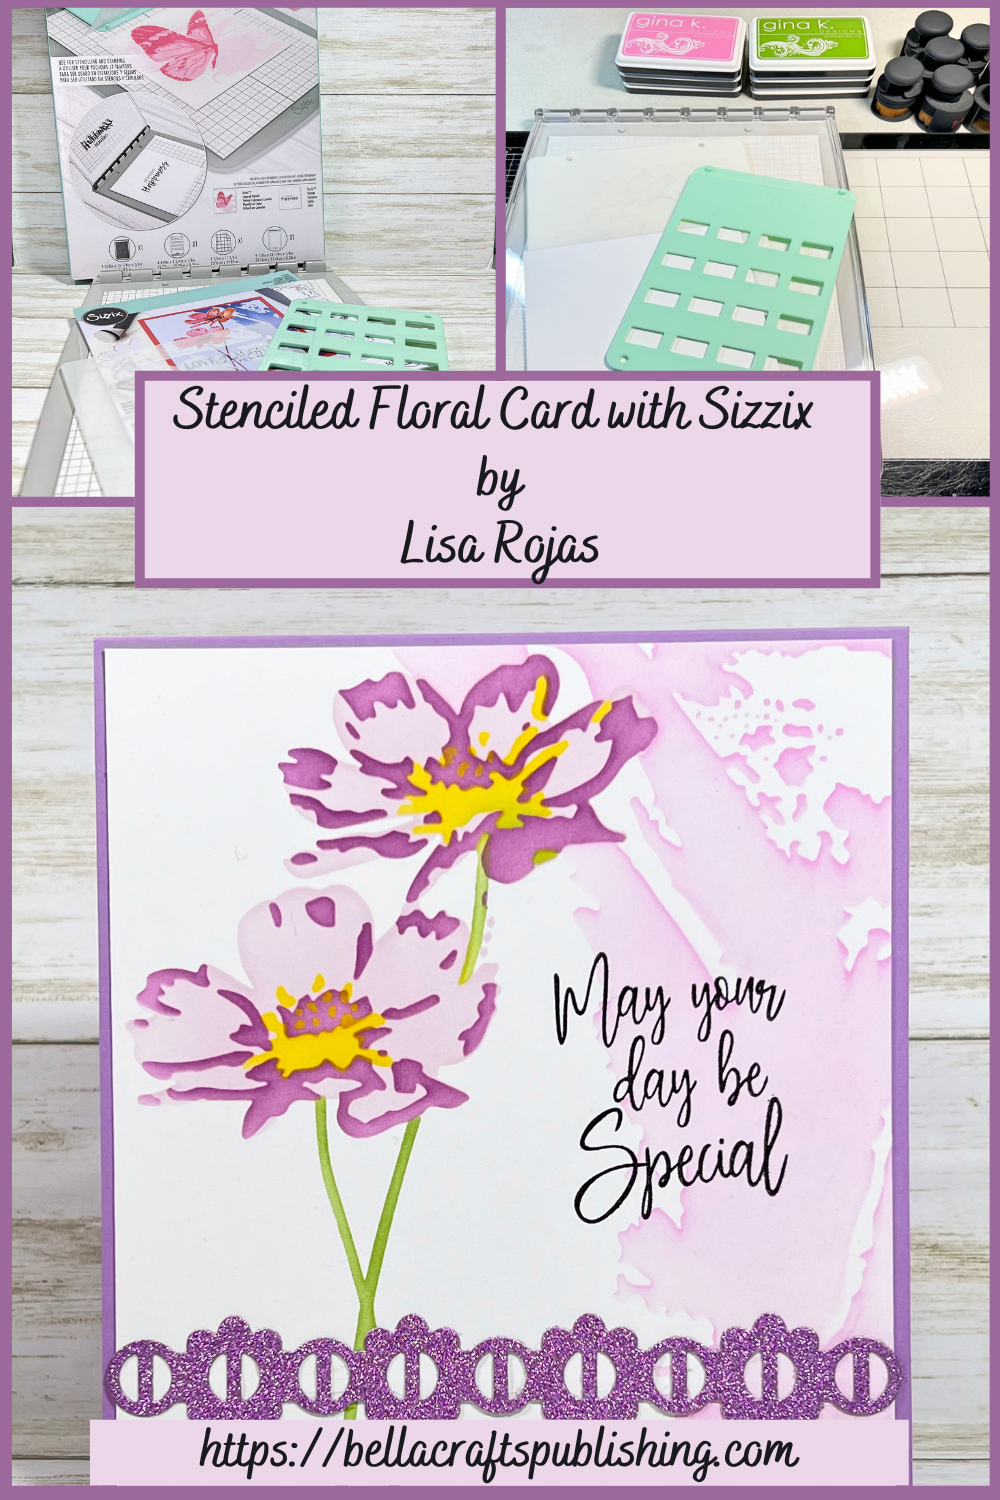
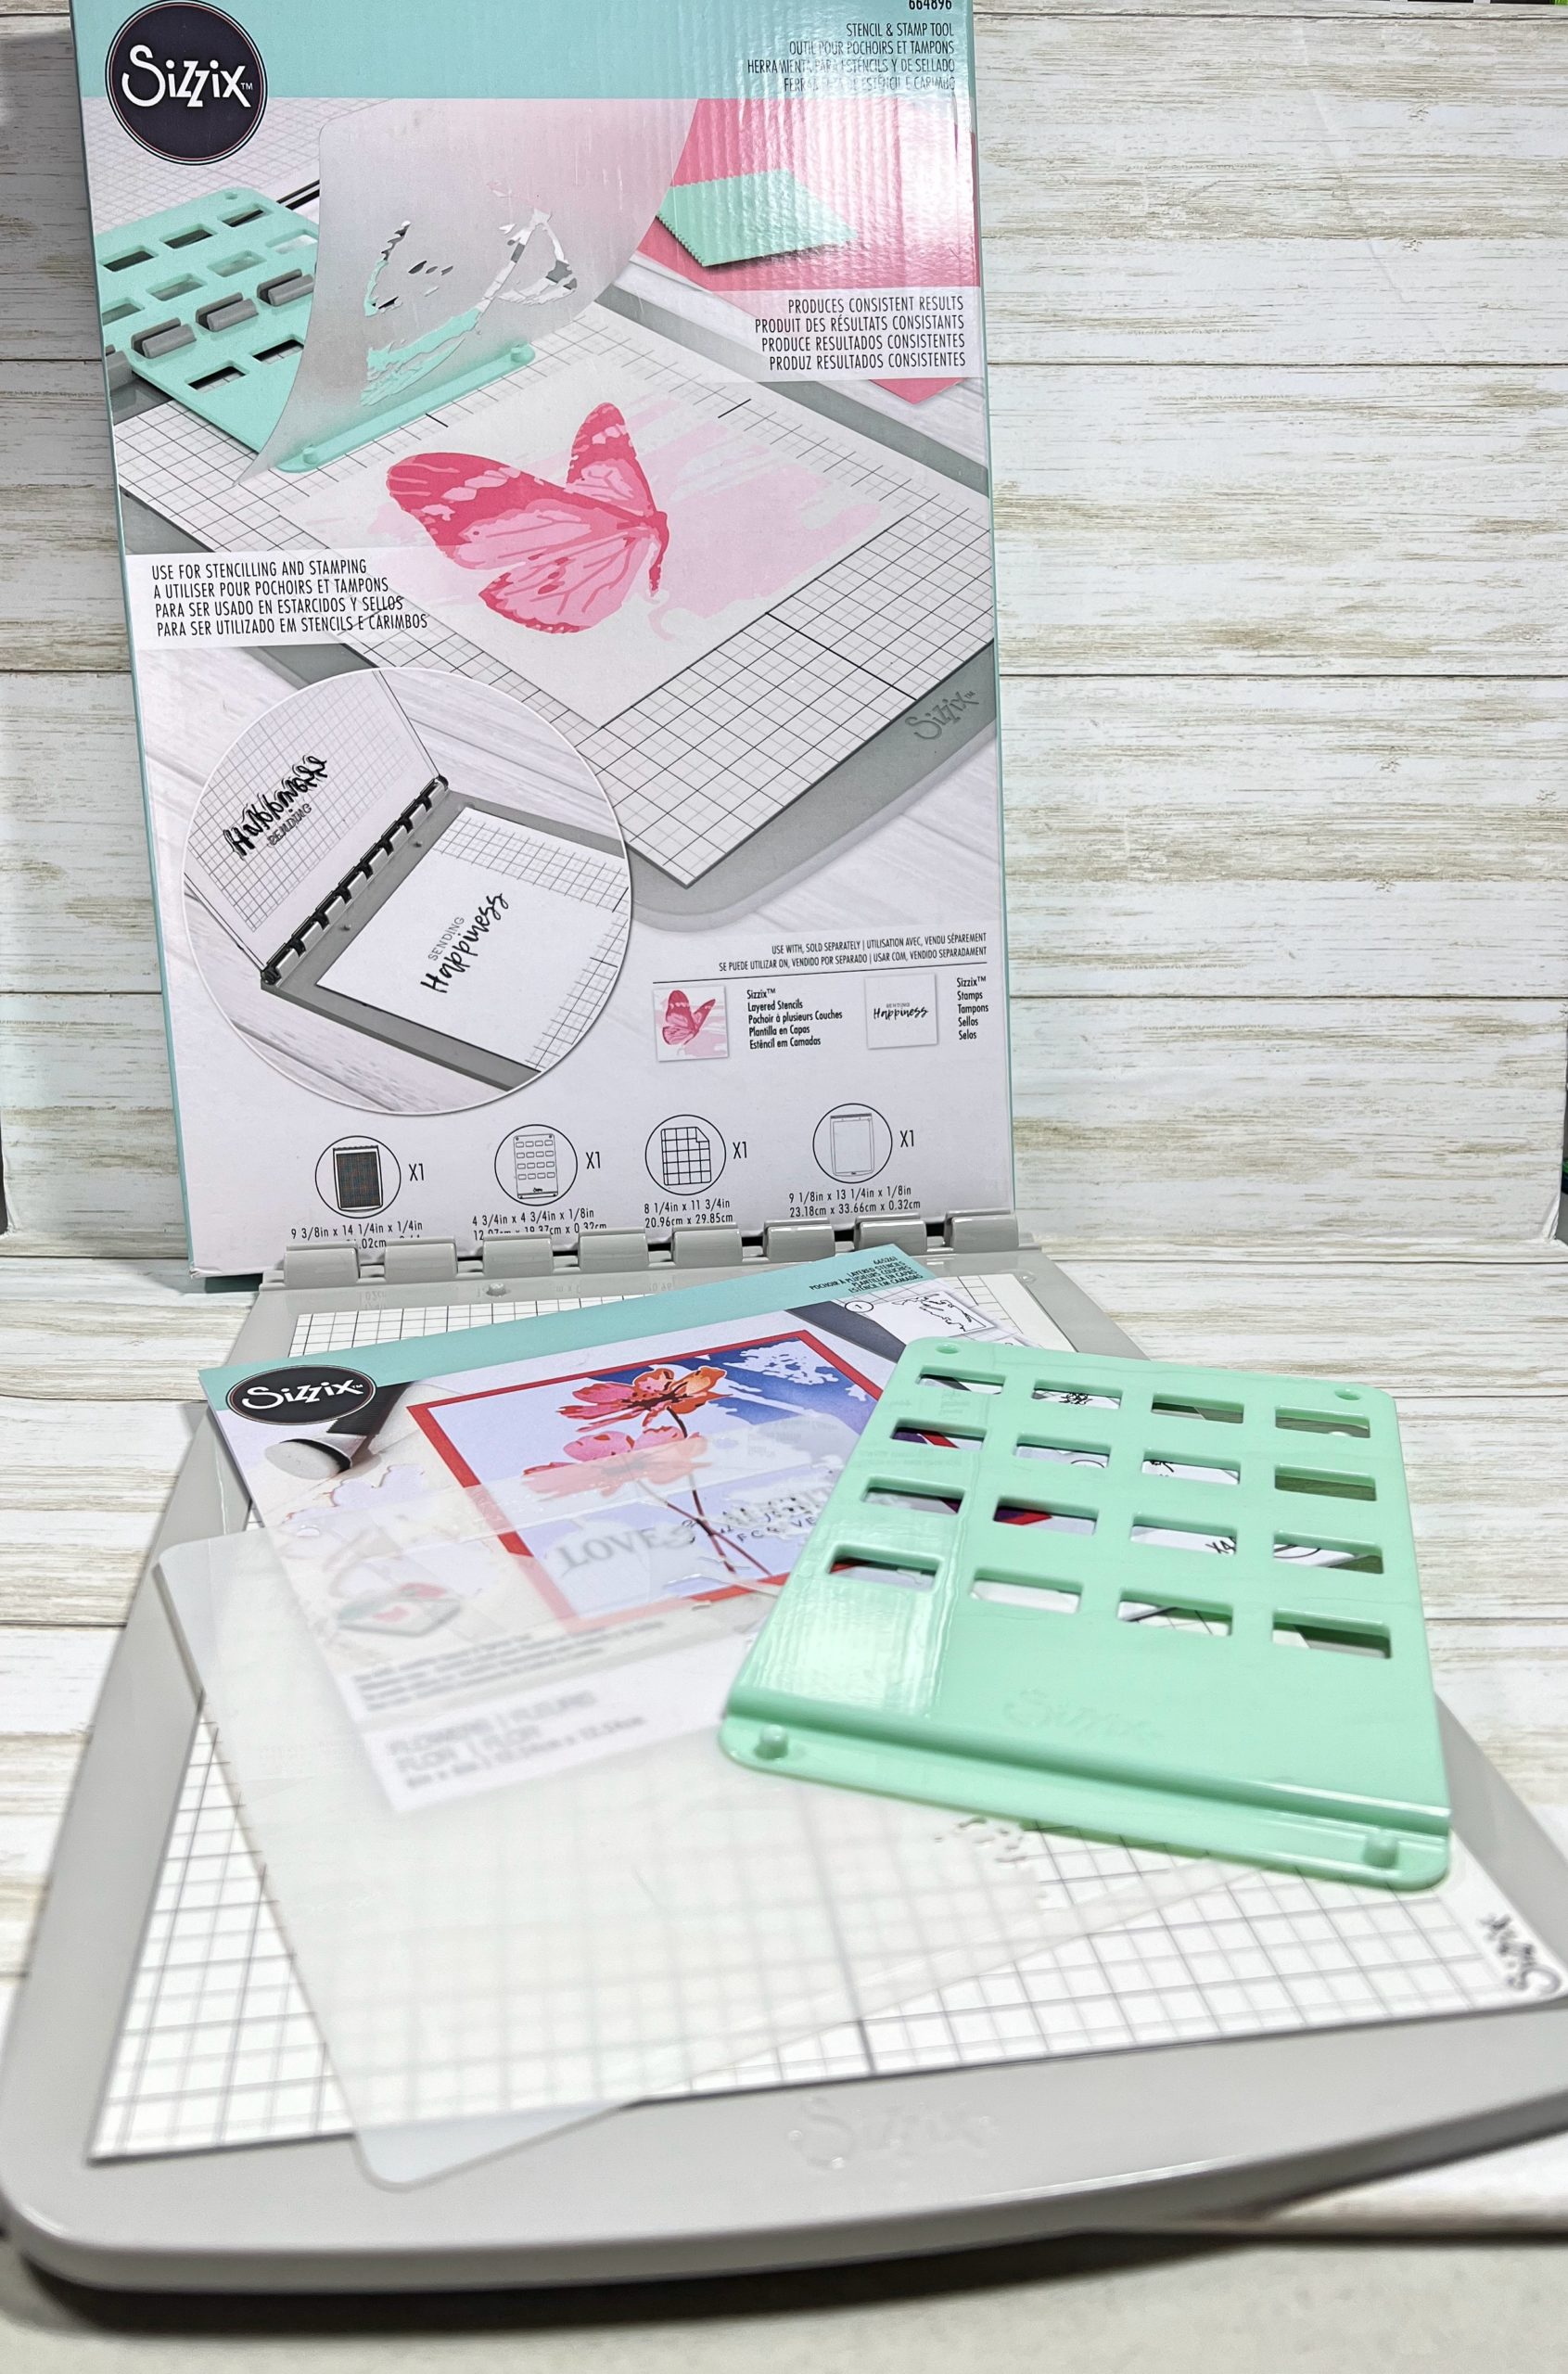
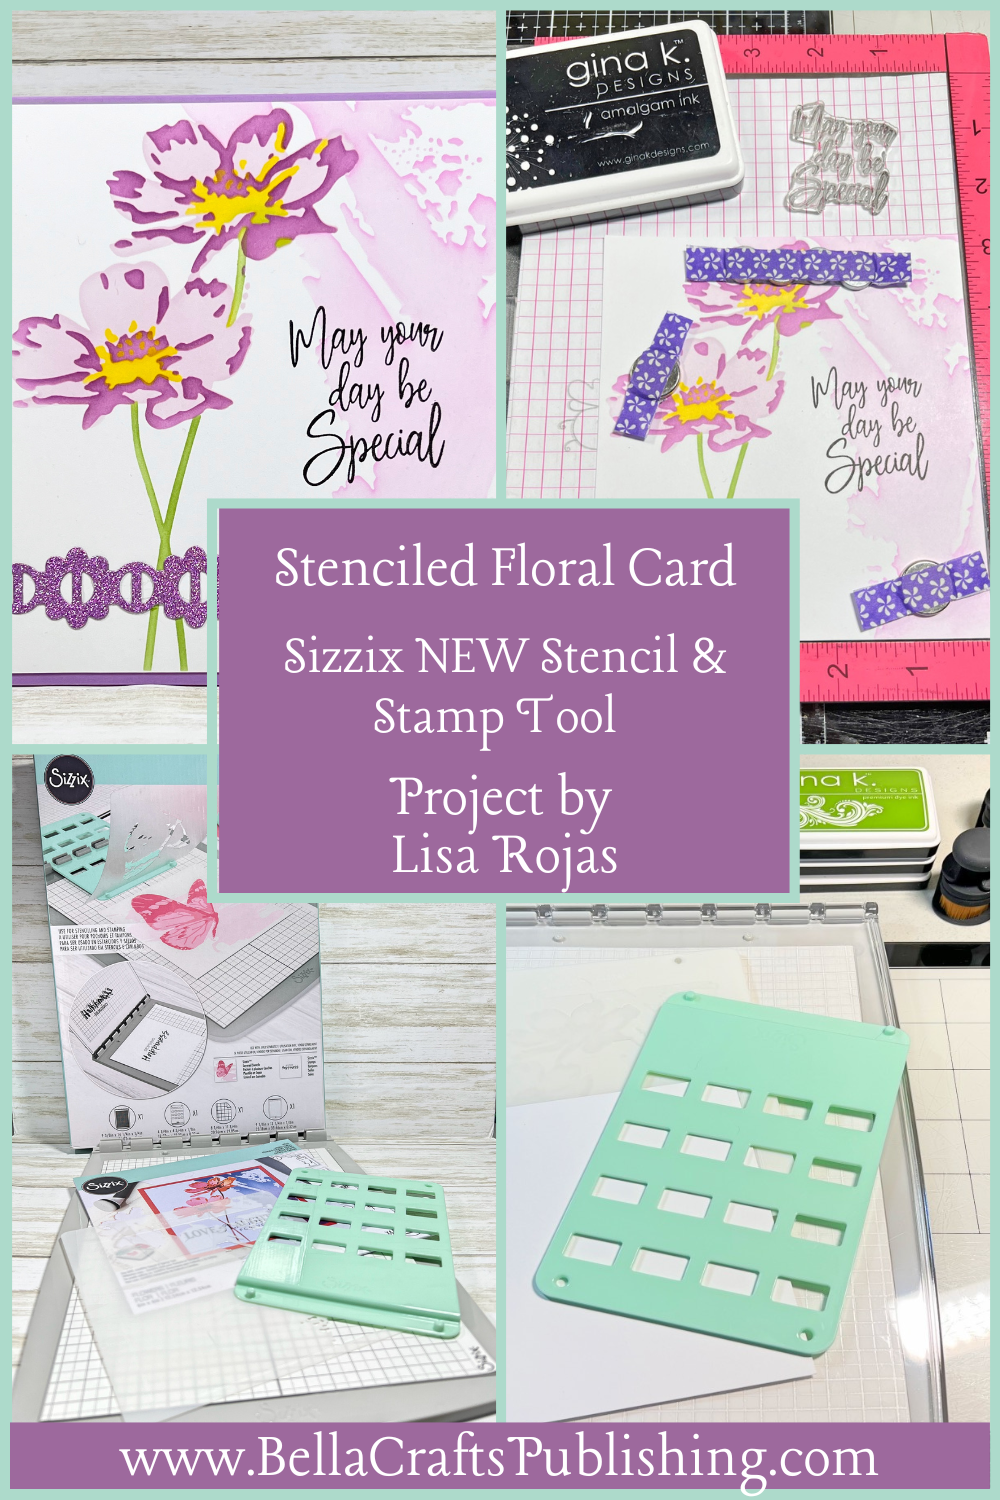
If you’re looking for something new to add to your crafty tool box, Sizzix Stencil & Stamp Tool is just for you!
Please note: This post contains affiliate links. If you use these links and make a purchase, we earn a commission at no extra cost to you…
I’ll admit it…I’m a gadget girl! Anytime I find a new crafty tool I just have to have it. But, I also have to say that there has been times when I buy a new tool I try it once and then it gets put away. Happily, that won’t happen to this one. The Sizzix Stencil & Stamp Tool is amazing! It makes using multiple layers of stencils and stamps a breeze. The card below was created in less than 20 minutes, but it looks like I spent hours working on it. Should you buy this product? That would be a definite YES from me!!! I hope you give it a try. Have fun! Lisa~
Instructions for the Stenciled Floral Card
Steps One, Two, Three:

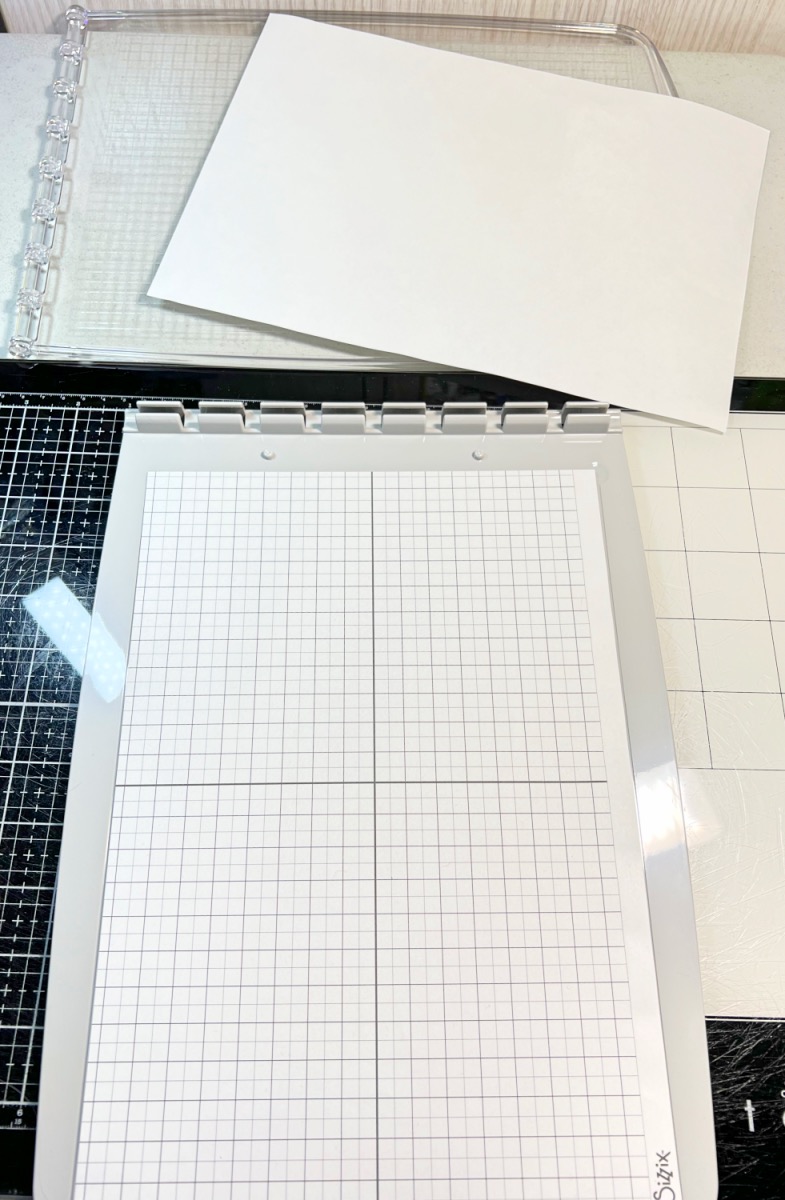

To begin, gather your supplies and remove the clear lid from the platform.
Place the sticky grid sheet on the platform.
Cut a pice of white cardstock 5 3/4″ x 6 1/2″ and lay it on the grid sheet. Next, attach the green stencil adapter as shown.
Steps Four, Five, Six:

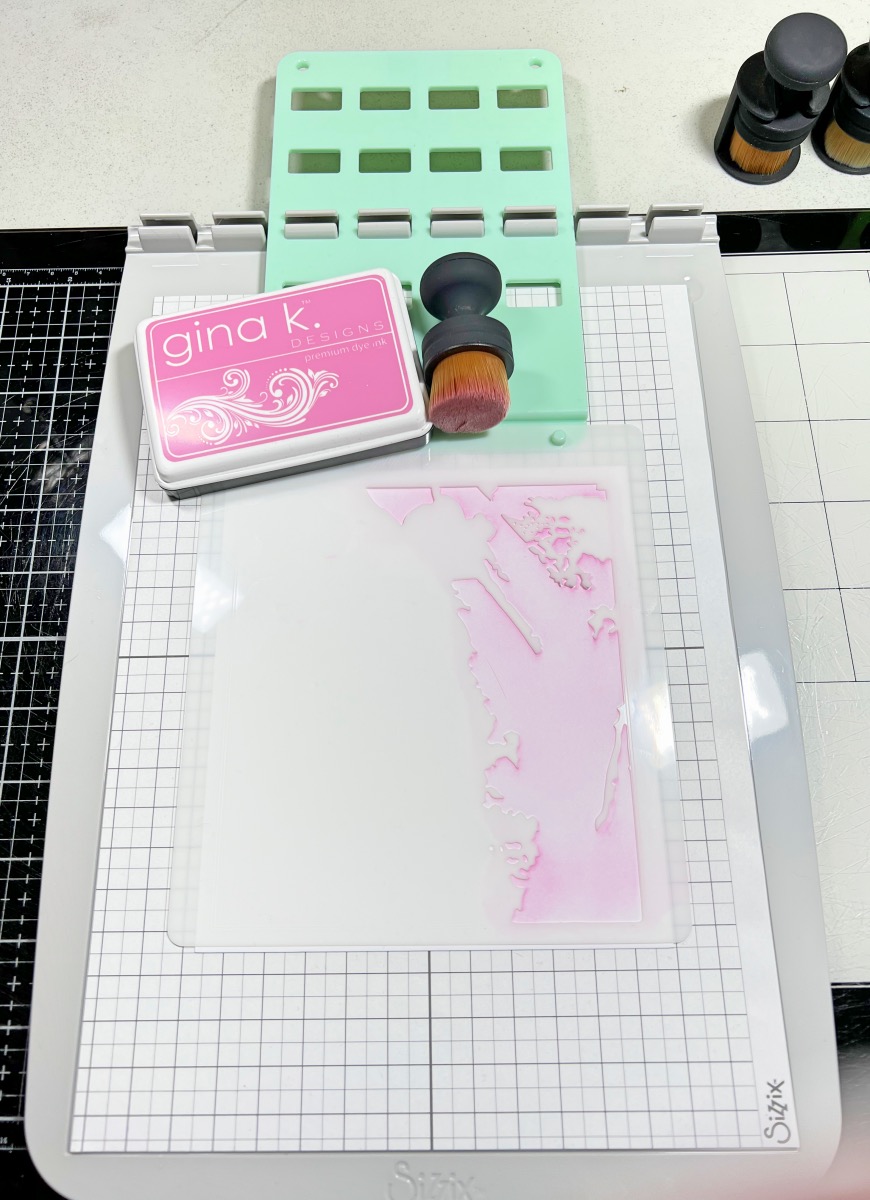
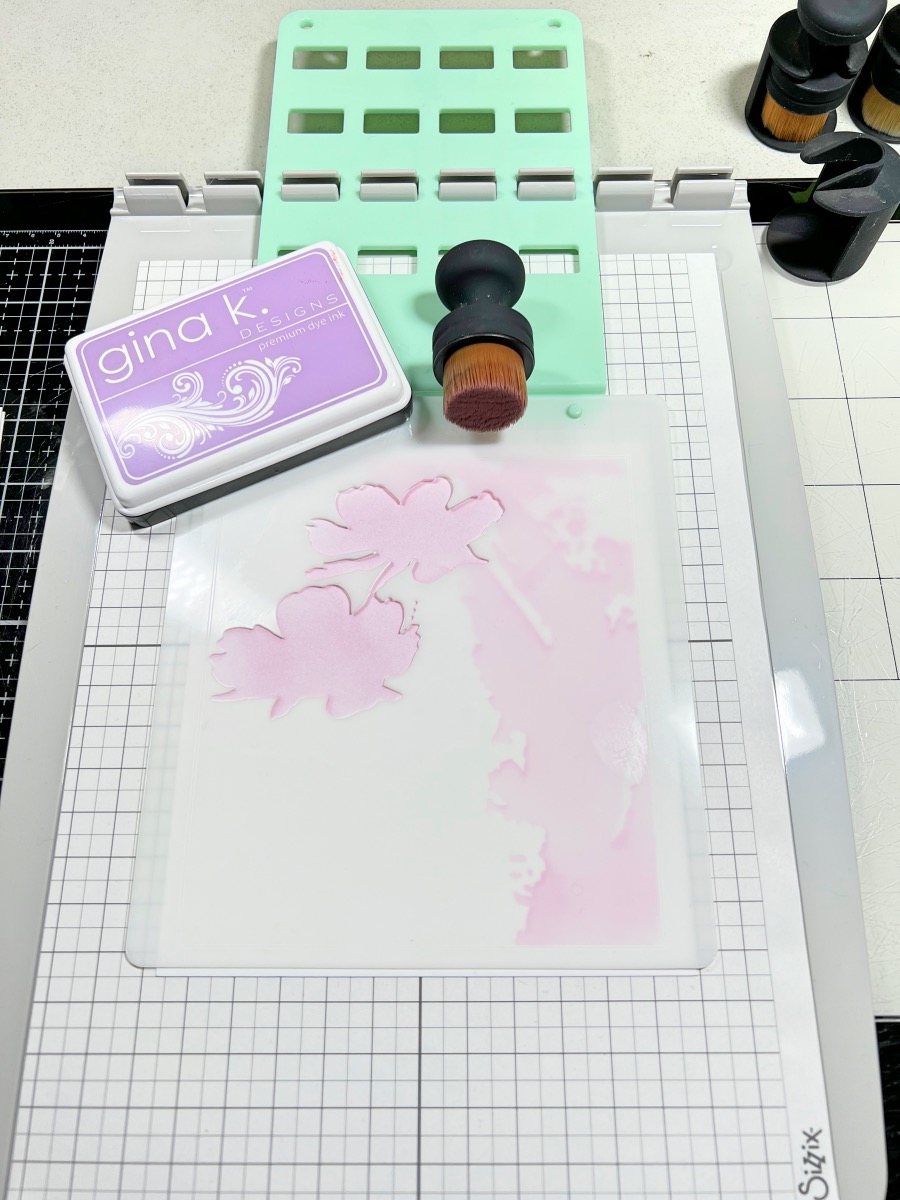
This card uses four layered stencils and each one is numbered. Place #1 stencil on the platform as shown.
Use the Bubblegum Pink inkpad and a blending brush to apply onto the stencil.
Remove the stencil and place the #2 stencil down and repeat applying ink to the cardstock with the Lovely Lavender inkpad.
Steps Seven, Eight, Nine:


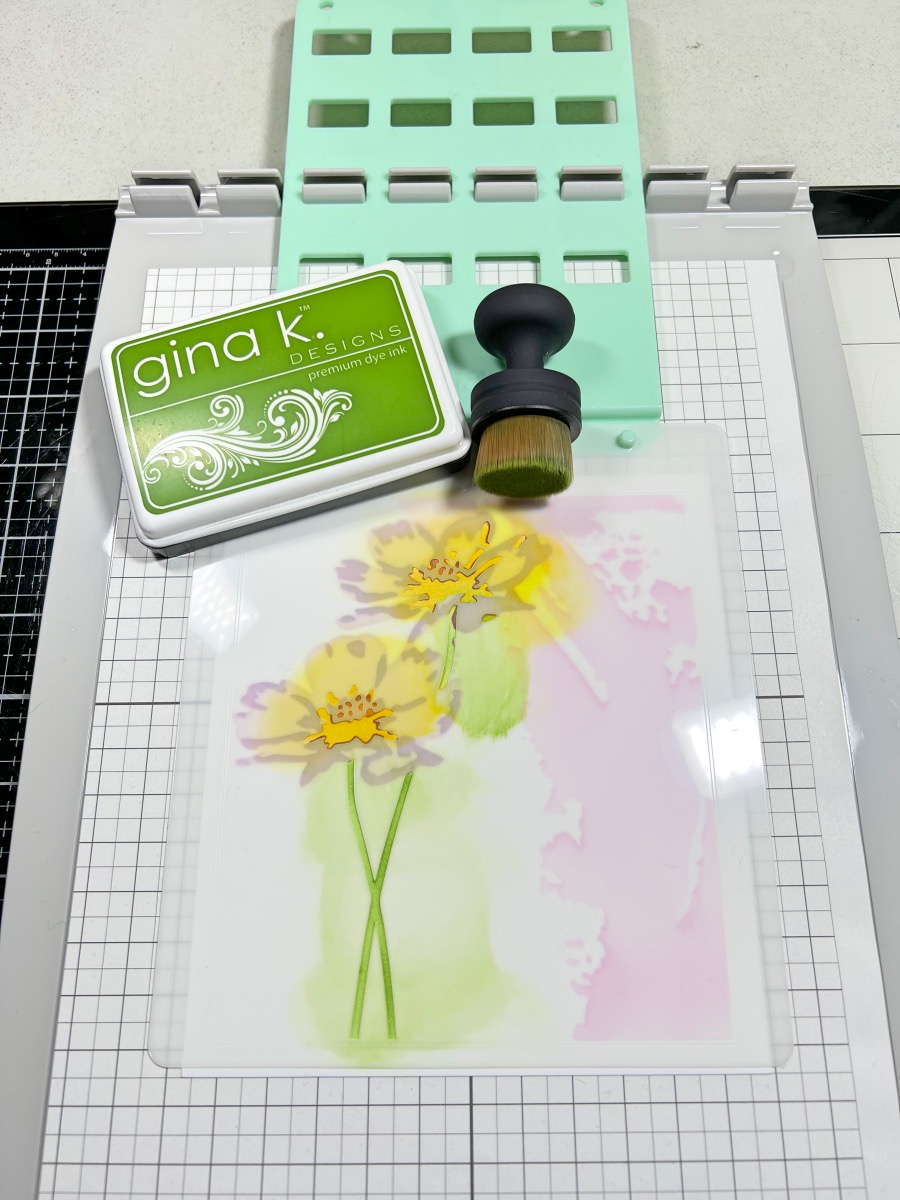
Remove stencil #2 and place #3 on the platform and apply Plum Punch ink to the stencil.
Remove the #3 stencil and attach #4.
Continue adding ink to the #4 stencil with Wild Dandelion inkpad. For step 9, keep the stencil on the platform and add the Grass Green ink to the flower stems.
Steps Ten, Eleven, Twelve, Thirteen:


Cut the cardstock to 5 1/4″ x 5 3/4″.
Place the cardstock into the MISTI and stamp the sentiment with the Obsidian inkpad. Cut the lavender cardstock for the base card, 5 1/2″ x 6″. Die cut a border die from lavender glitter paper.
To finish, adhere the papers together and attach the glitter border to the card as shown in finished photo below.
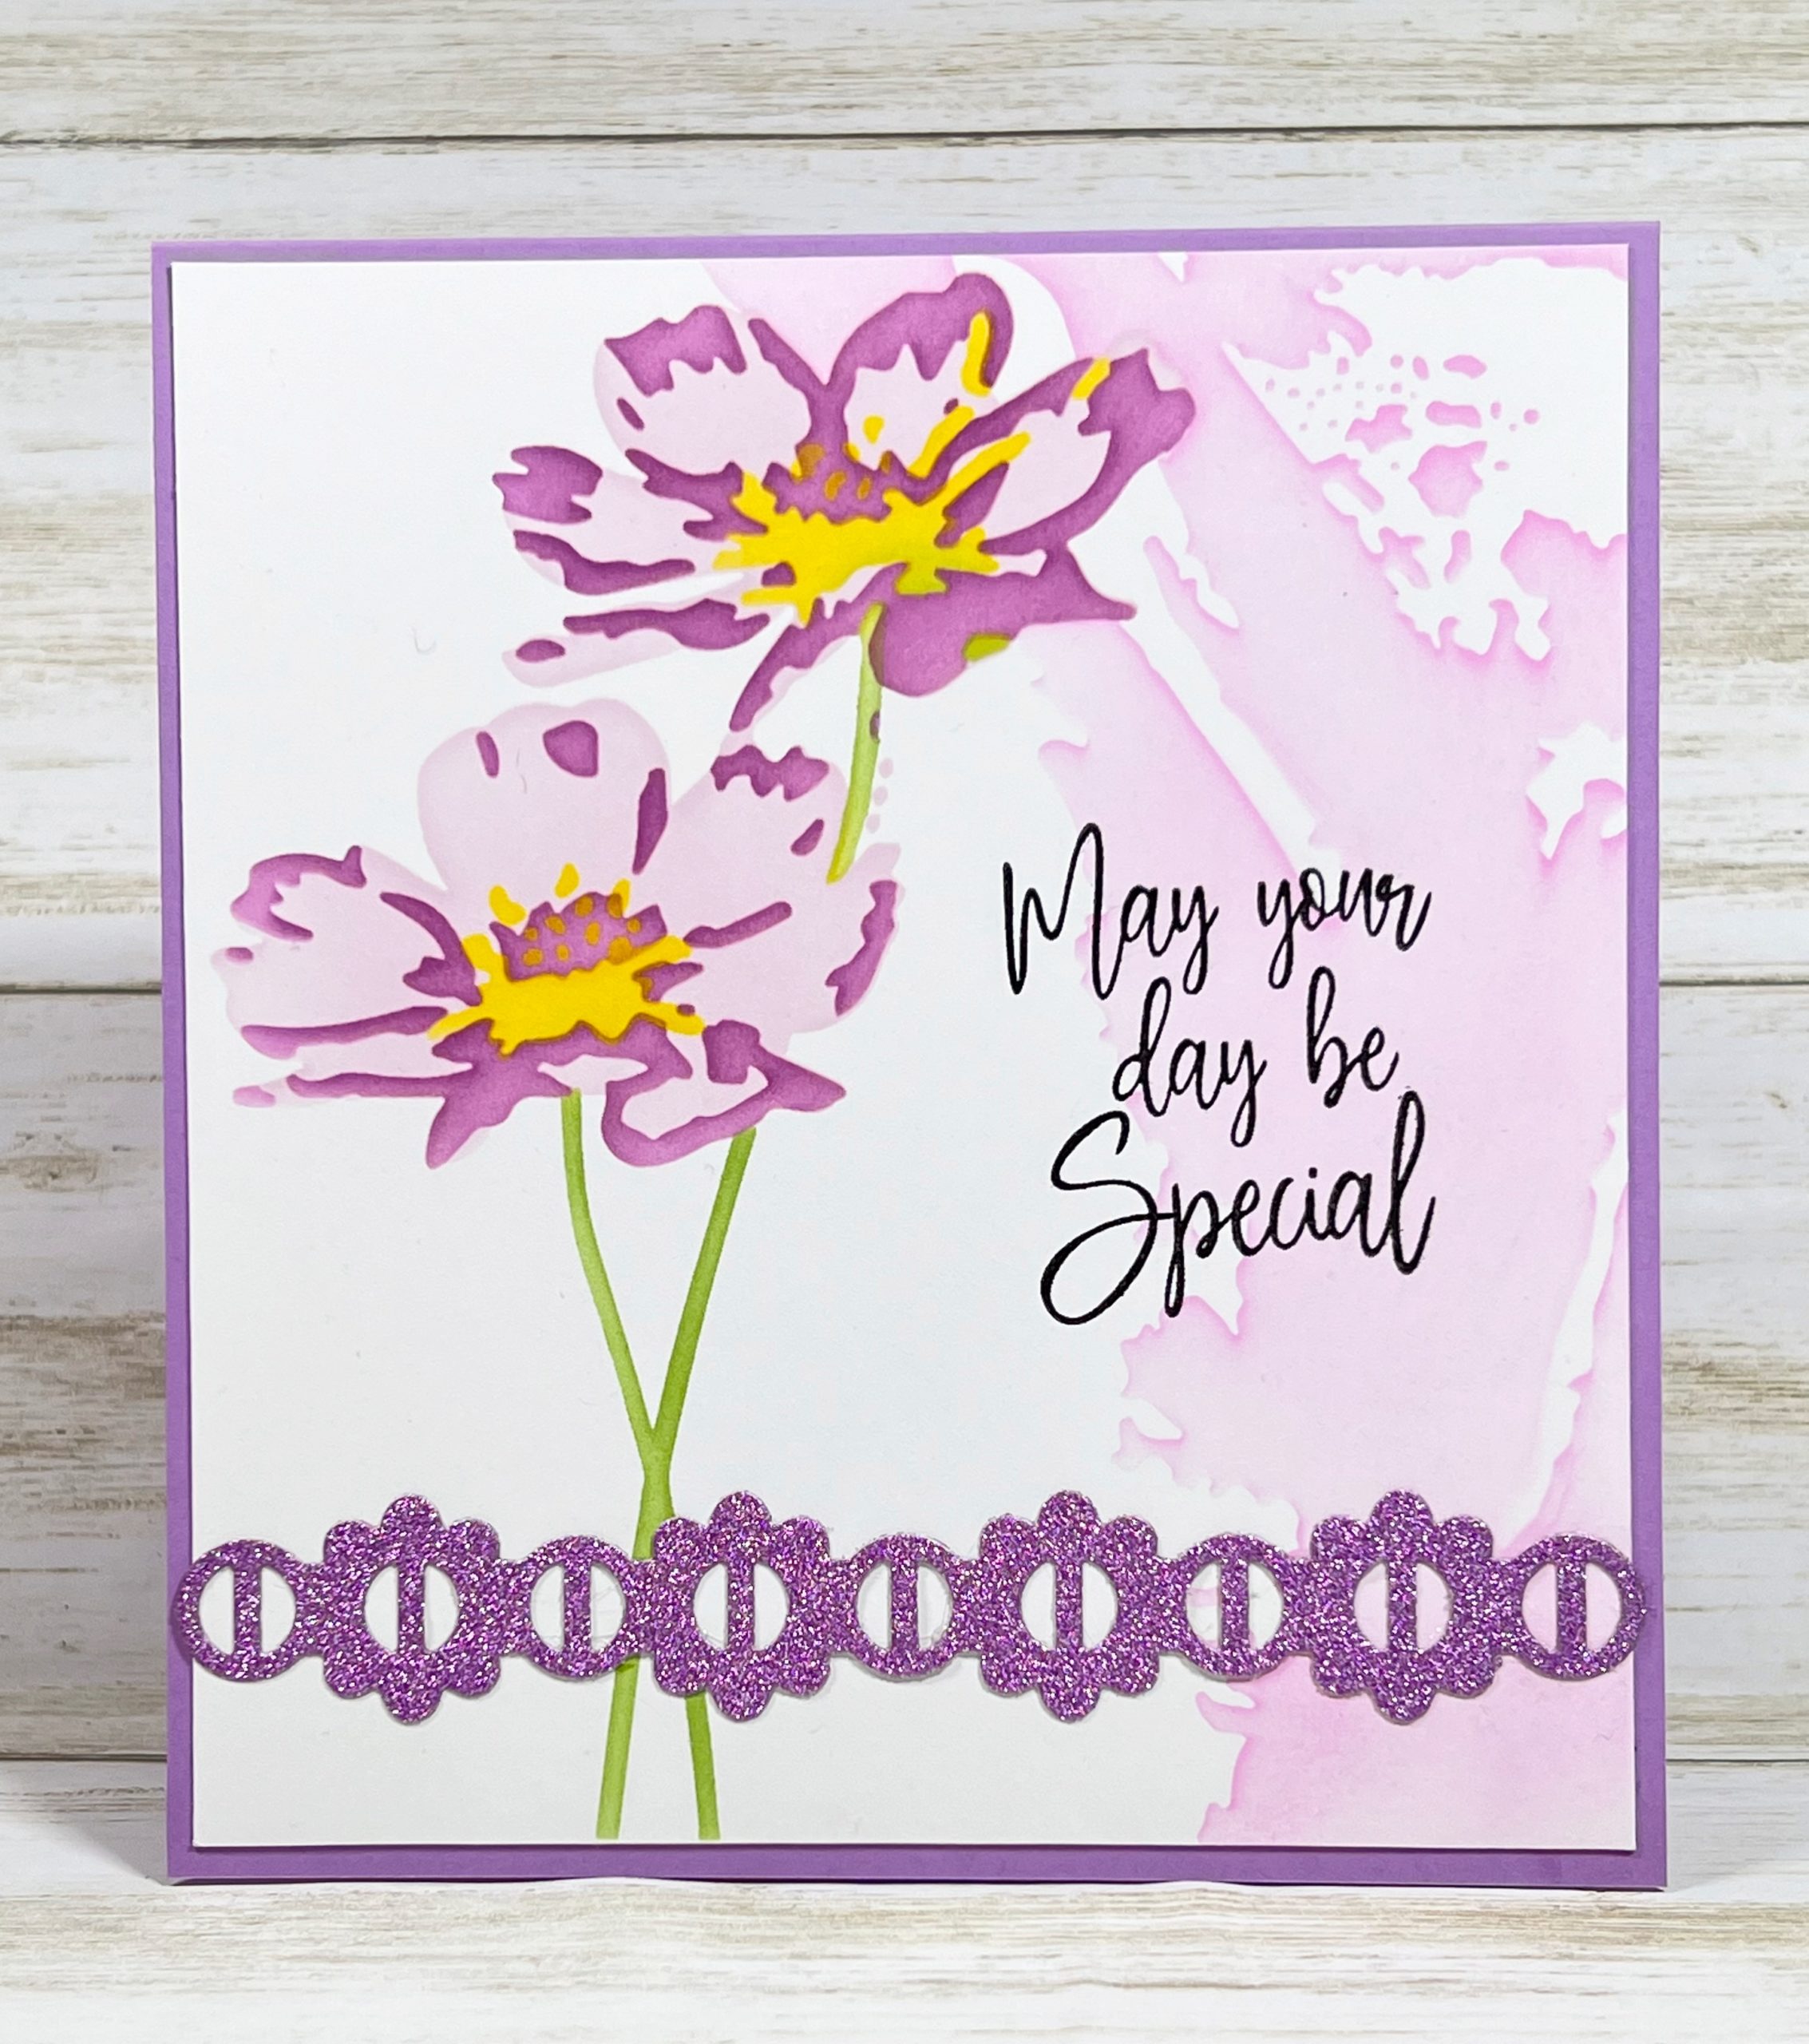
Stenciled Floral Card with Sizzix Tool
- Cardstock: White, Lavender
- Glitter Paper, Lavender
- Gina K. Designs Inkpads: Obsidian, Wild Dandelion, Plum Punch, Lovely Lavender, Bubblegum Pink, Grass Green
- Sentiment Stamp
- Beacon Adhesives Zip DryPaper Glue
- Pink and Main Blending Brushes
- Sizzix Stencil & Stamp Tool
- Sizzix Layered Stencils Set # 665261
- Stampendous! Border Die
- Sizzix Big Shot Die Cutting Machine
- Paper Trimmer
- MISTI Tool
One more PIN to share
Interesting tool; love working with stencils!
It is great!