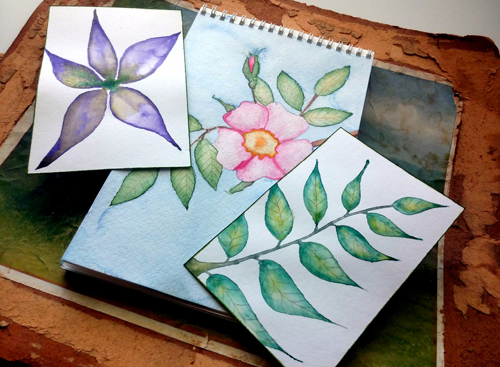
This is Molly Alexander and I’m back to share a wonderful wet on wet watercolor notecard tutorial with you. This project is so beautiful and simple you will want to make a whole bunch of these cards to send to someone special or to frame for your wall!
[Tweet “Beautiful watercolor notecard tutorial #watercolor #notecard #tutorial”]
Supplies/Tools:
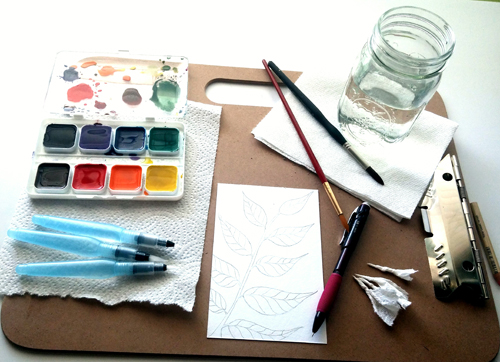
- Watercolor paints
- Round watercolor brushes, size 8 and size 10
- 4″ x 6″ watercolor sheet
- Water brushes in multiple sizes
- Pencil
- Jar of clean water
- Paper towels
- Optional: dark green or brown inkpad
Instructions:
- Lightly draw your vine and leaves in pencil on your watercolor paper. Try not to erase too much as this can cause the paper to lift apart and affect how it absorbs the paint.
- Add significant water to the green, brown and yellow dry watercolor paint. Keep adding small amounts of water until there is a layer of water sitting on top of the paint.
- Tear off small pieces of paper towel (approximately 1″ x 1″) and roll one end of each piece into a point (see photo above).
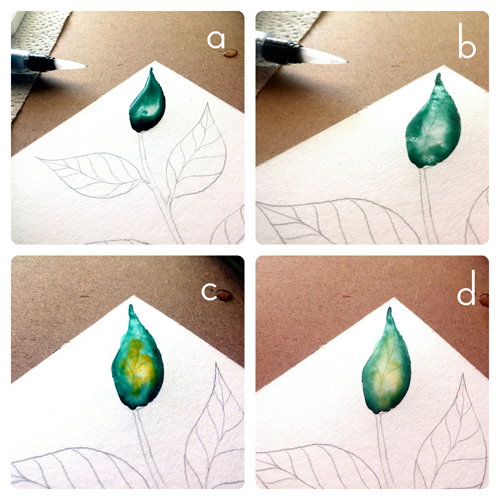 Using the smallest water brush, carefully outline and then fill in the first leaf with a layer of water. Slowly add drops of water until the water is slightly domed. The water will stay in the lines as long as you are slow and careful as you add it to the drawing. Now, using the smallest size of watercolor brush, add small drops of green paint to the top, the bottom and each side of the leaf (figure a). The paint will start to move around the water, coloring the leaf.
- Using the tip of one of the pieces of the rolled paper towel, *barely* touch the top of the domed water and allow the paper towel to soak up a good part of the paint and water (figure b). You may need more than one piece of paper towel.
- Now, this will seem counter-intuitive, but you need to slowly add a couple of more drops of water to the middle of the leaf. This will serve to push the pigment to the outside edges of the leaf as it dries.
- Add a couple of small drops of the yellow paint to the middle of the leaf (figure c).
- Repeat steps 5 and 6. Your leaf will now have light green-yellow in the center and a darker green on the edges (figure d). Don’t be tempted to soak up the excess water on the leaf. The water helps the pigment dry in a natural way and adds interesting texture to the leaf.
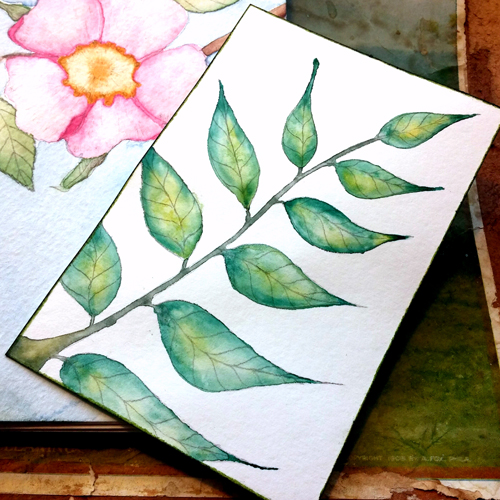
- Repeat these steps for all of the leaves, being careful not to bump the paper. After the leaves have dried a bit, you can color the stem. To create a more natural look, you can mix a little bit of brown with the green so the stem is darker than the leaves.
- Set your card aside overnight.
- Once your card is 100% dry, you can add ink to the edges of the notecard if you desire.
- Stand back and admire your work of art – well done!
These are beautiful Molly! Great tutorial!
Thanks Carmen!
I love these Molly. Thank you for sharing.
Thanks Larissa!
Lovely project! Thanks for sharing.
Michele
Thanks so much Michele!
Great project Molly. I really want to learn to use watercolors. This makes it look easy.
Thanks Lisa – I think you will be surprised at how easily you get the hang of this method!