Thrift stores and antique stores are great places for finding lovely treasures that you won’t find at your local Walmart. Our guest blogger today, Carmen Whitehead, loves to shop at these type of stores and purchase vintage frames that she can take home and refurbish in something beautiful. And she has done just that with this stunning vintage frame.
One of my favorite things to do on the weekends is visit thrift stores or antique stores and look for old pieces that need a little TLC to bring them back to life. Vintage frames are very common in thrift stores and many times people pass them by because of the artwork in them, but I’m looking at the frame itself and how I can use it another way or with something else that I already have at home. Recently I found a wood frame that was really sturdy and strong, but had a really badly damaged print. The $3 price tag was reason enough to get it and fix it up for a beautiful piece of chenille material I had in my stash.
Materials:
- Thrift Store Vintage Frame
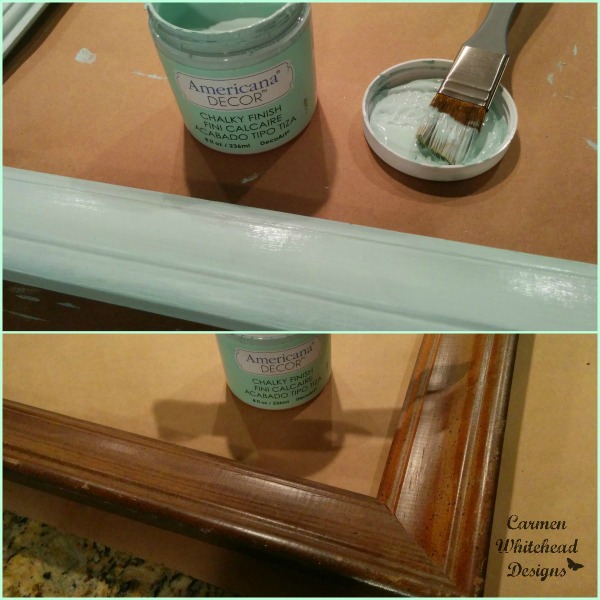
- Americana Decor Chalky Finish Paint in color of choice
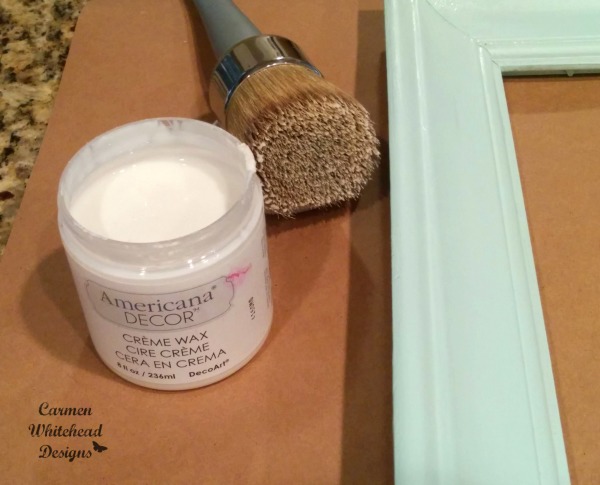
- Americana Decor Clear Creme Wax and Deep Brown Wax
- Americana Decor Soft Touch Varnish
Tools
- 1 inch angle brush
- Waxing brush
- Clean cotton cloth
Instructions
- Take out print and glass from frame, wipe clean frame of dust. Use 1 inch angle brush to apply 2-3 coats of Chalky Finish paint. Wait for paint to dry between coats. I used the color Refreshing.
2. Once paint is dry, apply Clear Creme Wax with waxing brush in long strokes. Apply in thin coat, a little bit goes a long way. If you want a simple paint finish, you could skip the darker wax step and go to step # 4 here.
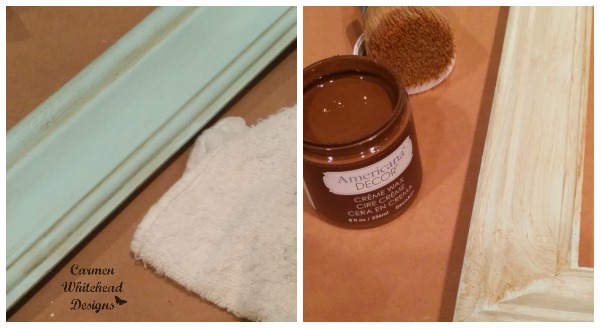
- Once Clear Creme Wax is dry, apply Dark Creme Wax with waxing brush. I dip the brush into the lid of the jar and pick up the dark wax from there. This helps control the amount of dark wax on the brush. Apply in long strokes and spread thin coat into all crevices of the frame. Then take a clean cotton cloth and wipe off excess dark wax until you get the look you want. If you want only a minimal amount of wax in the crevices then wet the cloth a bit with water and this will help lift more of the dark wax.
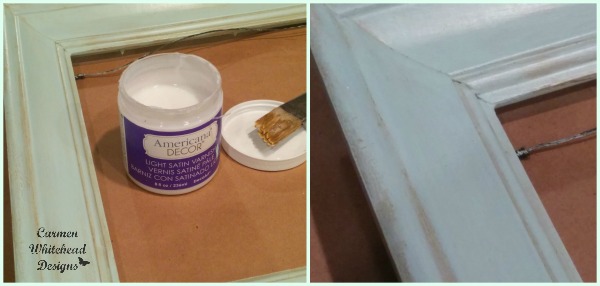
4. Let the wax dry completely and then seal it with some varnish. I really like the Soft Touch varnish, it leaves a very smooth and soft look to the wood. If you want a more satin or shiny look, you can get the Light Satin Varnish.
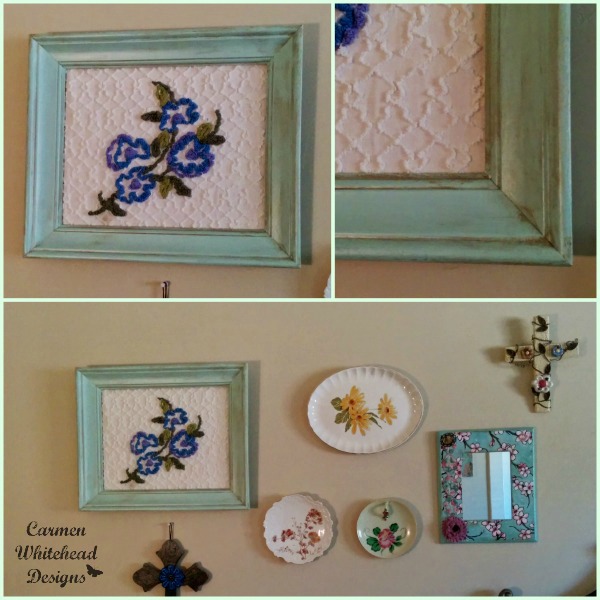
5. Once the varnish was dry I was ready to insert my art. But, in this case I had 16” x 18” piece of chenille fabric that had a flower in the center. I really wanted to showcase this flower, so I wrapped it around the cardboard piece that was originally in the frame and placed a backing to cover the folded edges of the fabric. I left the glass out so the texture of the fabric will show.
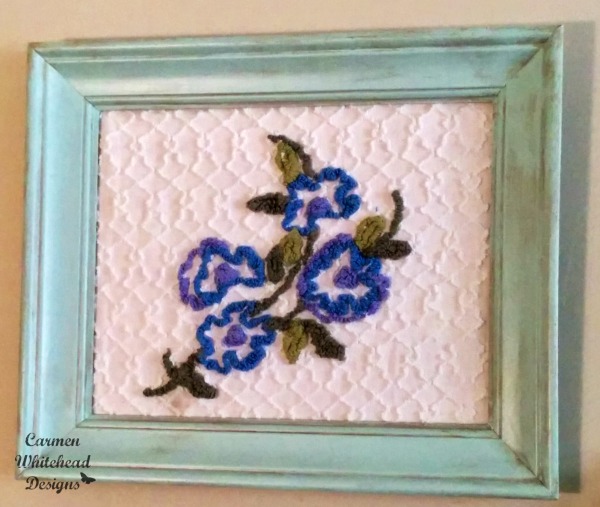
This frame was destined for a wall gallery I was creating in my bedroom of other thrift store finds. This project is a great way to restore old frames and use pieces of fabric from a tablecloth or bedspread that can no longer be used for it’s original purpose. So, don’t pass that frame up next time you see it or throw away that fabric.
Tips:
- You don’t need to sand the wood prior to painting. The paint will go on smoothly as long as the surface is clean of dust.
- You don’t need to apply a heavy coat of paint and make sure paint is dry in between coats before adding the next.
- If your frame will be used outdoors or in direct sunlight, apply 2-3 coats of the finishing varnish.
About the Artist: Carmen Whitehead is a self-taught mixed media artist with recently published art in Somerset Studio magazine. She has a love all things vintage and incorporates that into her artwork by using vintage ephemera and laces. You can see more of her work, tutorials and shop on her blog .
Blog: www.carmenwhitehead.blogspot.com
Shop: https://www.etsy.com/shop/CarmenWDesign