Hello friends! This is Carmen back with you again with an easy project for your home and garden decor. If you’re like me, you have some terra cotta pots laying around that have seen better days. Well, don’t throw them away, you can save them by updating them with some Chalky Finish paint and stencils.
Here are the supplies I used…
- Terra Cotta Pot
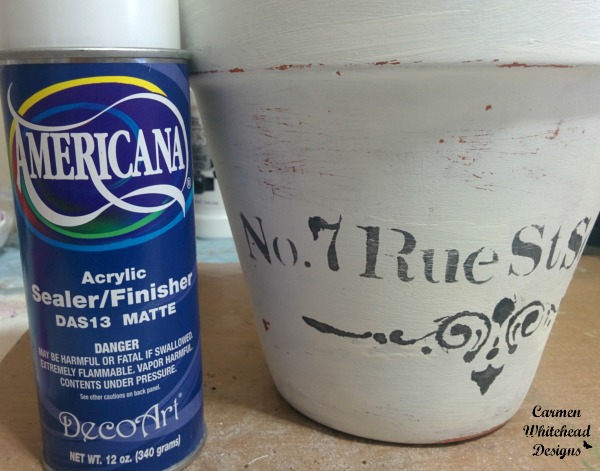
- Americana Decor Chalky Finish in Everlasting
- Americana Acrylic in Graphite
- Americana Decor stencil, Cafe Paris
- makeup sponges
- 336 Sand paper
- Americana Acrylic Spray Sealer in Matte
- Potting soil
- Various succulents of your choice.
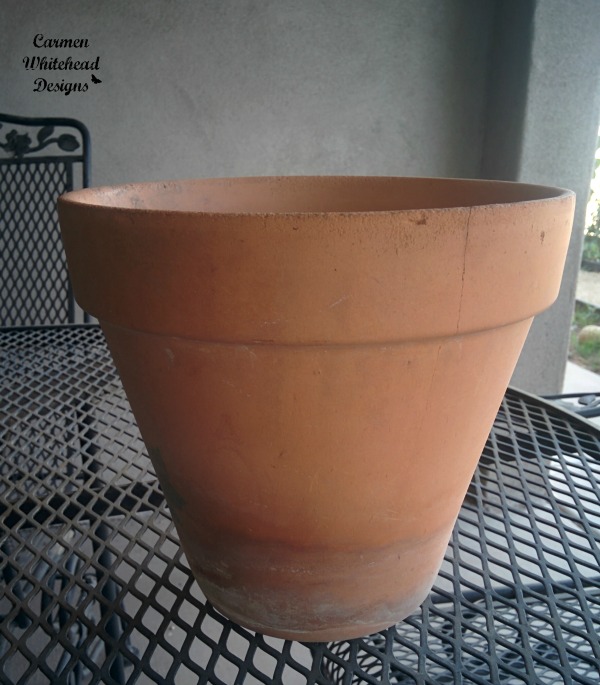
I used a terra cotta pot that I had for years and wanted to update, but you can certainly use a new pot for this project too. Just make sure you wipe the pot down and remove all dirt and debris before painting.
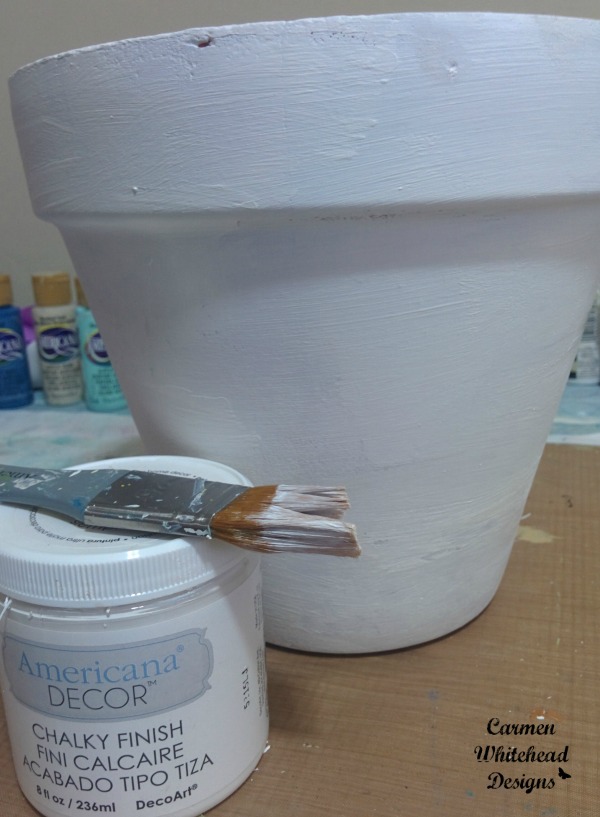
I applied two coats of Chalky Finish paint in Everlasting. I didn’t worry too much about even coverage because I knew I was going to be distressing it with sandpaper.
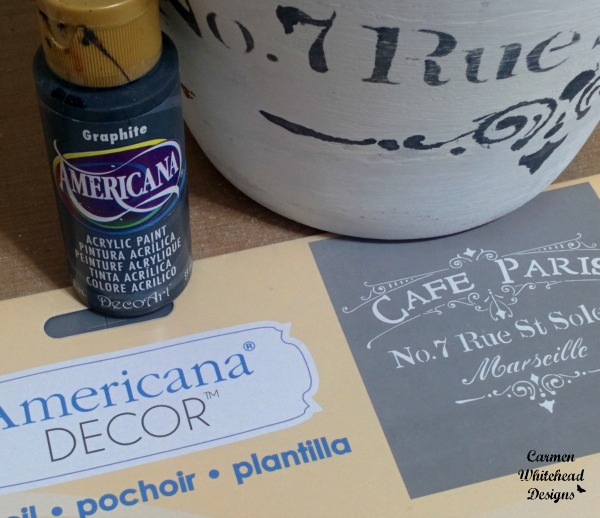
Once completely dry, I applied the Americana Acrylic in Graphite using a make up sponge and the Americana Decor stencil, Cafe Paris. I only used partial elements of this stencil. I held the stencil by hand as opposed to taping it because when you lay the stencil flat onto the curved pot, the words are not on a straight line. So, I sponged on sections of the words at a time and then moved the stencil to ensure the words would be straight.
Before applying the spray sealant, I used a piece of 336 sandpaper to distress parts of the pot. You can give it as a distressed look as you want. Wipe the pot of any powder and then apply two layers of the matte spray sealant. I plan on using this pot inside, but if you place it outside the sealant will protect the paint from chipping.
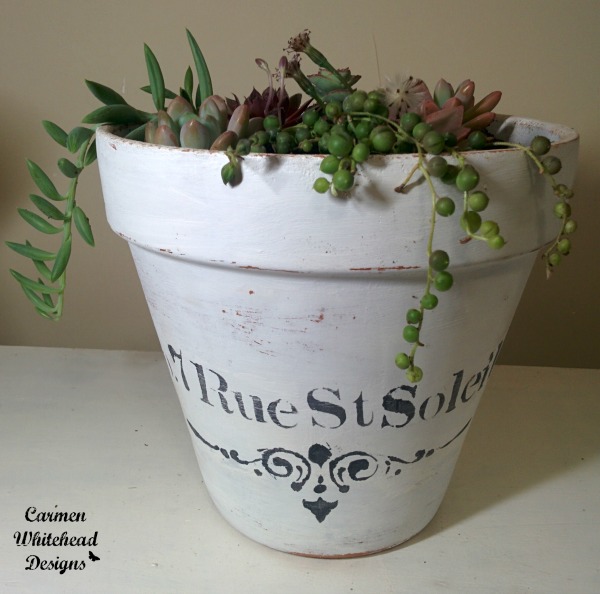
Next comes filling up the pot! Before filling with potting soil, I always lay a used coffee filter at the bottom of the pot to cover the drainage hole and reduce soil seeping out. This won’t hurt your drainage, but it will help your shelves from having soil on them. I use regular potting soil for my succulents and have had great luck. But, you can purchase cactus soil too. The succulents I used I purchased online with Mountain Crest Gardens. I was really pleased with them and the quality of the plants. I bought the String of Pearls that will hang over the edge of the pot, and the Pastel Soft Succulent that came with 5 beautiful succulents. I already had a Strings of Bananas plant and simply took a few cuttings. The string of pearls already has some shoots of blooming flowers.
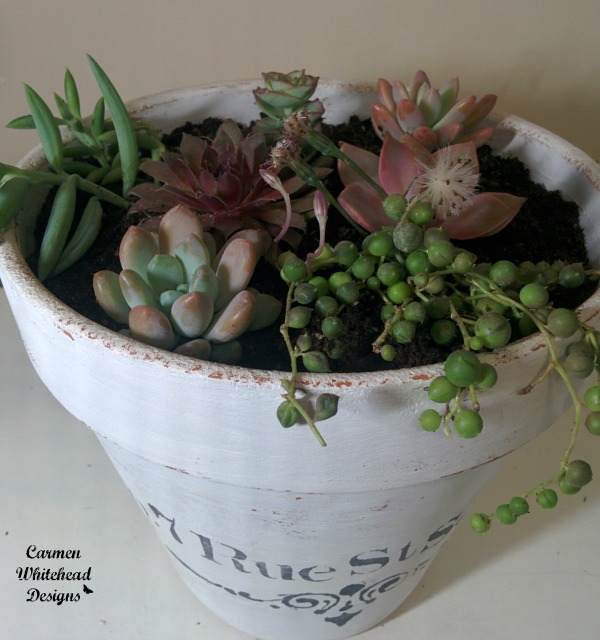
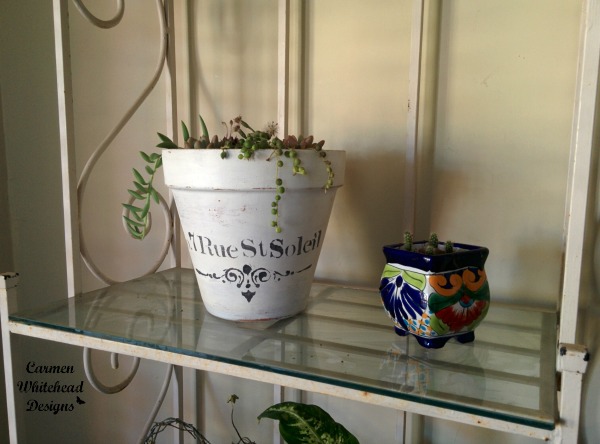
Over time these plants will grow and fill in this updated pot. It’ll have soft colors and soft trailing succulents. These are hardy enough to have them outside with partial sun, but I have a shelving unit by my back patio door that I’m filling up with house plants and succulents. So, it will get great light here and flourish.
I hope you enjoyed this project and it inspires you to create something for your home or garden.
Always make sure and return to the site for more inspiration!
Blessings,
