Anytime Bella Crafts Blog can put up a post on recycled projects we’ll do it in a heartbeat! We love projects that shows us how to use up all those products left over from other projects. With craft product being so expensive, we need a way to catch a break without having to give up on our creativity. This project is a perfect example of that! Our guest blogger, Marjolaine Walker, has turned an old tin and outdated chipboard into a beautiful recycled tin that anyone would love to showcase in their homes.
Hello Bella Crafts friends, Marjolaine here to show you how to turn a recycled tin and outdated chipboard into a beautiful and useful decorative work of art. As I mentioned in a previous post, I don’t like to waste so I’m always trying to find ways to avoid it. I have always loved chipboard but am forever left with unused pieces from every collection. My bin for remnant chipboard is usually filled to the brim and new collections continue to be a temptation for me, not to mention the ones I receive as gifts! My solution is to transform the chipboard with Gesso and other medias and make a larger scale project to use a considerable amount at the same time thus noticeably diminishing the pile!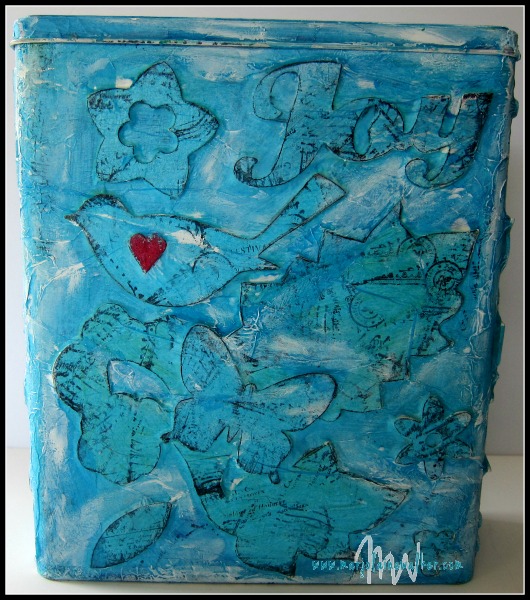
Here’s the list of supplies and the steps to creating this decorative tin.
Supplies:
Recycled Tin
Chipboard Shapes
Decoupage medium
Sand Paper
Gesso
Tissue Paper
Background Stamp
Adhesive
Archival Ink
Charcoal Pencil
Dust Buddy Cleaning Cloth
One Color of Paint
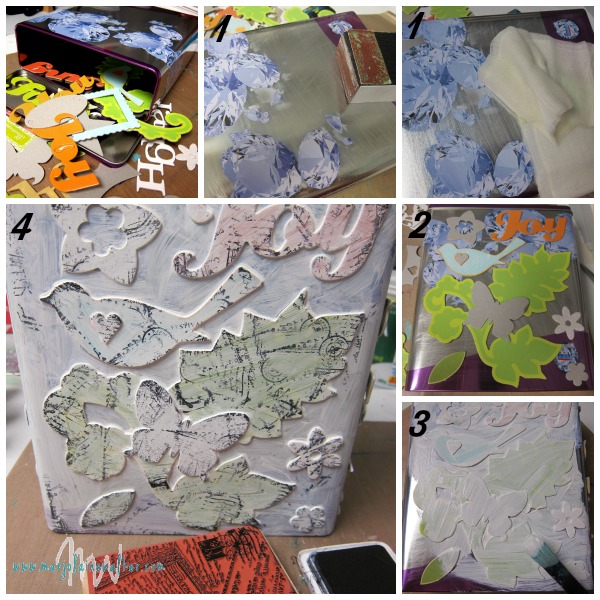
Step One: Sand the tin with sand paper to rough the surface. This will give tooth to the tin and help the Gesso to bond to it. Wipe the dust away with a cleaning cloth to help your chipboard adhere to the tin.
Step Two: Use a strong adhesive to attach the chipboard pieces to the tin. Layering the chipboard adds beautiful dimension and adhering your favorite pieces on the top will really make them pop. I did one side at a time and put a heavy dictionary on top until it was dry.
Step Three: Paint the entire surface with Gesso making sure to get into all the cracks. Allow the tin to dry completely.
Step Four: Stamp all over the chipboard and tin with a background stamp and archival ink. Make sure it’s dry before moving on to the next step.
Step Five: Bunch up the tissue paper to make it nice and wrinkled.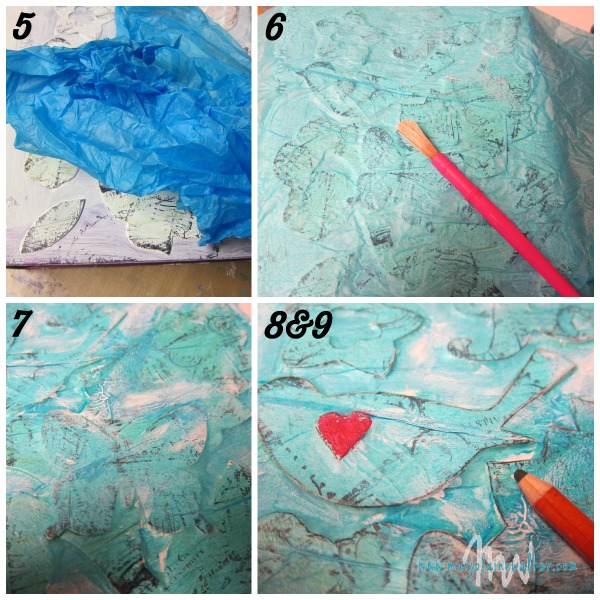
Step Six: Paint a layer of decoupage medium on the tin and cover it with the tissue paper. Use a paint brush to help get the tissue paper into all the cracks. Apply a layer of decoupage medium to the surface as well. It helps to work with one section at a time. Once the whole tin is covered allow it to dry completely.
Step Seven: Use your finger to smear Gesso all over the tin. Focus on getting the Gesso on top of the wrinkles to bring extra attention to them. Also use the Gesso to extenuate any area that you may not like. It’s a great way to cover any unsightly seams. Allow the Gesso to dry.
Step Eight: Paint one piece of chipboard with a bright contrasting color to make it stand out.
Step Nine: Use a charcoal pencil to outline all the chipboard.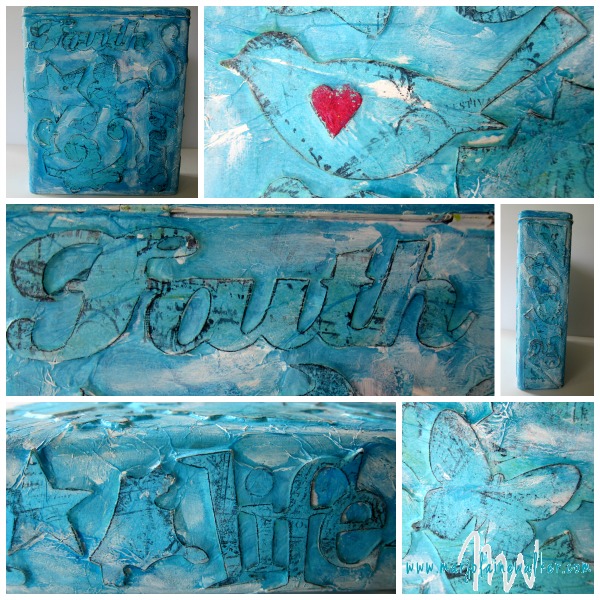
I hope you enjoyed this tutorial and are motivated to use up all those stashed chipboard pieces!
Trackbacks/Pingbacks