If you are looking for a DIY project for your home or a project to do with your kids, try this tutorial technique to create a simple and colorful inspirational painting using graduating colors in the ombre style!
Materials:
- 5 colors of mossy green paint in graduating shades from dark to nearly white (note: don’t use paints with a gloss finish as it will peel off with the letters in Step 3)
- Ann Butler Iridescents Earth Safe Finishes in Orchid and Sheer Gold Pearl
- 9″ x 12″ canvas board
- set of 2″ vinyl letter stickers
- a different foam paintbrush for each paint color
- a paper plate to use as a disposable palette
- small flat-end paintbrush
- rubbing alcohol
- 1″ painter’s or another low-tack tape (optional)
- workable fixative (optional)
- final clear coat spray (optional)
[Tweet “Super Easy DIY painted ombre wall art tutorial #crafts #art #tutorial”]
Step 1: Coat the entire canvas board with the Iridescents Orchid paint and allow to dry completely. Spray a coat of workable fixitif to seal the background color (optional). Adhere your vinyl letters where you would like them to go and add a stripe (or two or three) of painter’s tape (optional):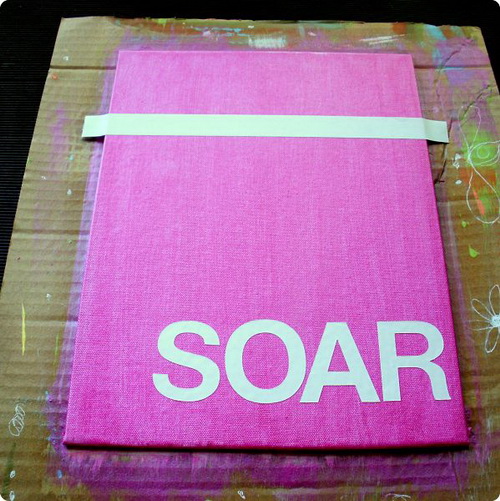
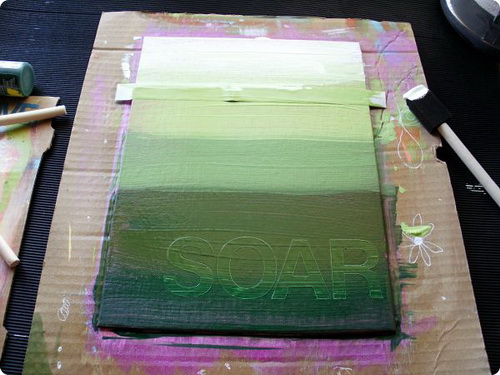
Step 2: (This step needs to be done fairly quickly.) Starting with the darkest green at the bottom, paint thick stripes in your graduating shades using a different brush for each color. Working quickly, go back to each color and blend the edges into each other so the lines blend together seamlessly. Try to let a tiny bit of the orchid to show through in places as well as working in a little of the dark color into the lighter colors and a little of the lighter color into the dark layer:
Step 3: Continue to work the paint until you are happy with the blending and let it dry nearly all the way. Carefully lift off the letters and the painter’s tape to reveal the background color underneath and let it dry the rest of the way. As you can see, the paint will inevitably seep under the letters and the tape and will need to be cleaned up. Using your small flat paintbrush and rubbing alcohol, carefully brush a tiny bit of rubbing alcohol onto the paint you want to remove and wipe it away with the corner of a damp paper towel or rag. Work in very small areas at a time and take your time here – it will be worth it in the end – I promise!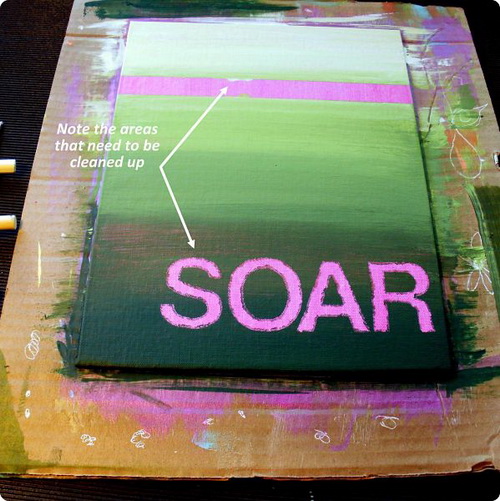
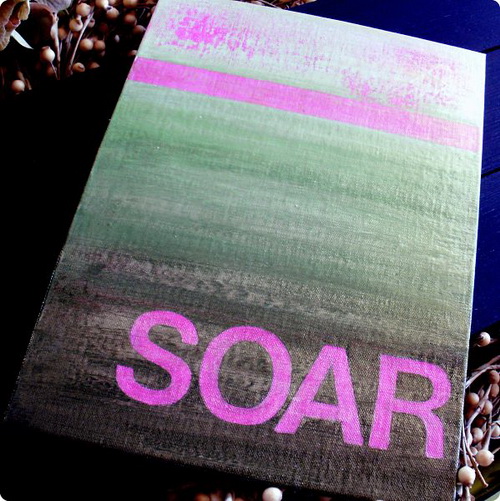
Step 4: Now is the time to add the finishing touches. As you can see, in my final piece I used rubbing alcohol to pull off some of the lightest paint from the top section of my painting to give it a grungy look. When everything is dry, paint a coat of Iridescents Sheer Gold Pearl over the whole piece to give it a beautiful sheen. (Optional: seal the paint with a layer of clear coat spray.)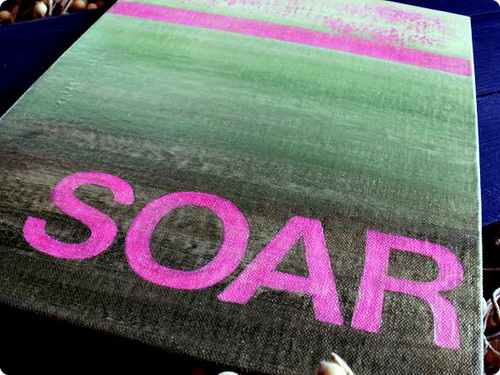
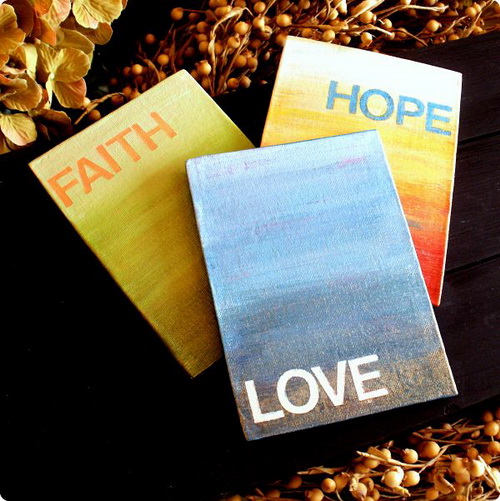
That’s it – so simple and fun! You can finish up your painting any way you wish. Try doodling on top of the paint or collaging under the ombre paints so your letters reveal some of your collage patterns – let your imagination go wild! Here are some examples of other inspirational word paintings I have done using this technique:
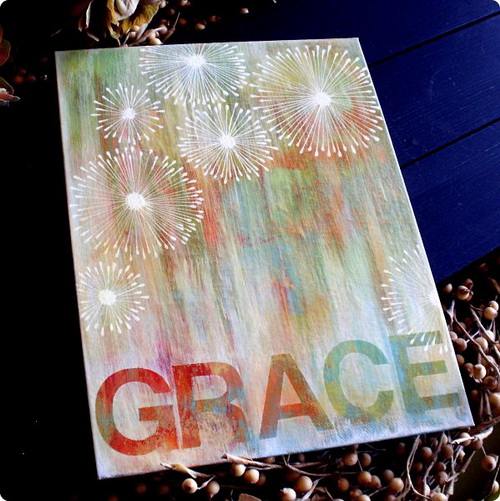
If you give this technique a try we would love to see what you make, so leave a link to your painting in the comments below and share your work!
Wonderful project, Molly and fantastic instructions!
Thanks Roberta!
As usual Molly, this tutorial is wonderful. Thank you for sharing with us. The instructions are great to follow. Hugs!
Thanks Martha – this is an addictive project – my house has these paintings everywhere!
Super fun tutorial!! You make it look so easy that even I think I can do it!! Awesome job!
xxDaniella
Thanks Daniella – I’m glad you liked it!
OMG Molly! I love these! What a great project to do with kids.
Thanks so much Carmen! :)
Molly, this is a fabulous project and tutorial! Thank you so much for sharing!
Thanks so much Lisa!
What a wonderful tutorial. Thank you for sharing!
Thanks Lisa! :)
Really need to try this one. Great tutorial and lovely outcomes.
Thanks Irit – I’d love to see your paintings when you are finished!
Love the project!
Love and light,
Michele
Thanks so much Michele!
Love Love Love it. Thanks for sharing.
Thank you Larissa!